Nicola Foreman Quilts
  • BLOG
  • BAGS
  • CUSHIONS
  • QUILTYSTUFF
  • QUILTS
  • TABLERUNNERS
  • WALL HANGINGS
  • CONTACT ME

Blush Jelly Roll

29/7/2015

0 Comments

 
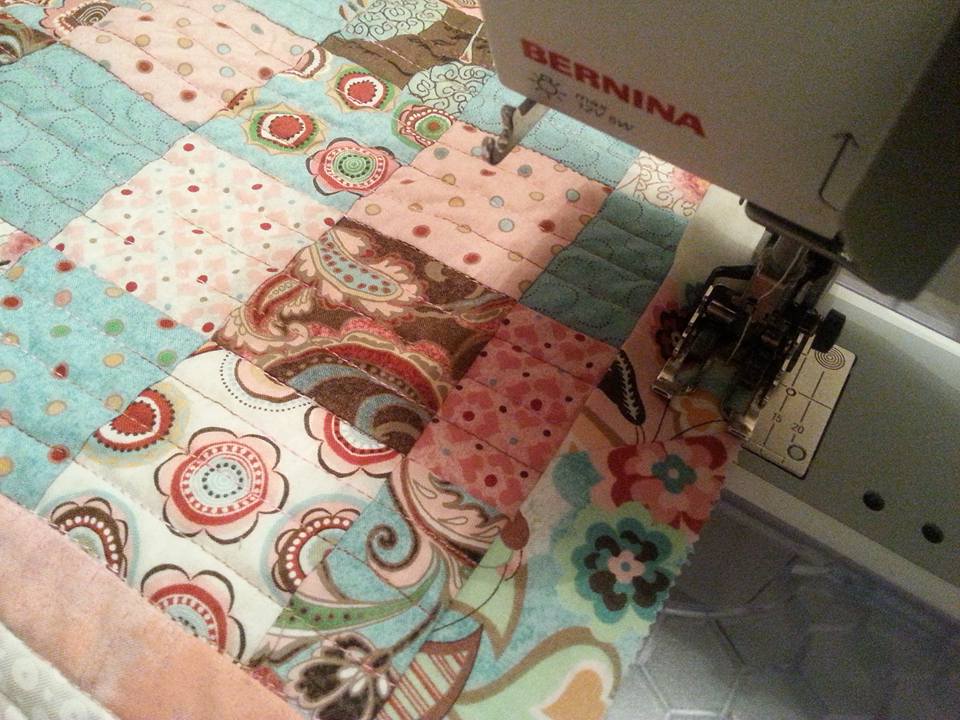
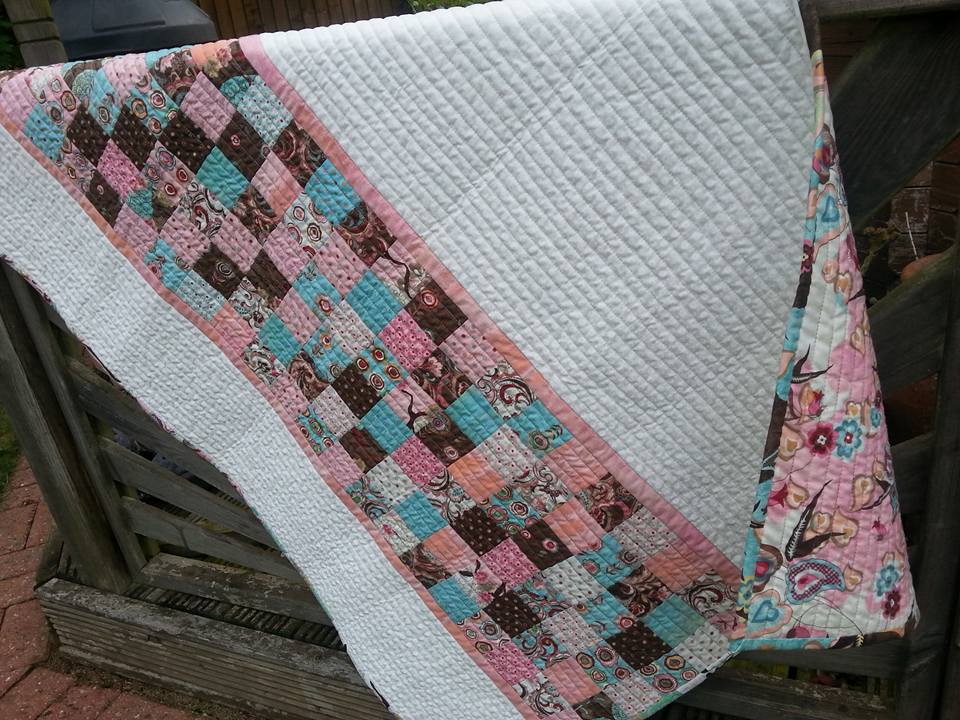
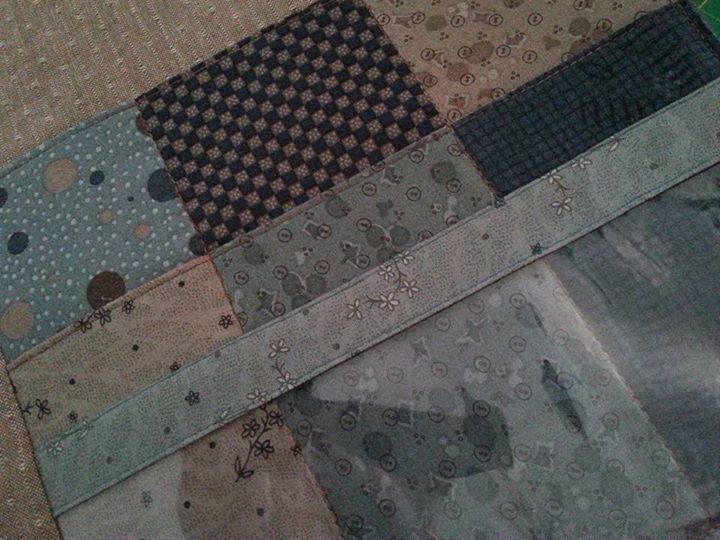
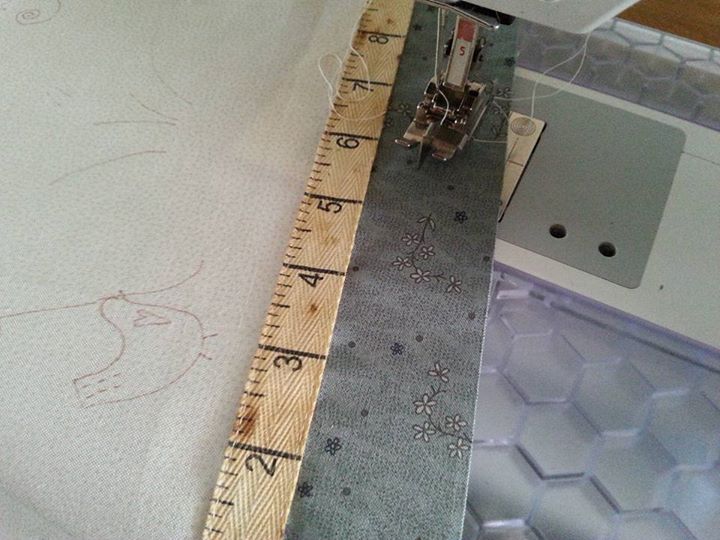
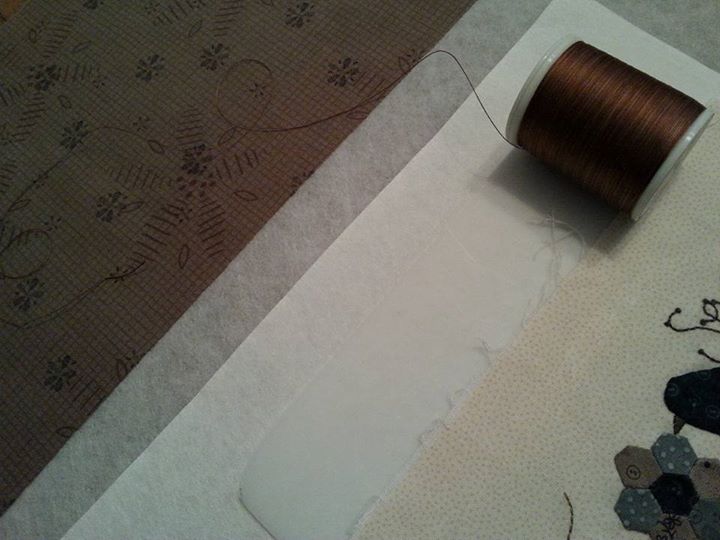
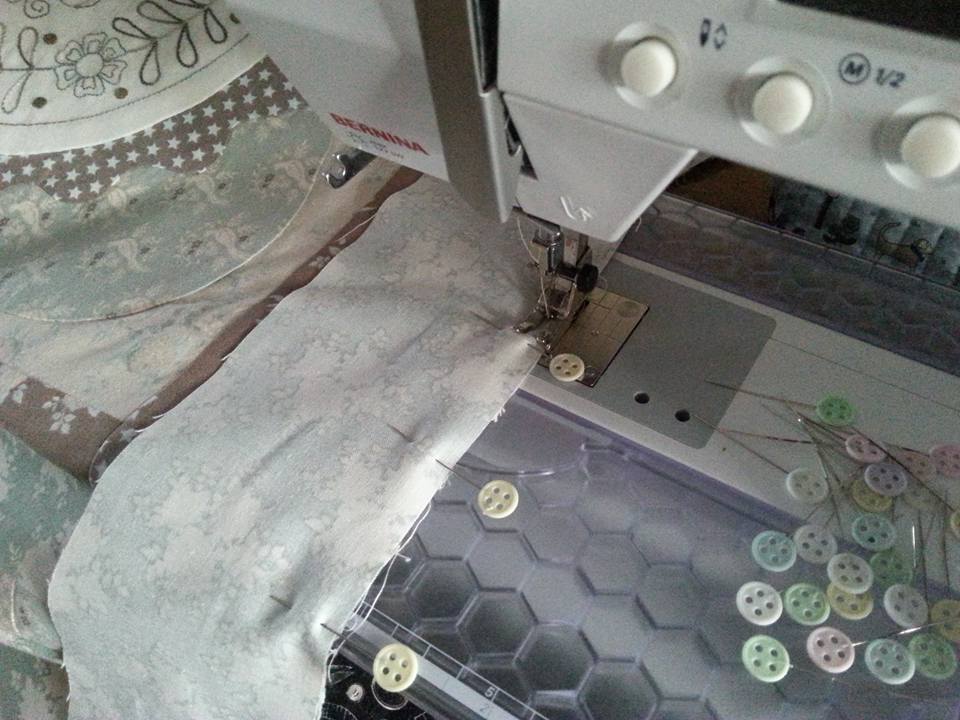
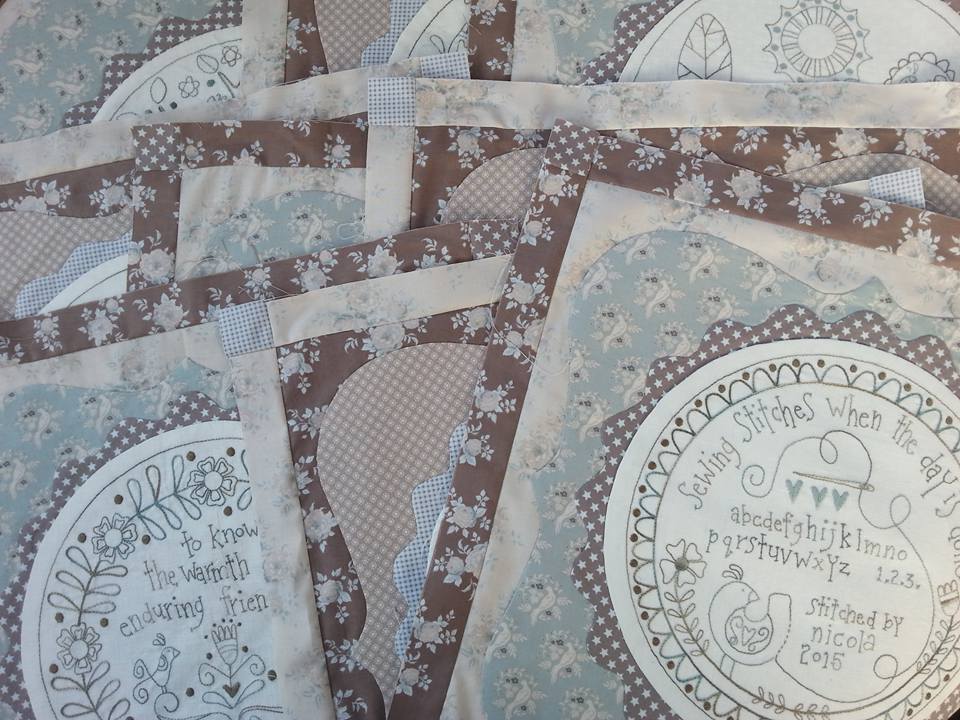
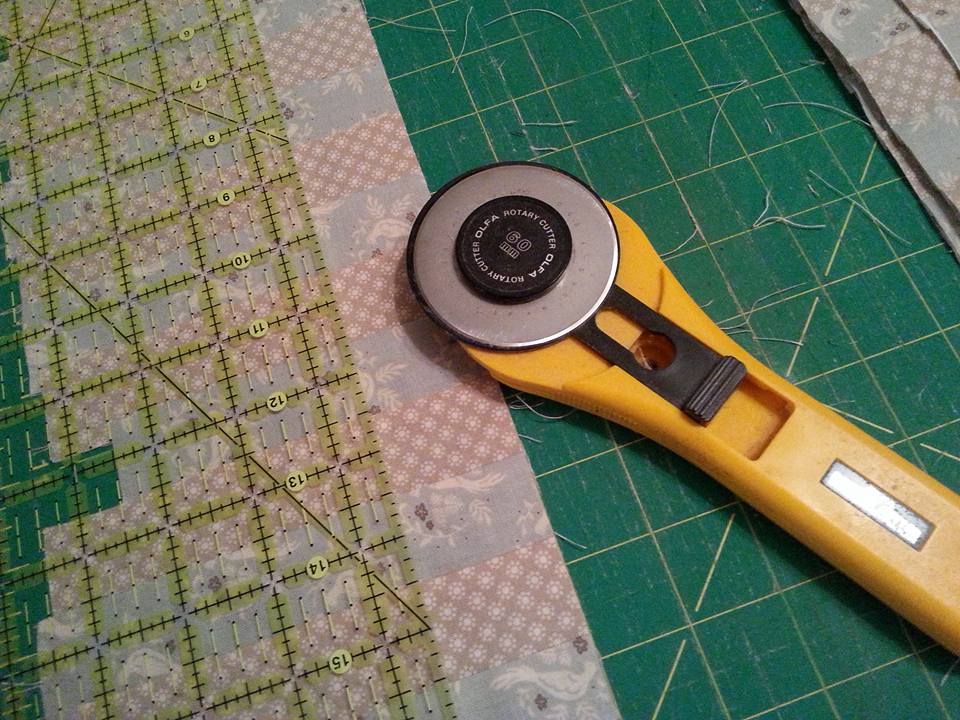
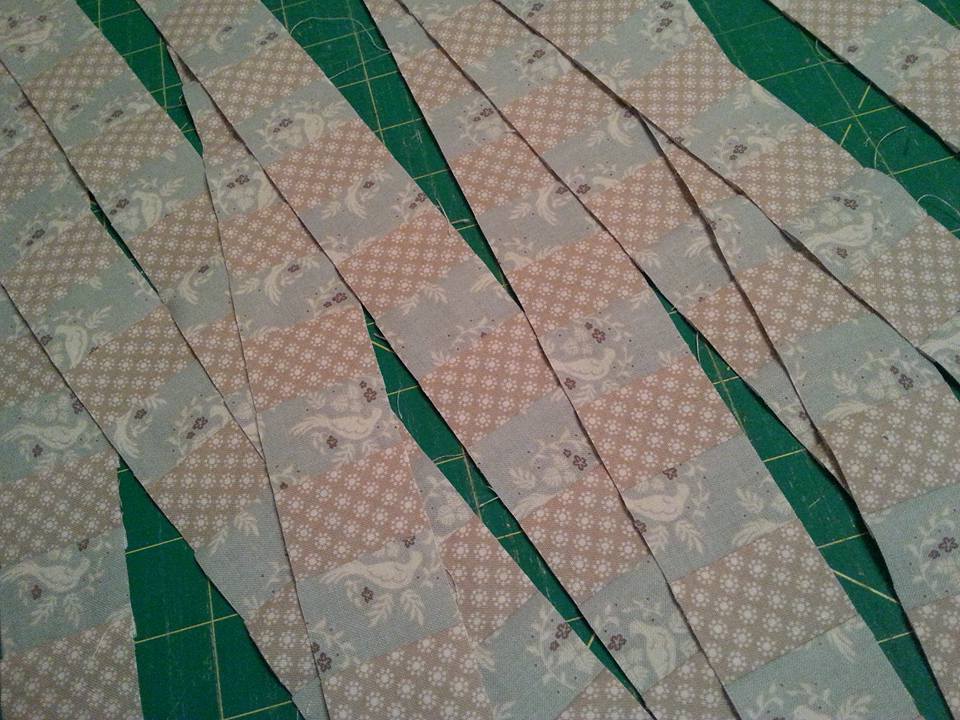
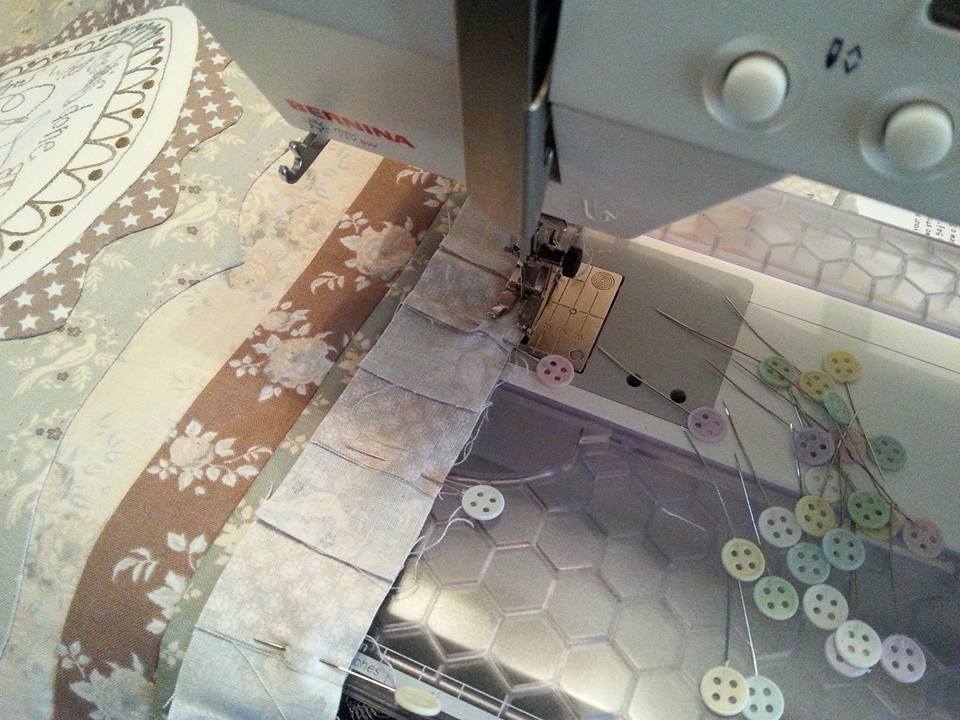
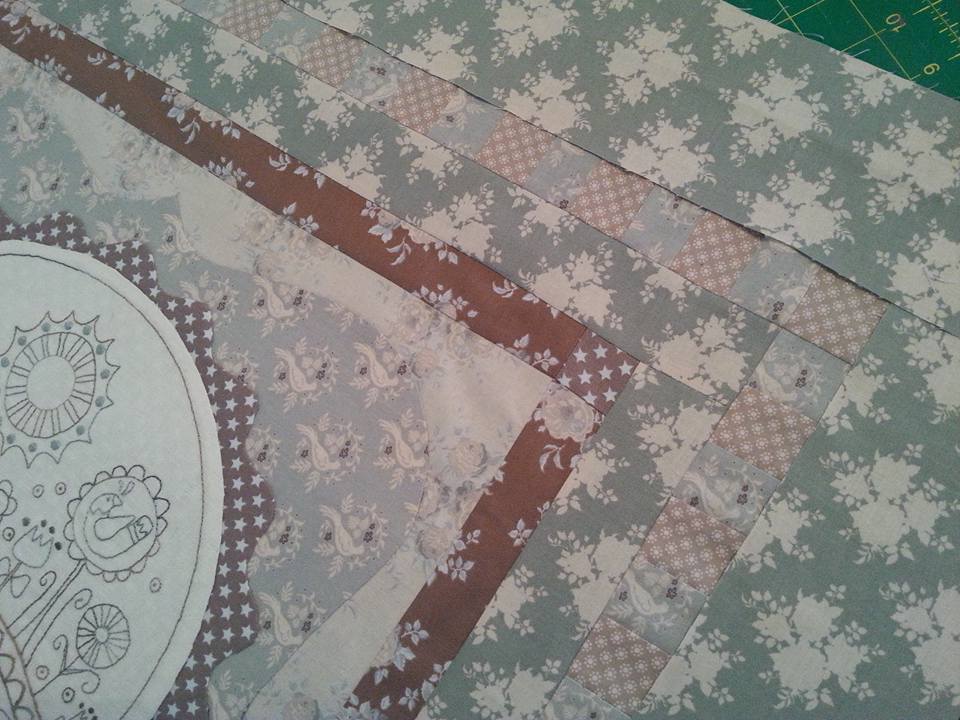
I've been rather busy with a secret project. This fabric collection is called "Blush" by Basic Grey for Moda... and this Jelly Roll and yardage has been in my fabric collection for absolutely ages, waiting for a very special project. The Jelly Roll strips were pieced together in strips of 6 and cross-cut into rows. These rows were then pieced together again. My top tips for accurate piecing is to use a fine machine sewing thread (I prefer Aurifil thread 50wt or Mettler fine embroidery thread 50 wt) and a fine sharp needle (I prefer Schmetz Microtex size 60). I used a slightly shorter stitch to prevent the strips coming apart when they are cross-cut...
Picture
Picture
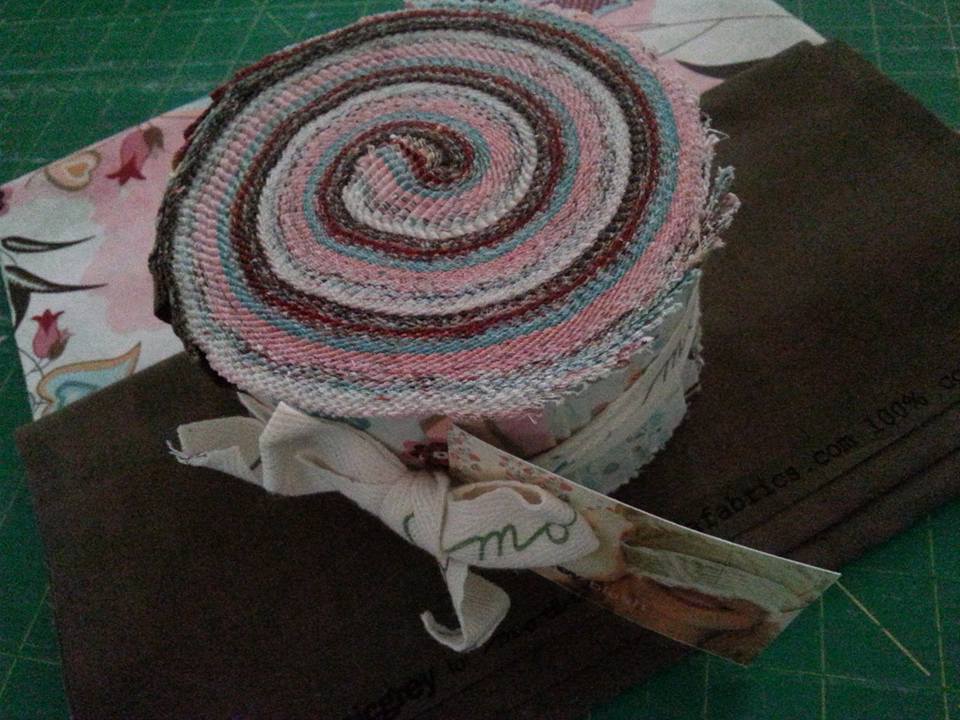
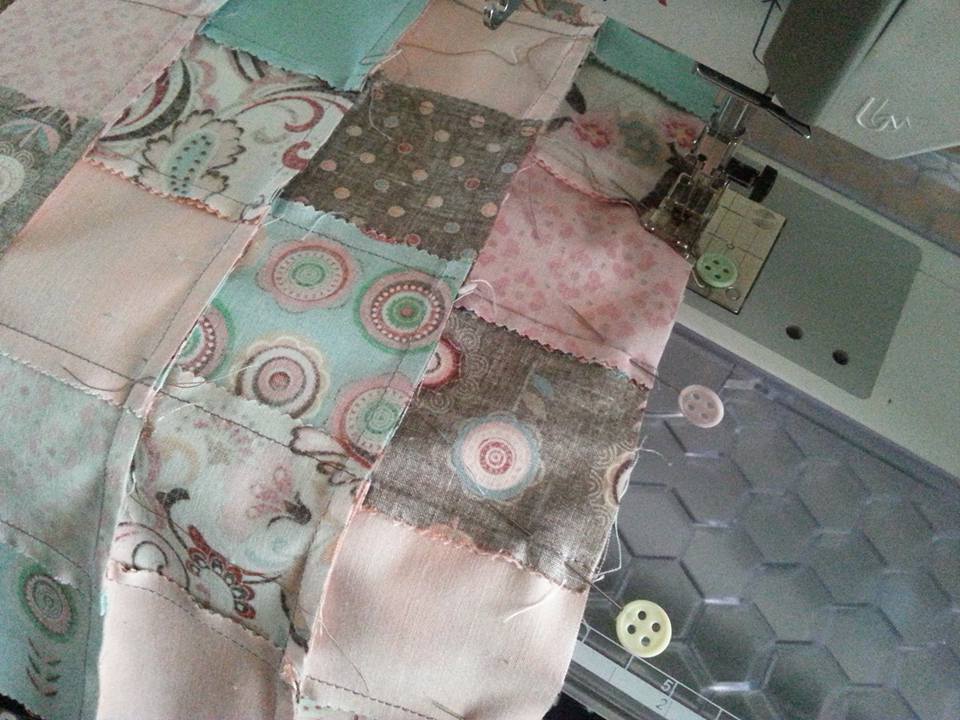
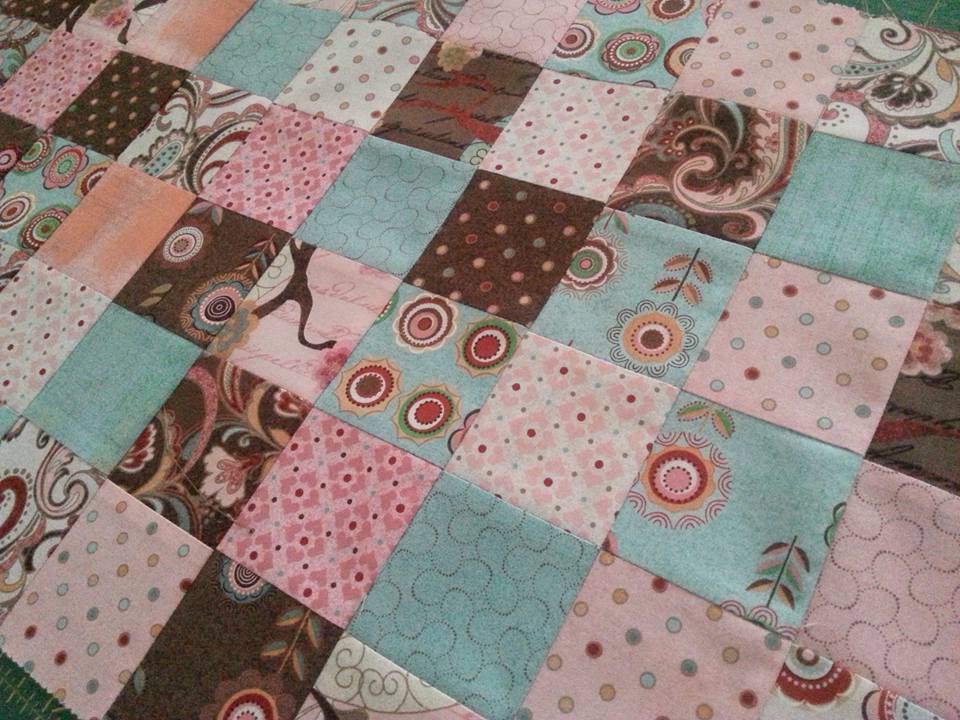
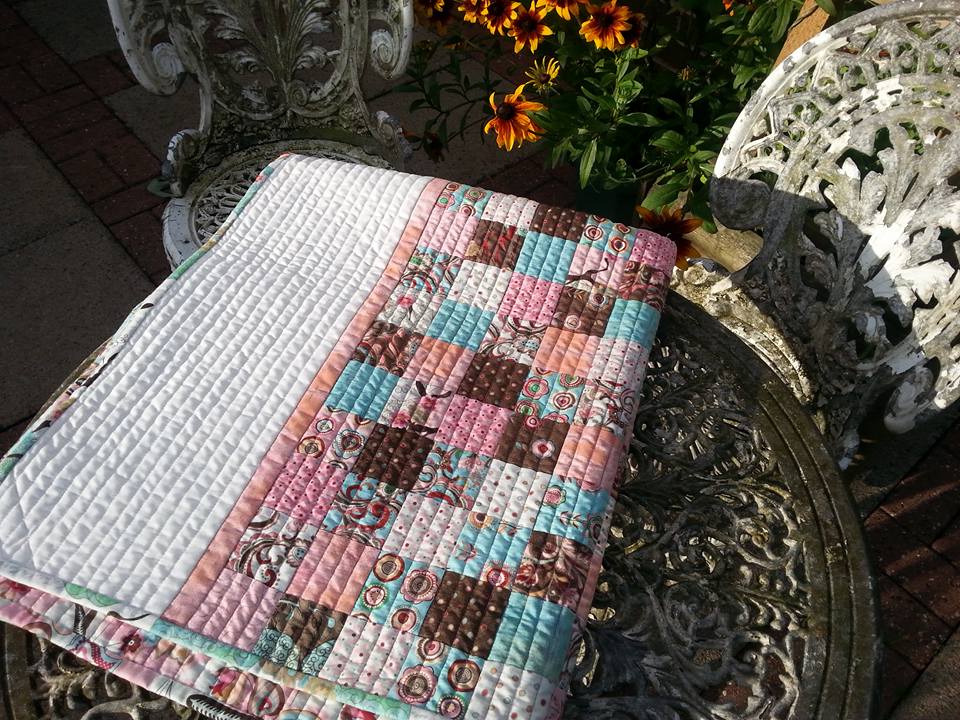
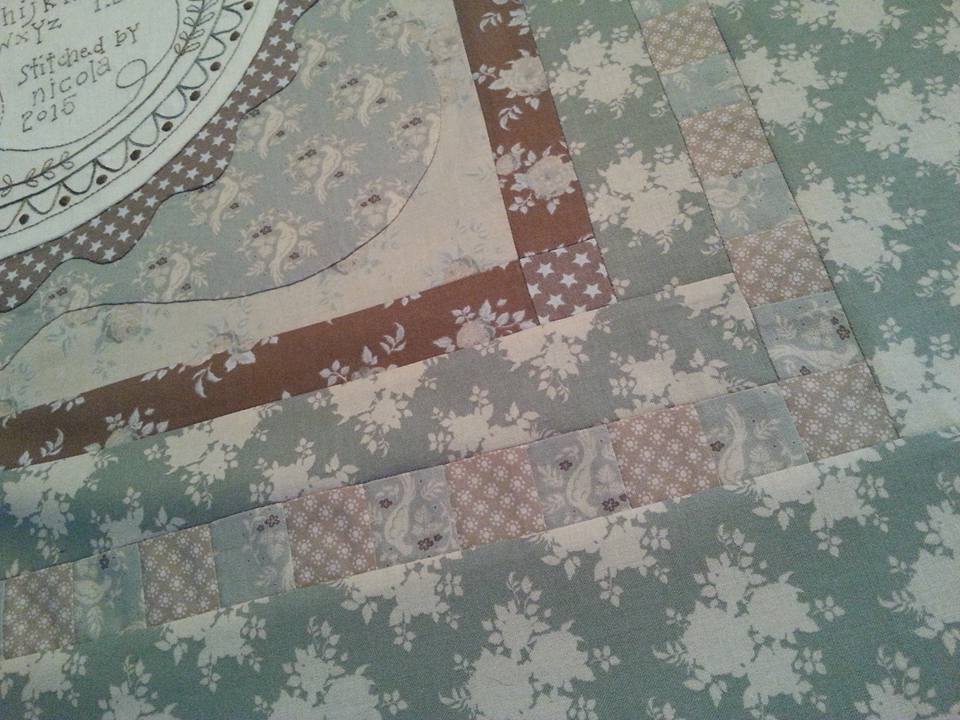
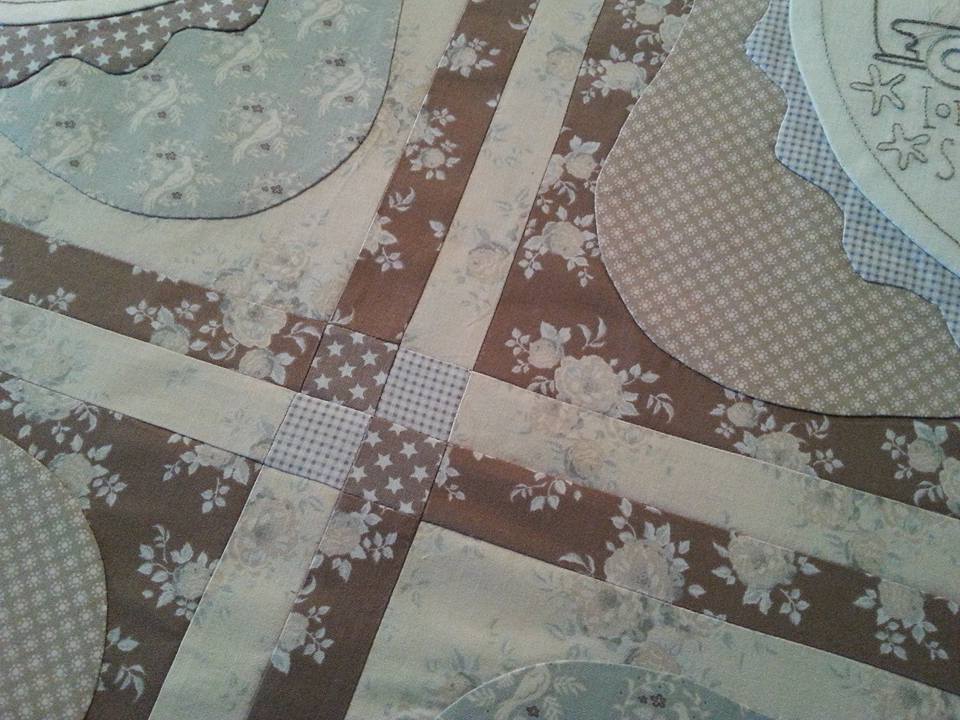
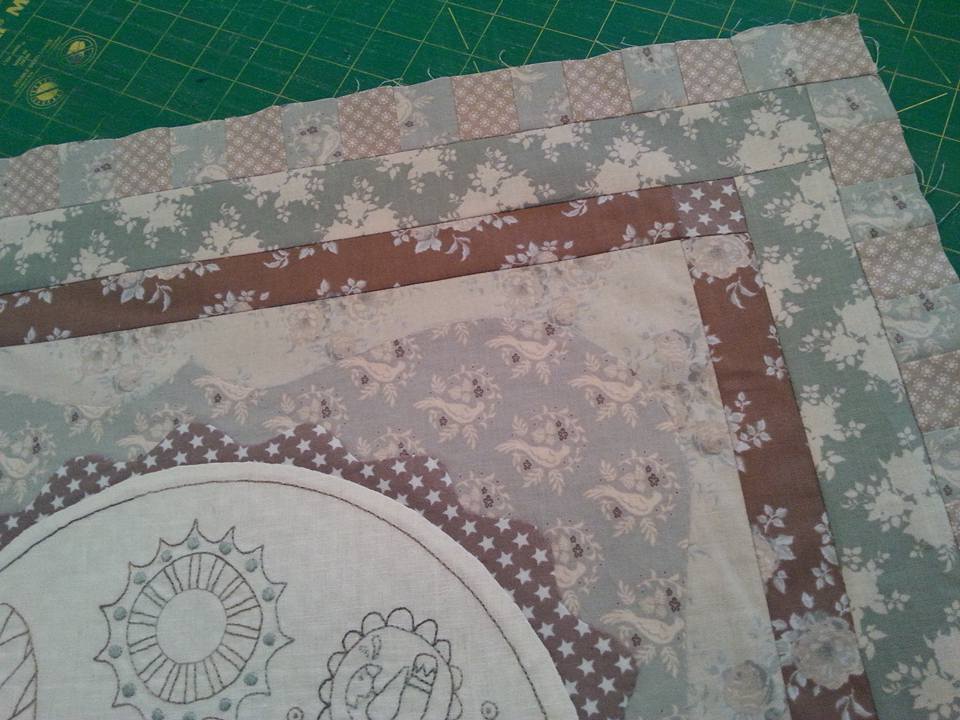
...I was just loving these pinks and turquoises and browns! This is a Jelly Roll "Blush" by Basic Grey for Moda, and the pattern is a free download from the Moda Bakeshop website called "Pure Baby Boy" (although mine is Blush Baby Girl). My favourite neutral fabric at the moment is this one from the Daysail collection by Bonnie and Camille for Moda. It was perfect for the 2 side borders for my latest project...
Picture
Picture
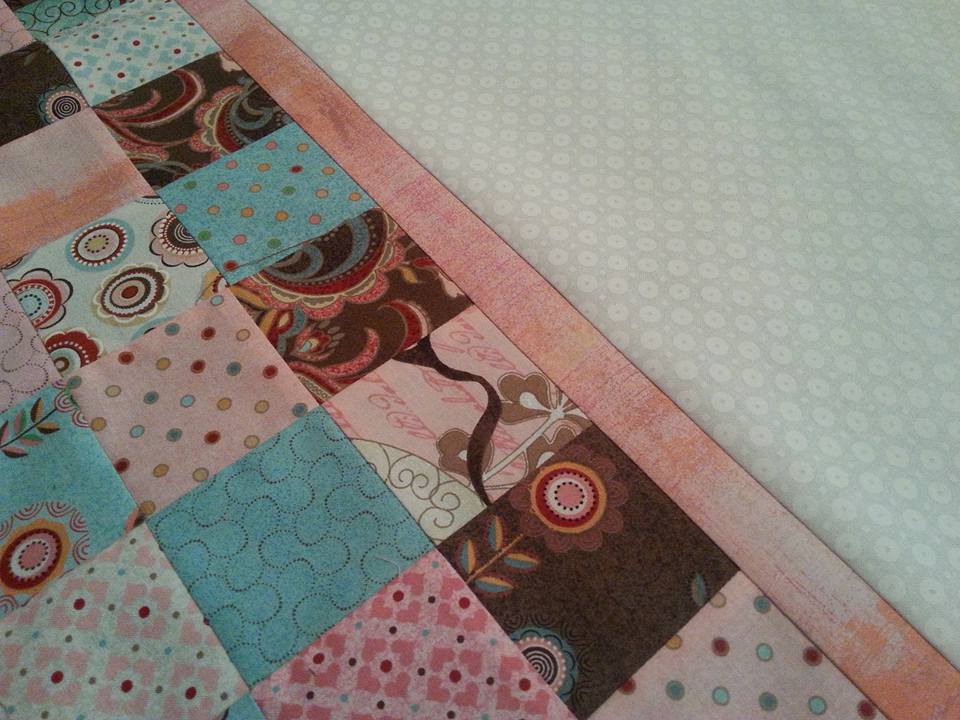
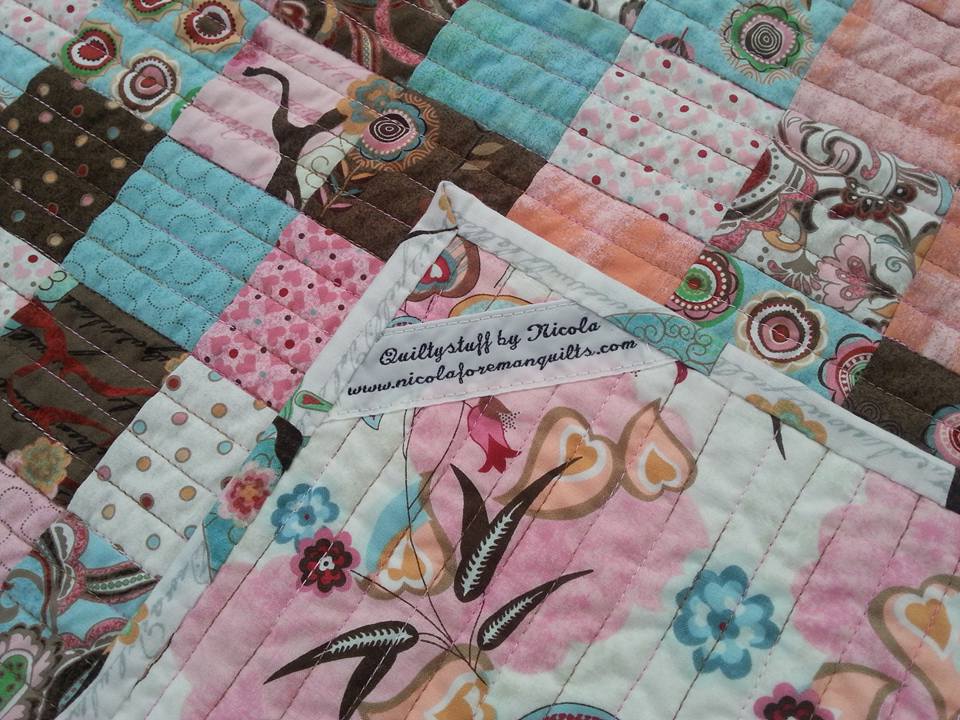
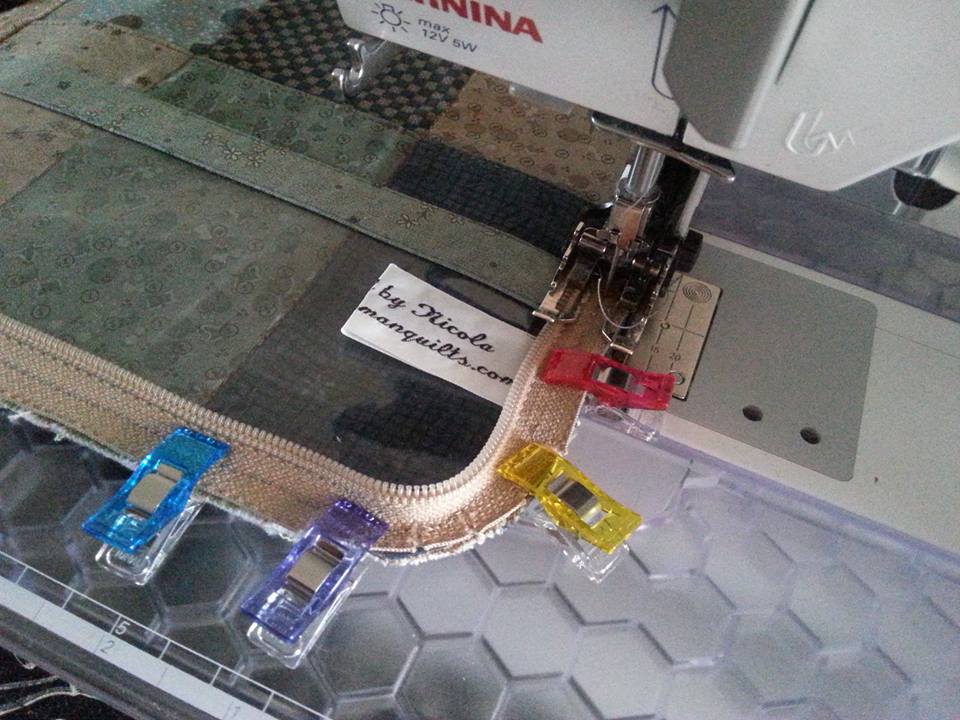
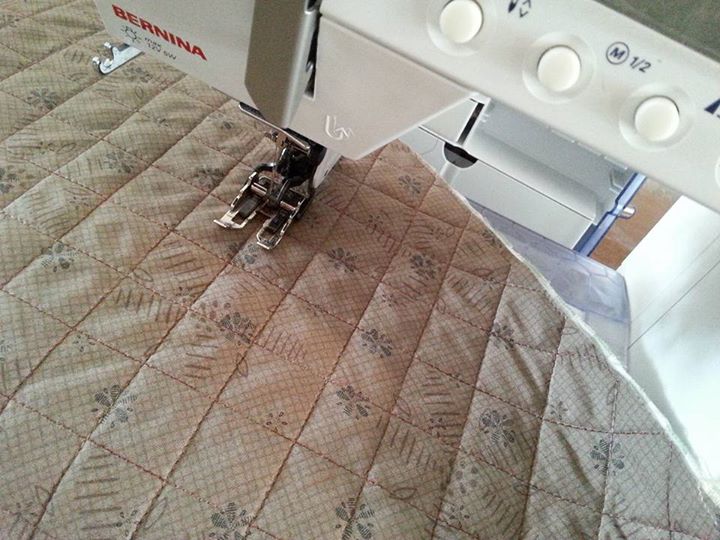
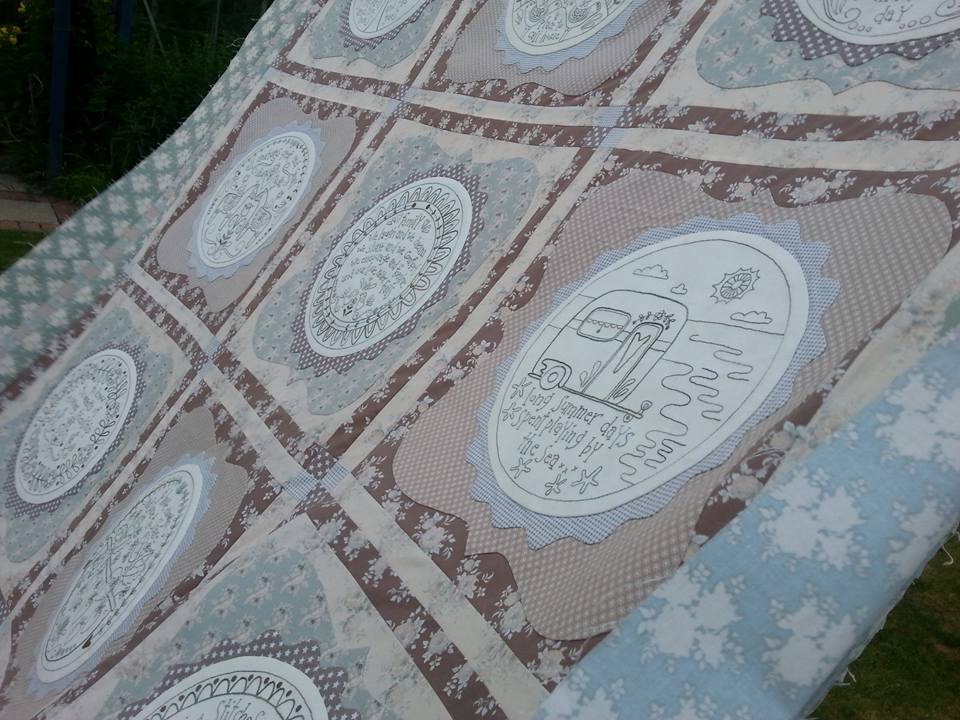
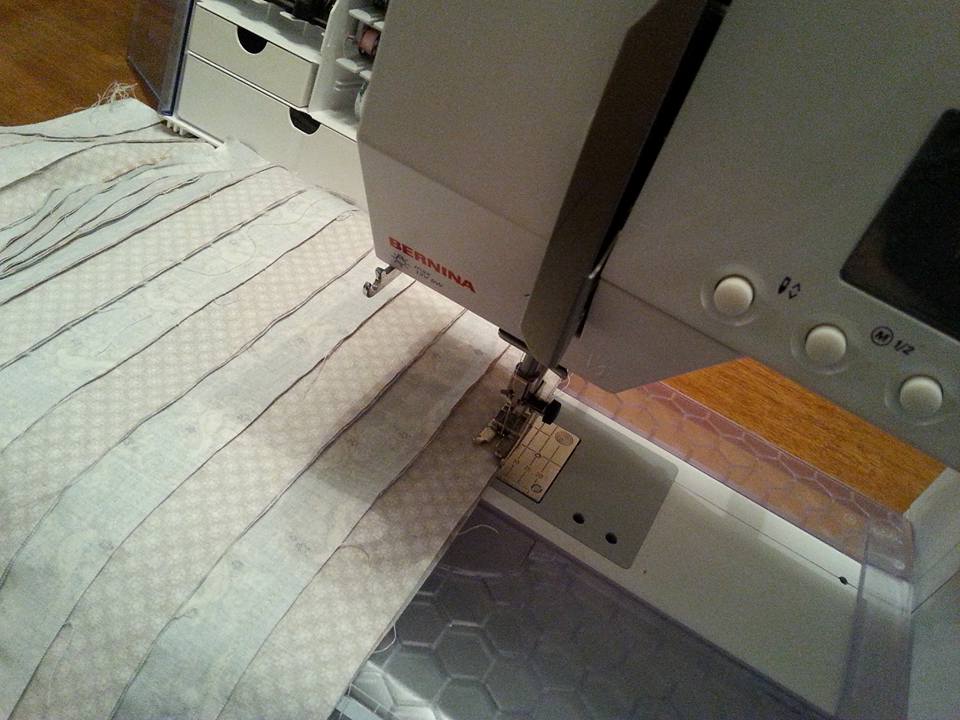
...this baby quilt was quilted very simply in straight rows 0.5" apart, using the edge of the walking foot as a guide. I've used a King Tut variegated quilting thread shade 944 for the centre panel and a cream King Tut quilting thread shade 957 for the side borders and a Schmetz Topstitch needle size 70. The final touch is a scrappy binding, made with 4 leftover strips from the Jelly Roll, joined with mitred seams, folded in half and stitched 3/8" from the raw edge of the quilt. The binding was folded over, and held in place with Clover Wonder Clips while it was hand stitched to the back of the quilt. One of my Quiltystuff labels was stitched into the corner of the quilt...
Picture
Picture
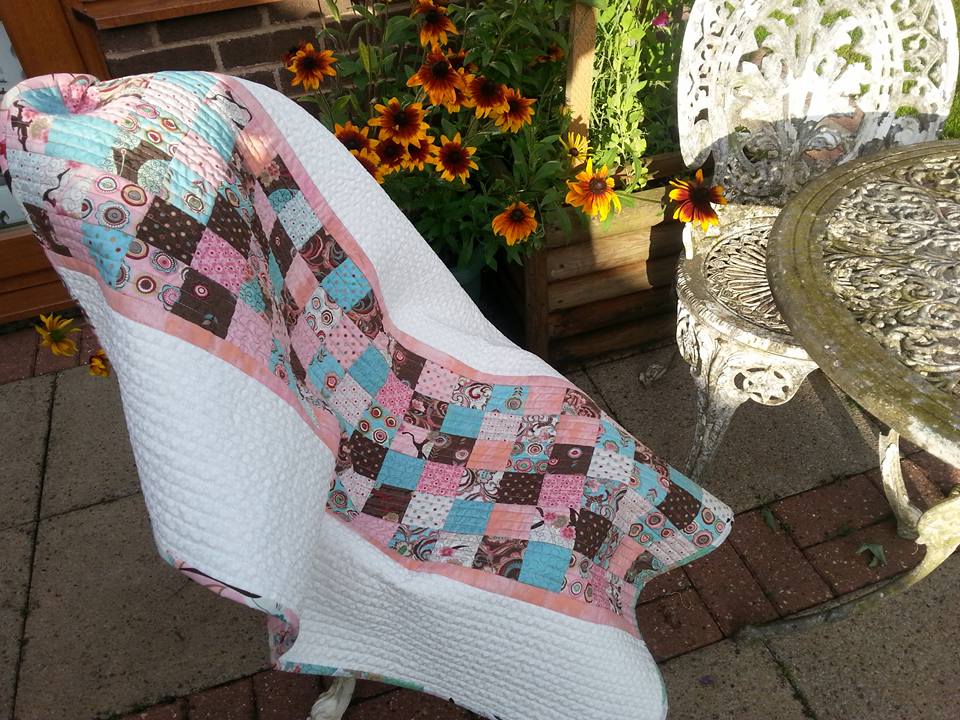
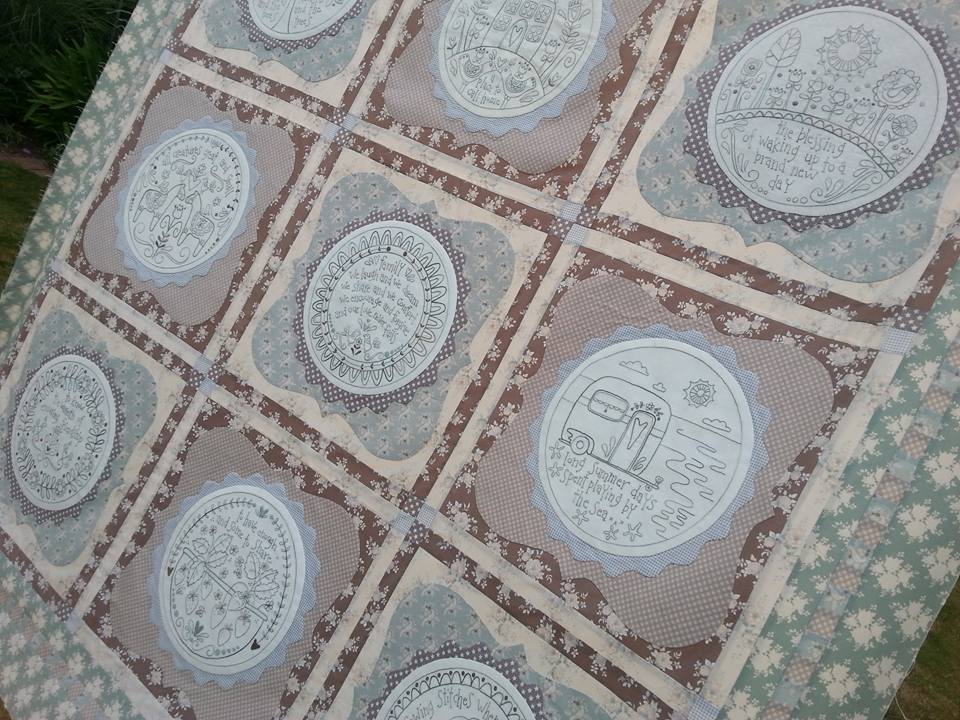
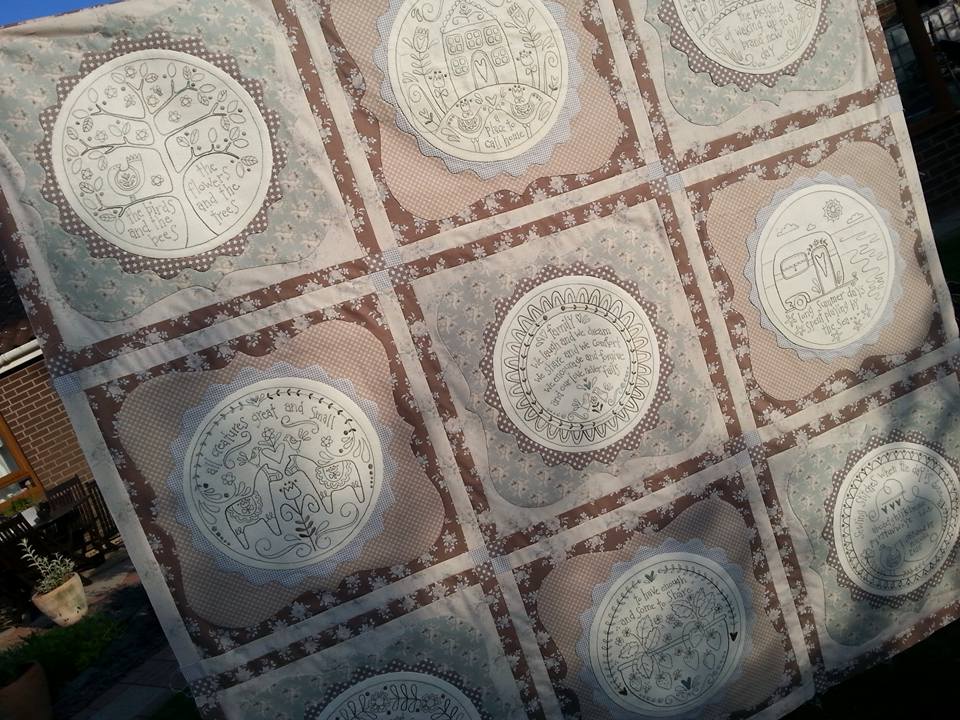
...there was just time for a quick photo shoot this morning before this was wrapped up and posted off to a very special baby girl. Thank goodness the sun was shining!
Picture
Picture
Picture
0 Comments

Sewing Accessory Case - Part 2

26/7/2015

1 Comment

 
Last week I started another project, this beautiful Sewing Accessory Case - the pattern and fabrics are by Lynette Anderson Designs, and was bought a few weeks ago as a kit from Patchwork Chicks. I like adding a twist to the patterns I use to make them a bit more "me" and rather than making a pocket with hexagons as per the pattern directions, I've added 6 pockets made with the fabrics that were included in the kit, and a clear plastic pocket trimmed with a narrow binding to neaten the top edge of the pocket. ...
Picture
Picture
...the sewing board still needs to be covered with fabric and sandpaper, but that will be on my list of jobs for next weekend! The elastic to hold it in place has been threaded through a fabric casing, stitched into place and embellished with a raw wood button. I've also got a tricky zipper to sew in place, and the binding to cover all the raw edges. I've detoured from Lynette's original instructions, as I didn't think my fingers or my nerves could cope with hand sewing the lining the binding and the zipper! Have you tried Clover Wonder Clips? They are absolutely brilliant! There's nothing worse than trying to stick pins into thick layers, and plastic. These little darlings make life so much easier, and you don't get stabbed with those pesky pins either. This has to be the TRICKIEST zipper I've ever sewn!! Thank goodness for Clover Wonder Clips, and a Schmetz Topstitch needle. My Bernina stitched through all these layers with no problems at all......
Picture
Picture
...once the birdie design is traced onto some fabric with a Micron Pigma pen, this cute pin cushion is hand embroidered, and stuffed with some wool wadding. It's slip stitched into place in the sewing case. The pattern includes instructions on how to make a charm to attach to the zipper pull, but this cute scissor charm has been in my jewellery box for simply ages and was perfect to clip onto the end of the zipper. I added one of my labels to the inside of the folder and stitched it into place when I was stitching that tricky zipper. I changed the zipper for an open ended one, and the zipper was probably the trickiest part of this project!...
Picture
Picture
...Those Clover Wonder Clips were perfect for holding the binding in place when it was folded over the edge of the zipper. No more getting stabbed by pins when I was stitching the binding in place by hand! This shows the inside of the Sewing Accessory Case. I still need to cover the board with fabric on one side and sandpaper on the other... unfortunately when I raided Mr F's man-drawer he only had some tatty bits so I'm off to the local d-i-y shop on Monday...
Picture
Picture
...Here's the finished project! The kit included all the fabrics (also designed by Lynette), embroidery threads, wool felt, hexagon papers, zipper (although I added my own zipper as I made this case slightly larger), fusible pellon, peltex, elastic and even the sewing board. Thank you so much Lynette for another fabulous design! I really have enjoyed making this so much. My sewing bag is getting filled with gorgeous sewing accessories!!
Picture
1 Comment

Turquoise Sminkepung

24/7/2015

0 Comments

 
I needed a gift for a work colleague who is going on a secondment for a year, and quickly made one of the cosmetic bags on Monday evening at Sewing Group. The pattern is Anna's Sminkepung by the Norwegian designer AnnAKa (these patterns are written in Norwegian and are available from quilt shops in Scandinavia). The turquoise fabrics are from the Flower Sugar lll collection by Lecien and a little bit of lace trimming adds the finishing touches! I managed to get the main part completed at the sewing group, and then finished it off at home with a nice cuppa and a chat with my girlies as I hadn't seen them all day!
Picture
0 Comments

Sewing Accessory Case - Part 1

19/7/2015

1 Comment

 
A few weeks ago I ordered this kit from Patchwork Chicks. It's called "Sewing Accessory Case" and is designed by Lynette Anderson Designs. The kit includes all these beautiful fabrics and embellishments needed to make this really useful sewing case. This sewing project started in the kitchen, coffee staining some tape-measure tape. I was so impatient to start stitching that I gave it a quick blast with the hairdryer...
Picture
Picture
...the background fabric was embellished with the coffee stained tape-measure tape (it looked a bit too dark, so turned the tape over and it looked perfect!). The tape was glued into place (used my Sewline glue stick for this instead of using pins) and stitched it with a matching coloured thread. The Bernina foot number 5 is perfect for attaching embellishments like this. The stitchery designs were traced onto the background fabric, appliqué shapes traced onto appliqué paper and fused into place all ready for some work with my apliquick rods and glue stick. The flowers and leaves have been traced onto steam-a-seam lite and fused onto wool felt, all ready for hand sewing into place...
Picture
Picture
...eeeekkkk!!! Quarter inch hexagons... I never imagined I'd be able to make something so tiny, but thankfully my apliquick rods and glue stick made them super simple! This kit has absolutely everything you need to make this (apart from a piece of sandpaper and I'll pinch that from Mr F's man-cupboard when he's not looking). The techniques used so far: machine piecing, edge stitching, hand appliqué using the apliquick rods and glue stick method, and hand embroidery...
Picture
Picture
...once the applique was finished, I made a start on the front of the sewing case. I picked out a variegated brown King Tut quilting thread to complement the brown fabric. The fabric for the front of the case was layered onto the fusible pellon that was included in the kit and I marked a quilting grid with a Clover Hera marker...
Picture
Picture
...I used a slightly longer stitch length (approx 3mm) for the quilting and used a Schmetz Topstitch needle size 70. The quilted piece was then trimmed to size (I made a template for this using the outline that was included in the pattern). The stitchery design was then appliquéd onto the front of the quilted area. I fused some appliqué paper to the back of the stitchery design, and used the apliquick rods and glue stick method for turning the raw edges over. This was then held in place with a few drops of Roxanne's basting glue and then was stitched with a neutral coloured YLI silk thread and a Clover Black Gold appliqué needle. The next step was the inside of the sewing case. I'll add those pictures in a few days once I've got that part completed!
Picture
Picture
1 Comment

Initial Pincushion

15/7/2015

0 Comments

 
After making some pincushions to use as gifts for sewing friends, I decided that I really needed a new pincushion for me - this is what I was saving my crushed walnut shells for!! This is the Initials Pincushion kit that I bought online from Patchwork Chicks. It's by Lynette Anderson Designs, and has a combination of stitchery, applique and piecing. This kit includes the pattern, fabric to make 1 pincushion, pellon, hexagon papers, tape measure tape and embroidery threads. Managed a bit of preparation ready to take the hand sewing part to sewing Group with me on Monday evening. I traced around a hexagon template onto appliqué paper which was then fused onto the WS of the fabric ready for the glue stick method. I traced the letter N onto one of the hexagons using a Micron Pigma pen, and the tape measure tape was machined into place using a matching coloured thread and a slightly longer stitch to prevent puckering... 
Picture
Picture
...I was very productive when I went to Sewing Group, as I managed to get all the hexagons stitched together and appliquéd into place on the top of the pincushion. A piece of fusible wadding has been secured into place on the WS of the top of the pincushion. Next stage is to make a calico lining for the crushed walnut shells. I used the same pattern for the pincushion, and used a smaller stitch, leaving an opening in the side seam. Once the lining was turned the right way through, I poked it into the pincushion itself, ready for filling...
Picture
Picture
...I'd bought these crushed walnut shells ages ago as they'd been recommended to me to use as pincushion filling. They're very finely ground, and I'd made a paper cone to help guide the shells into place. Making a liner for the crushed walnut shells proved to be the easy part, as stuffing it proved to be trickier than I expected it to be. Eventually I resorted to using this nozzle from my icing set as it was the perfect tool for getting the crushed walnut shells into the lining... 
Picture
Picture
...and a drum roll please - it's completed! I really am absolutely thrilled with this one. Thanks Lynette for another great design! It's my absolute favourite, and has pride of place in my sewing corner. Despite it being a bit tricky to fill, the finished result is great - it's firm and holds it's shape well, and is a bit "weighty" so when I pull out a pin, the pincushion stays put - and the crushed walnut shells inside keep my pins clean and sharp. Now I need to get started on another one of Lynette's designs that I've had for a while - my sewing corner is filling up with lots of pretty things to use while I'm being creative!
Picture
0 Comments

Sarah's Pincushions

12/7/2015

5 Comments

 
I'd been clearing out a box of patterns, and I came across this one - I had made several of these pincushions a few years ago, and (before I had a blog!!) and decided it was about time I made a few more! This is a pattern by Leanne Beasley, called Sarah's Pincushions. Scraps of Lecien fabrics, an assortment of Cosmo embroidery threads, a very fine micron pigma pen and a lightbox. Yes I was ready for a couple of hours of peaceful stitching!I used a fusible woven interfacing (Weaveline) on the back of the pale aqua spot and the hand embroidery really didn't take very long at all...
Picture
Picture
...I added a piece of thin cotton wadding to the WS of both the front and back pieces of fabric, added some ric-rac trimming, and stuffed it with some leftover polyester wadding. The next pincushion had appliqued daisy petals (I used the applique paper and glue stick method for these). I managed t get the front of the pincushion completed at the Sewing Group last week. Wadding was added again to the WS of the front and back pieces of fabric, the front and back were joined together, and a small calico bag was inserted into the opening. This was filled with crushed walnut shells, and the calico bag was secured with a few stitches before the opening of the pincushion was stitched up...
Picture
Picture
...another pincushion from the same pattern has a pretty stitchery design. I also used Cosmo embroidery threads for this one too. I'm saving my crushed walnut shells for a rather special project, so used leftover polyester wadding for this one too...
Picture
Picture
...all of these pincushions were made with scraps of Lecian fabrics, some ric-rac trimming and small pieces of leftover wadding. This picture shows the back of the pincushions - they are almost as pretty as the fronts! I really like making smaller projects that are useful and these will be gifts for some of my sewing friends...
Picture
Picture
...I much prefer the pincushion that is stuffed with crushed walnut shells as it's firmer and has a better shape. Well I'm off to the local pet shop on my day off as it's much more reasonable to buy crushed walnut shells from there than getting it from the quilt shop! 
Picture
5 Comments

July 09th, 2015

10/7/2015

0 Comments

 
Picture
0 Comments

Simply Blessed - Borders Completed!

9/7/2015

0 Comments

 
This beautiful Tilda fabric arrived last Tuesday, and I didn't waste any time at all getting the new fabric cut and pieced together for the final border! I'd found this fabric (part of the Summer Fair collection by Tilda) when I did a quick google search - it was from Stitch Craft Create and I was really pleased with their swift delivery. (I've also ordered some other Tilda fabrics from Under The Mulberry Tree too, but this is the one that I was desperate for!). I continued to use Mettler thread for the piecing, and a Schmetz Microtex needle size 60...
Picture
Picture
...a final press, and the borders were completed!These Tilda fabrics are beautifully soft and have been lovely to stitch with. It was then time for a quick photoshoot with the quilt top pegged to the washing line, blowing gently in the breeze...
Picture
Picture
...the finished quilt top has now been carefully folded and stored in a cotton pillow case while I'm saving my pennies ready to take it to Janette at J-Quilts so she can work her magic on it with her longarm machine. I'm planning on getting this one custom quilted, as I really want to showcase the applique and stitchery. 
Picture
0 Comments

United Stitches - US009 and US010

5/7/2015

0 Comments

 
A few weeks ago another package arrived from Under The Mulberry Tree in Australia - the next 2 stitchery designs for United Stitches, US009 and US010, by Rosalie Quinlan Designs. These designs are already screen printed onto linen (saves having to trace the designs on by hand!) which means all I had to do was fuse a piece of weaveline to the back of the linen, put it in my wooden hoop and I was ready to make a start with the hand embroidery...
Picture
Picture
...these are stitched very simply with Cosmo embroidery threads, using back stitch, chain stitch and satin stitch. I've spent a few peaceful evenings getting these completed. And I've had an email from UTMT to let me know the next 2 designs are on their way over from Oz!
Picture
Picture
0 Comments

Simply Blessed - Pieced Together

3/7/2015

0 Comments

 
Once all the blocks of Simply Blessed had been completed, it was time to get the blocks pieced together. This has been a 9 month BOM that I ordered online from Under the Mulberry Tree in Australia, and the pattern was designed by the Australian designer Rosalie Quinlan. This version is made with Tilda fabrics from the Summer fair collection, and beautiful muted tones, and the Cosmo variegated thread that is used for the hand embroidery compliments these colours perfectly...
Picture
Picture
...once the blocks were stitched together, it was time for a quick photoshoot of the quilt top before I tackled the borders. The inner border was machined into place, then I made the pieced border. Strips of fabric were cut each month and by the time it was month 9, the strips were already prepared. I stitched these together in pairs, using a smaller than usual machine stitch, as they will be cross cut and I don't want these tiny seams to unravel! The pairs strips were all sewn in one direction, then as the pairs were stitched together this was done in the opposite direction to prevent the fabric from distorting... 
Picture
Picture
...it was important to press the seams well, all in the same direction, so the pieced set lay flat on the cutting board when it was time for the cross cutting.  I used a Schmetz Microtex needle size 60 and a fine Mettler thread for the piecing. Some careful piecing, pressing, and cutting cutting ensured the accuracy of these pretty strips...
Picture
Picture
...the side borders were stitched into place first, taking care not to stretch the edges of the pieced border. Once the top and bottom borders were also in place, on final press and it was time for the outer borders...
Picture
Picture
...I joined all my border seams diagonally (I always do this unless I'm matching stripes, then I use a end-to-end seam) and unfortunately this meant that I was a bit short of enough fabric for the bottom border. After a frantic Google search, I found some here in the UK from "Stitch Craft Create" so a quick online order was placed for the extra fabric, and I ordered some binding fabric at the same time to save on P&P. Hopefully the express order will arrive soon, so that I can get the quilt top finished and share some more photographs with the border in place.
Picture
0 Comments
    Picture

    About me...

    Hi - welcome to my quilting blog! My passions are my family, my dog, my friends and sewing, not necessarily in that order! 
    ​​I live in Suffolk, not far from the coast, surrounded by the beautiful countryside.  
    ​If you want to share or pin any of my pictures, please link back to my blog.

    Picture
    Picture
    Picture
    Picture
    Picture
    Picture
    Picture
    Picture
    Picture
    Picture
    Picture
    Picture
    Picture
    Picture
    Picture
    Picture
    Picture
    Picture
    Picture
    Picture
    Picture
    Picture
    Picture
    Picture
    Picture
    Picture
    Picture
    Picture
    Picture
    Picture
    Picture
    Picture

    Archives

    January 2023
    December 2022
    November 2022
    October 2022
    September 2022
    August 2022
    July 2022
    June 2022
    May 2022
    April 2022
    March 2022
    February 2022
    January 2022
    December 2021
    November 2021
    October 2021
    September 2021
    August 2021
    July 2021
    June 2021
    May 2021
    April 2021
    March 2021
    February 2021
    January 2021
    December 2020
    November 2020
    October 2020
    September 2020
    August 2020
    July 2020
    June 2020
    May 2020
    April 2020
    March 2020
    February 2020
    January 2020
    December 2019
    November 2019
    October 2019
    September 2019
    August 2019
    July 2019
    June 2019
    May 2019
    April 2019
    March 2019
    February 2019
    January 2019
    December 2018
    November 2018
    October 2018
    September 2018
    August 2018
    July 2018
    June 2018
    May 2018
    April 2018
    March 2018
    February 2018
    January 2018
    December 2017
    November 2017
    October 2017
    September 2017
    August 2017
    July 2017
    June 2017
    May 2017
    April 2017
    March 2017
    February 2017
    January 2017
    December 2016
    November 2016
    October 2016
    September 2016
    August 2016
    July 2016
    June 2016
    May 2016
    April 2016
    March 2016
    February 2016
    January 2016
    December 2015
    November 2015
    October 2015
    September 2015
    August 2015
    July 2015
    June 2015
    May 2015
    April 2015
    March 2015
    February 2015
    January 2015
    December 2014
    November 2014
    October 2014
    September 2014
    August 2014
    July 2014
    June 2014
    May 2014
    April 2014
    March 2014
    February 2014
    January 2014
    December 2013
    November 2013
    October 2013
    September 2013
    August 2013
    July 2013
    June 2013
    May 2013
    April 2013
    March 2013
    February 2013
    January 2013
    December 2012
    November 2012
    October 2012
    September 2012
    August 2012
    July 2012
    June 2012
    May 2012
    April 2012
    March 2012
    February 2012
    January 2012
    December 2011
    November 2011
    October 2011
    September 2011
    August 2011
    July 2011
    June 2011
    May 2011
    April 2011
    March 2011
    February 2011
    January 2011
    December 2010
    November 2010
    October 2010

    RSS Feed

    Picture
    Picture

    Blogs I follow

    A Quilt Lady
    A Quilting Life
    Abyquilt
    Anne-Grethe's quiltblog
    Anne Marie Quilt
    Bente Malm Quilte-Design
    Bloom
    Cinderberry Styitches
    Daisy made it
    Dilly Dimple
    Karis Quilterier
    Evas Quilterom
    Erickaeckles
    Fantasia Yarns
    Gail Pan Designs
    Hanne's Quilt Corner
    Halfpenny Home
    I'm a Ginger Monkey
    J-quilts
    Just Jude Designs
    Kviltstina
    Leanne's House
    Liv Aagots Quilteblogg
    Lily's Quilts
    Litamora's Quilt & Design
    Lynette Anderson Designs
    Merete's Quiltestue
    Mona's quiltblog
    Pam's Paradise Stitching
    Pia Si Sia
    Random Ramblings
    Sigrun's blog
    Sølvi's blog
    U-handblog
    ZewNice

     UK shops

    These are the UK shops that I use to purchase my quilting supplies - fabrics and threads etc.
    Bramblepatch
    Buttonberry
    Coast and Country Crafts
    Craft Den
    Cross Patch
    Emma's Fabric Studio
    Fiona's Fabrics
    Glenroy Designs
    Halfpenny Home
    Hulu
    J-quilts
    KIS Quilting
    Patchwork Chicks
    Quilter's Cloth
    Quilters Haven
    Sew and So's
    The Eternal Maker
    The Fat Quarters
    The Quilt Room
    U-handbag

    Australian links

    Cookies and Cream Craft
    Homespun magazine
    Little Quilt Store
    Quilt Fabric Delights
    Under The Mulberry Tree

    Scandinavian links

    Lapp-Elisa Quilts HB
    Lappedesign
    Lappedilla AS
    Myquilt
    Northern Quilts
    Quiltegården
    Quiltekroken
    Quiltemagasinet
    Quiltespecialisten
    Sy-Sammen