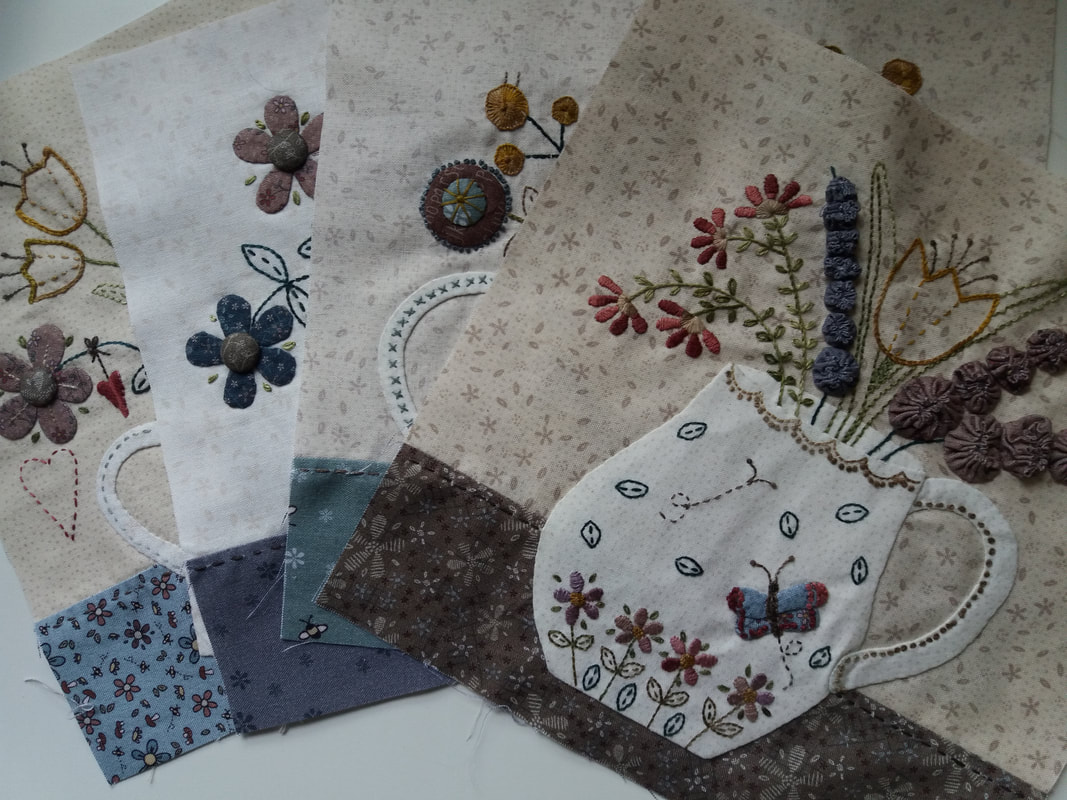
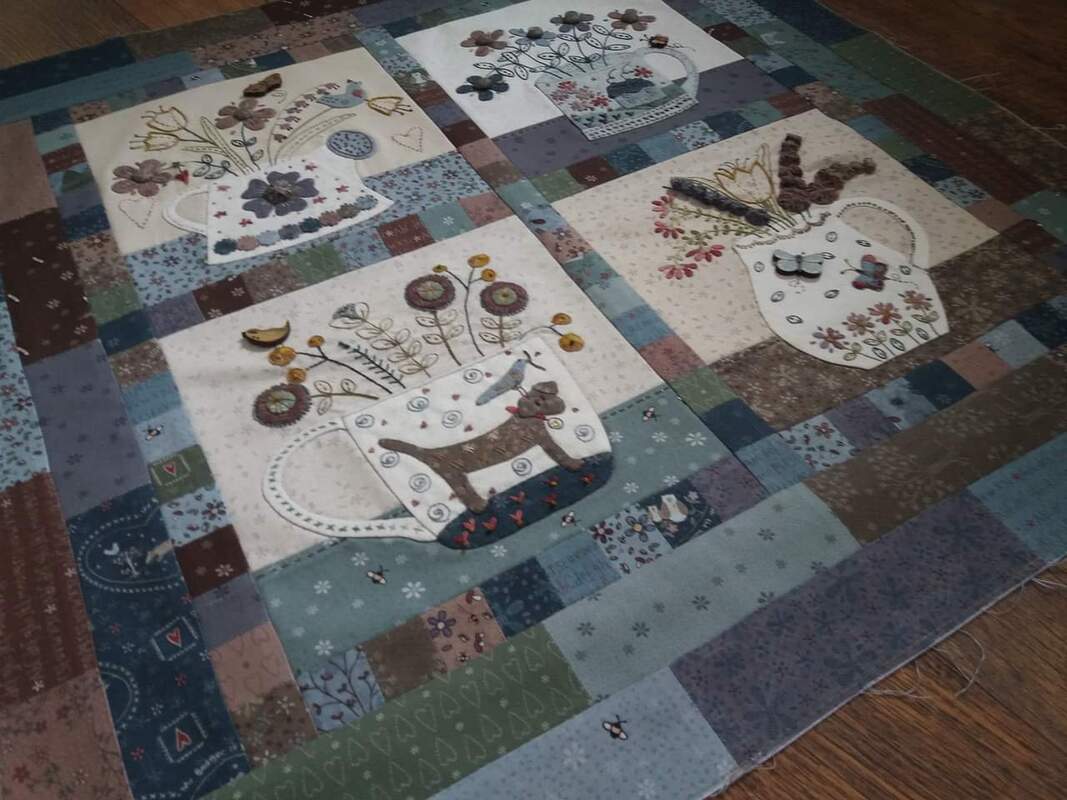
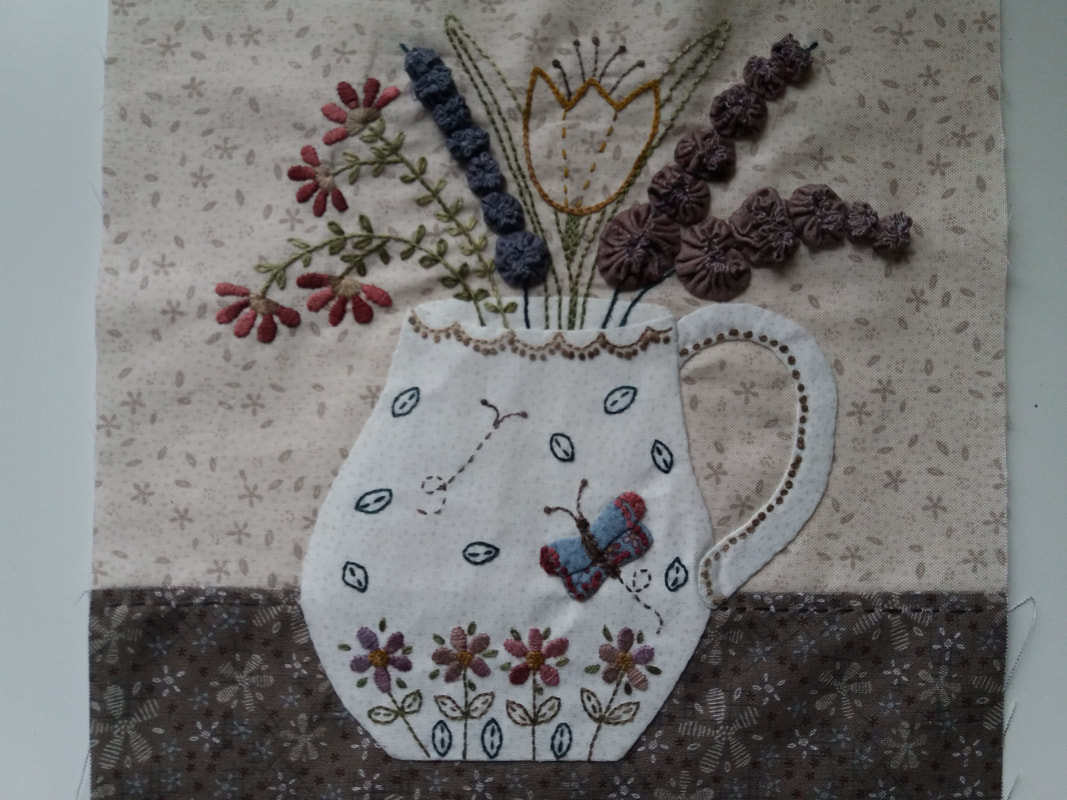
Once all four blocks for Say it with Flowers (this year's mystery button club quilt by Lynette Anderson Designs) were pressed and trimmed to size, it was time to add the sashing and borders. Firstly, a selection of 1.5" squares were cut and pieced together, pressing the seams open, and added to the blocks as sashing and an inner border... 
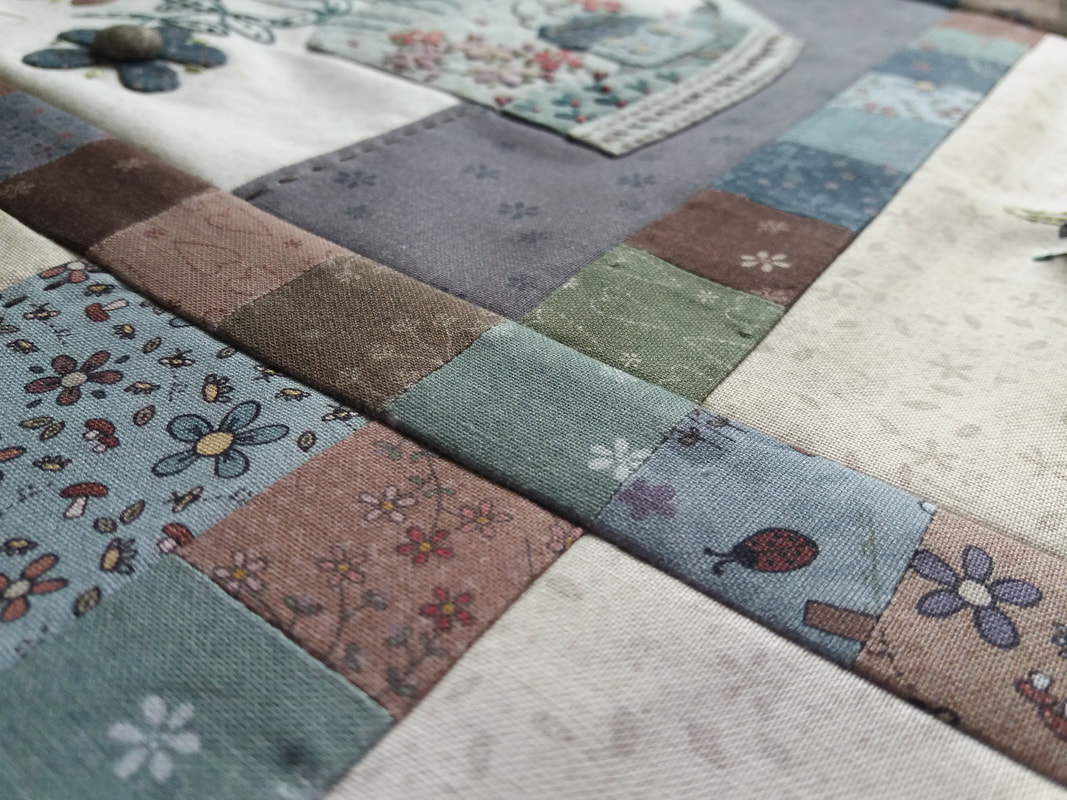
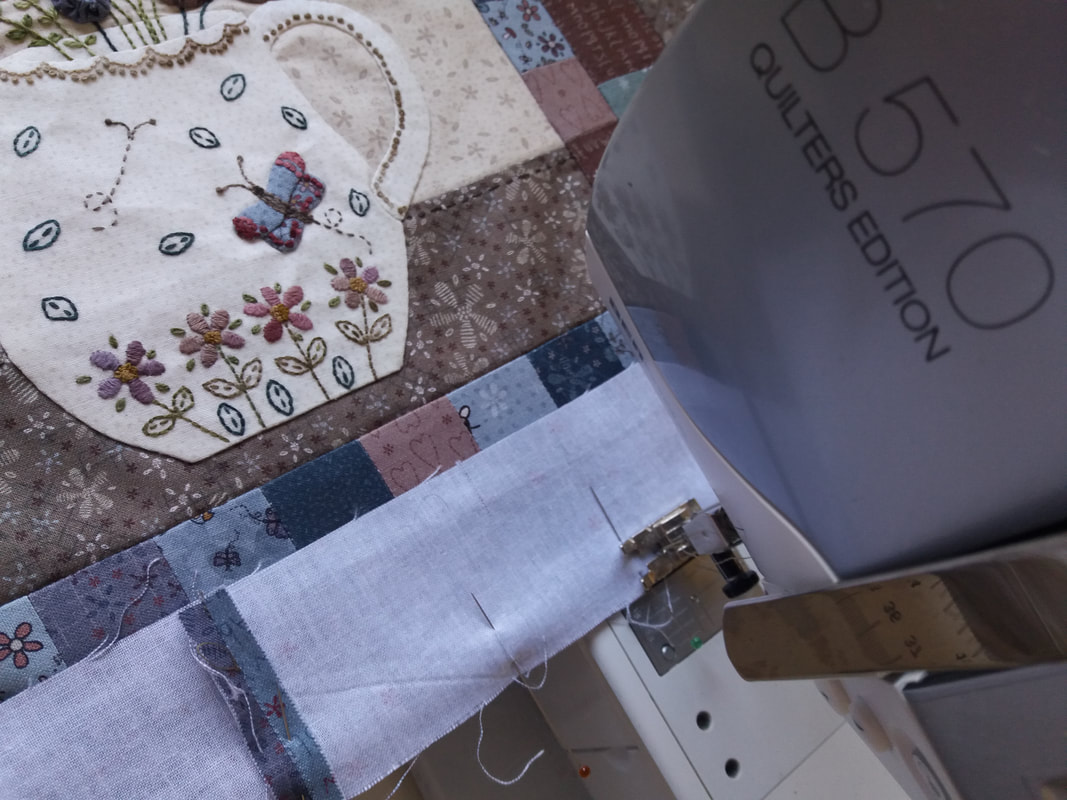
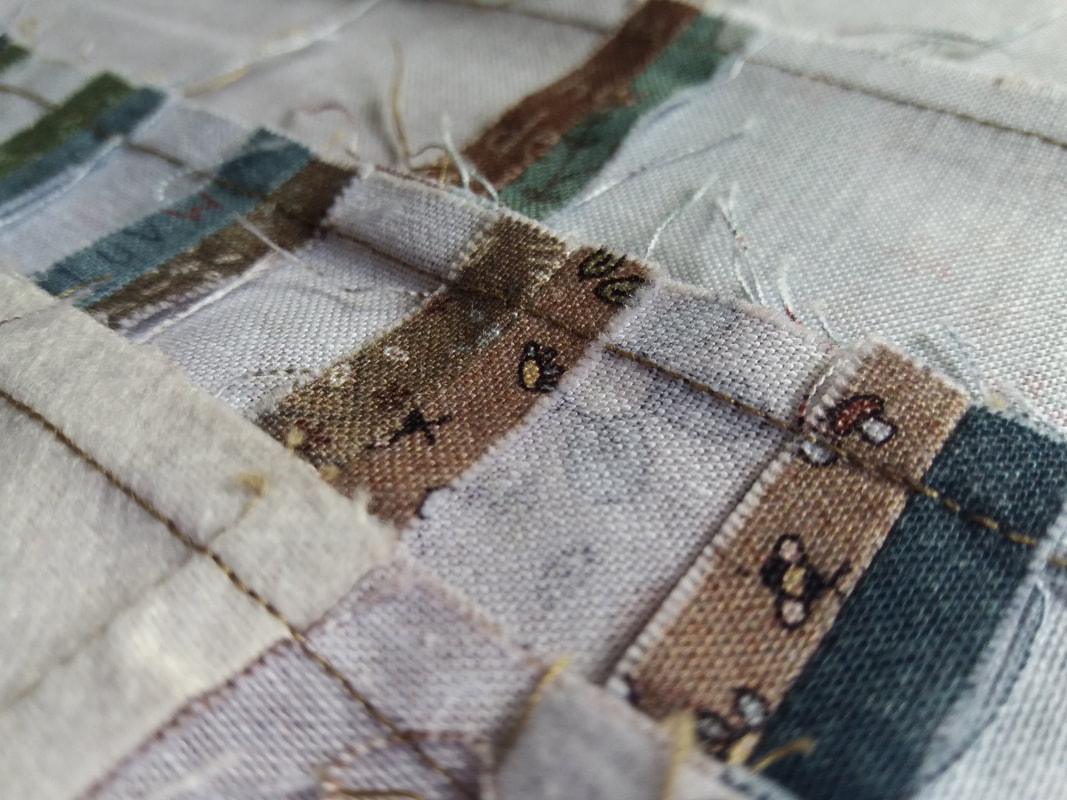
...the outer borders were made of an assortment of 2" wide rectangles, pieced together. and added to both sides of the quilt, then the top and bottom. This is repeated and all the seams for the two rounds of the outer border have been pressed... ...and here's the quilt top, ready to be layered with wadding anad backing fabric then it can be quilted. I'm still deliberating over quilting designs and haven't decided yet whether to do this by hand or machine.
0 Comments
I'd been doodling some ideas for a quilt label for my Say it with Flowers quilt (by Lynette Anderson Designs) and decided to use a selection of fabrics for the embroidery backgrounds. These were all used in the Say it with Flowers quilt, and are from the Corner of the Woods collection, also designed by Lynette. Once I'd picked the final design, I traced over the pencil lines with a fine Sharpie pen, as when I'm tracing the design onto fabric using a light box, the Sharpie pen shows up better than pencil. I pinned the design to the first background fabric, taped the fabric to my light box, and just traced the part of the design that I needed using a Micron Pigma pen with a fine nib. Once the design has been traced, I fuse a small piece of lightweight interfacing onto the wrong side of the background fabric. When I'm hand embroidering, I always use a wooden embroidery hoop to keep the fabric taut, and have a selection of hoops in various sizes... ...I've used Karen Kay Buckley Perfect Circles for making each shape. The fabric is cut larger than I need it to be, stitch a running stitch around the outer edge. When the template is placed on the back, the two ends of thread are drawn up and the fabric is pressed. When the template is removed, the threads are drawn up again, and you are left with a nice smooth edge. The circles were then layered up and hand appliqued on top of one another.... ...the hand embroideery was stitched using a selection of variegated Valdani hand dyed embroidery threads. The subtle shades go perfectly with Lynettes fabrics. The centre circle has a small appliqued watering can, hand embroidered flowers and some really teeny tiny Suffolk Puffs. I was inspired by the decorative edging that is on block 4 of the quilt and wanted to use that around the centre of the label... ...and here's the completed quilt label! It measures just 5.5" in diameter (the centre circle measures 3" in diameter) and has lots of elements from the front of the quilt incorporated into it. I haven't actually finished making the sashing and borders yet, but once Say it with Flowers has been pieced together and quilted, this pretty label will be hand appliqued onto the back of the quilt.
The pattern for block 4 of Say it with Flowers - this year's mystery button club BOM by Lynette Anderson Designs - arrived in the post recently from Coast & Country Crafts and Quilts along with fabric for the backing and binding. This is the final block for this BOM, and it has been an absolute pleasure to stitch. As always, I've traced the stitchery design onto the background fabric using a lightpad and a fine Micro Pigma pen in a pale brown shade. I prefer a fine nib such as 005 size. I've also been using hand dyed Valdani variegated stranded embroidery threads for this project and the variegation is very subtle... ...I've used the Apliquick method for this cute appliqued butterfly, which was stitched in place before it was hand embroidered. These pink satin stitch flowers are lovely... ...teeny tiny Suffolk Puffs were stitched into place once the "stalks" were hand embroidered. I love the decorative edging along the top of the jug, and I'm going to incorporate that into my quilt label too. The hand painted wooden button is so cute!... ...and here's the completed block, trimmed and ready to be pressed on my wool pressing mat. The hand painted wooden button will be stitched in place once this has been quilted. The next step is to make the sashing (lots of tiny squares) and the borders, which will have to wait until later in the week as I'm busy for a few days with my non-sewing life!
A few years ago, I did a "pattern test" for Lynette Anderson Designs, of a pretty pattern named My Floss Organiser. It's very useful, and when I was given the opportunity to make another one, I jumped at the chance! Supplied by Oh Sew Sweet Shop this kit includes one of Lynette's pre-printed panels, along with clear vinyl and woolfelt. I love how the panel includes instructions for what each piece of fabric is to be used for, AND includes the printed stitchery design... ...I've used a selection of Valdani variegated threads for the hand embroidery (the colours Lynette used are listed on the back of the pattern). These threads have a very subtle variegation and are lovely for hand embroidery. If you don't have variegated threads, a top tip is to pick 2 similar colours and use one strand from each and this also gives a nice effect. My stash of Valdani stranded threads was getting a bit low on my favourite colours, however I was able to replenish my stock thanks to The Patchwork Rabbit here in the UK. These hand embroidered "ribbons" are so pretty! When they're completed they'll be separated, and put to one side, awaiting the construction of this organiser. A little pair of scissors is printed to indicate the cutting lines... ...the next step is to prepare the applique, and I did this the Apliquick way! Using Hugs 'n Kisses applique paper, Apliquick tools and a Sewline fabric glue pen, along with a pencil for tracing the applique shapes and a fine nibbed Micron Pigma pen for tracing the surface embroidery design. Once the applque shapes have been embroidered, the edges are glued and turned to the wrong side using the Apliquick tools.. These applique pieces are then ready to be stitched in place - I use Clover Black Gold needle and a fine tgread such as Bottomline, or Aurifil 80wt. Yes, as you can see, I've strayed from the original design, and the quilt is made from one piece of fabric, and I've used a different colour thread to embroider the details on the sewing machine so it resembles my vintage Singer... ...wool felt is used to make these birds which can be used as needlekeepers. Fusible webbing is used to attach them to the background fabric, then theyre secured with handembroidered blanket stitch. A small fabric envelope is used to store a packet of hand sewing needles and is appliqued into place between the birds. Pretty embroidered bunting completes this part... ...plastic pockets with bound edges are used for storing threads, and I've used some fabric glue to temporarily hold the binding in place, along with some Clover Wonder Clips, then the plastic pockets are stitched in place. The embroidered ribbons are stitched in place to cover the bottom edges of the pockets... ...once the front and back are stitched together, a narrow single fold binding is added to cover all the raw edges. The pictures below show the envelope for storing needles and the needlekeepers... ...and inside there are 24 plastic pockets for storing embroidery threads. I'm using personalised wooden spools that I bought a few years ago when I took part in a thread club, organised by Lynette... ...one of the "ribbons" is embroidered with my name and date. The pattern includes letters that you can trace to personalise this for yourself or a friend - this would make a lovely gift for anyone who enjoys hand embroidery. Afterall, you can never have too much thread storage! A neat scissor charm is added to the front as a final embellishment... ...now this has been completed, it's ready to be posted to Oh Sew Sweet to be on display. I've really enjoyed stitching this - my favourite projects are ones that are pretty AND useful!
|
About me...Hi - welcome to my quilting blog! My passions are my family, my dog, my friends and sewing, not necessarily in that order! Archives
January 2025
Blogs I followUK shopsThese are the UK shops that I use to purchase my quilting supplies - fabrics and threads etc.
Australian linksScandinavian links |