Nicola Foreman Quilts
  • BLOG
  • BAGS
  • CUSHIONS
  • QUILTYSTUFF
  • QUILTS
  • TABLERUNNERS
  • WALL HANGINGS
  • CONTACT ME

Valdani Threads - Month 3

27/3/2015

0 Comments

 
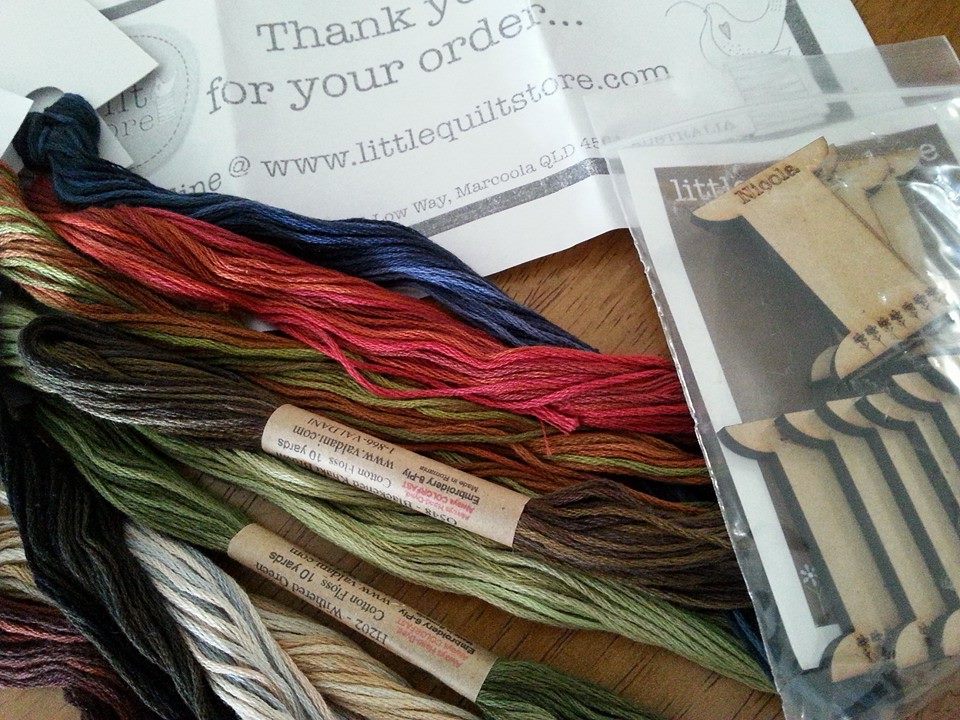
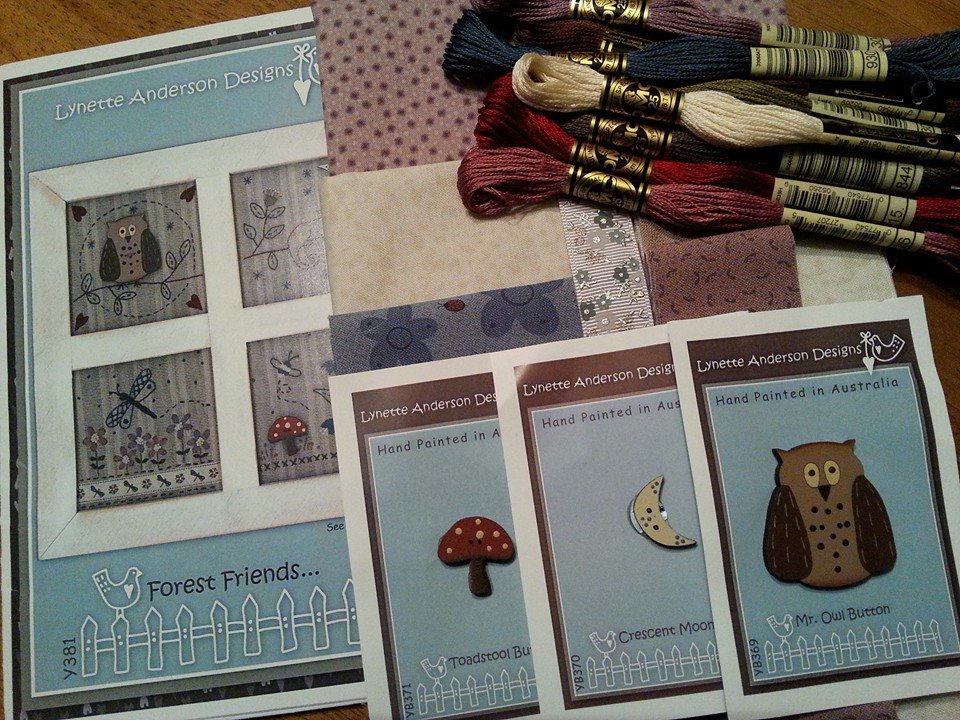
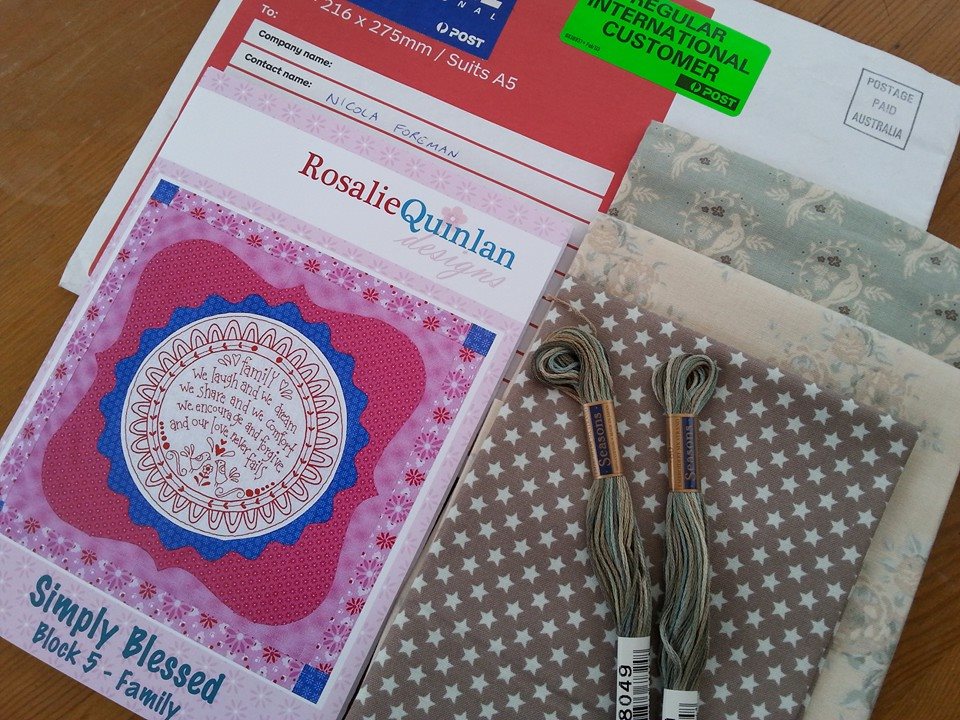
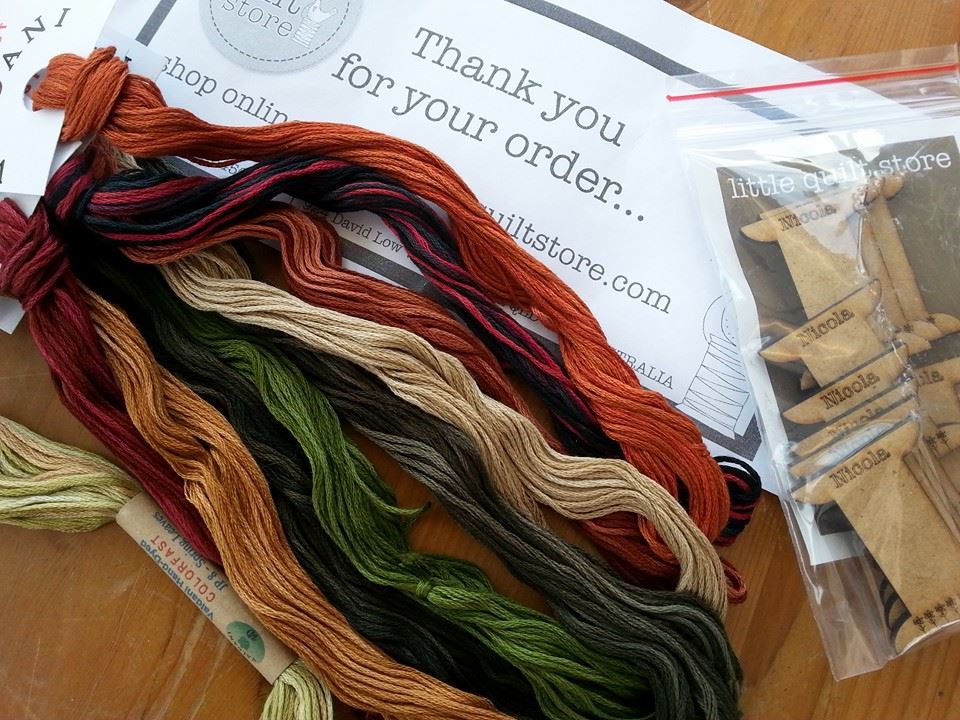
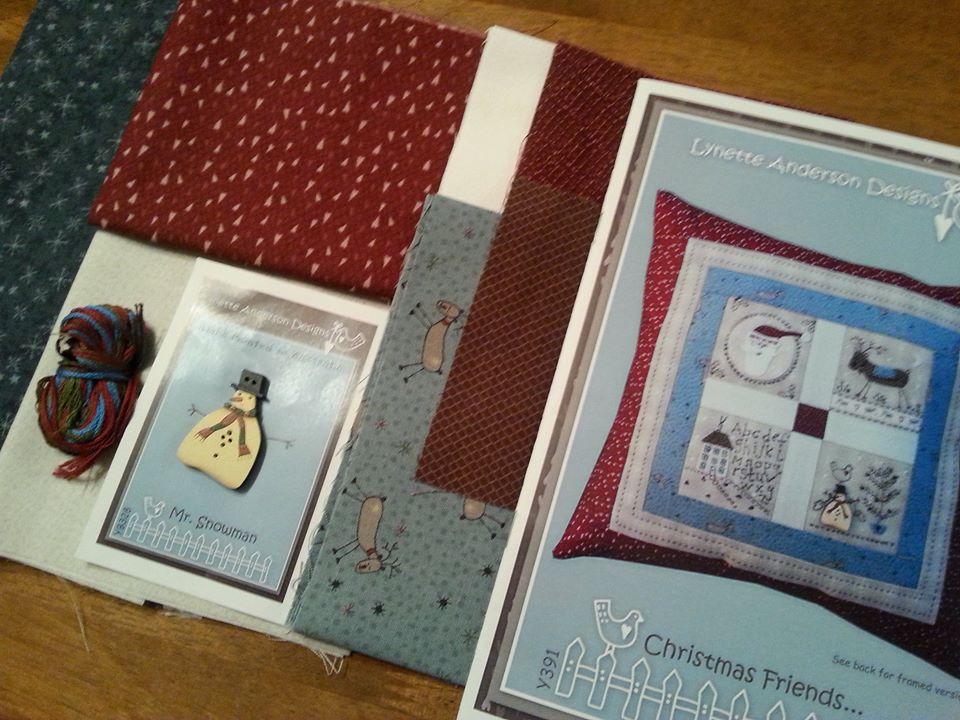
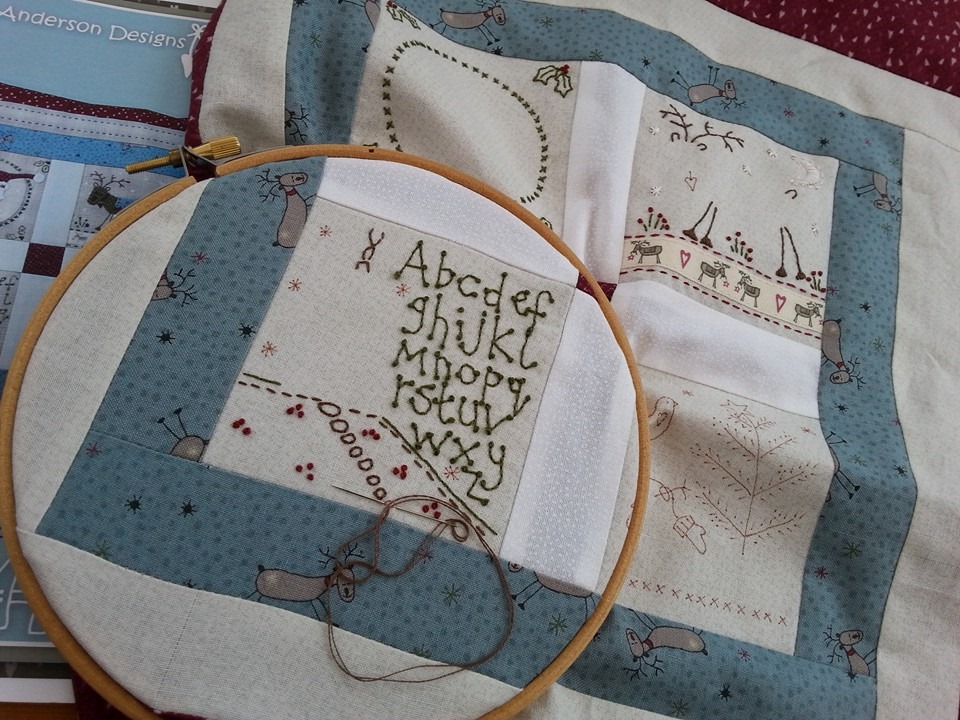
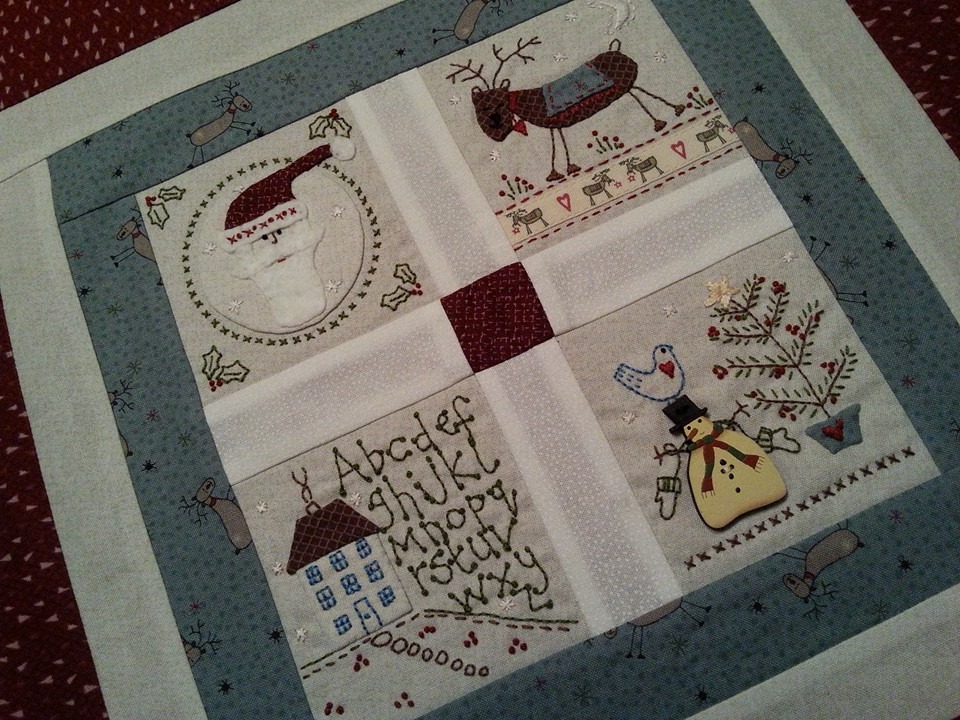
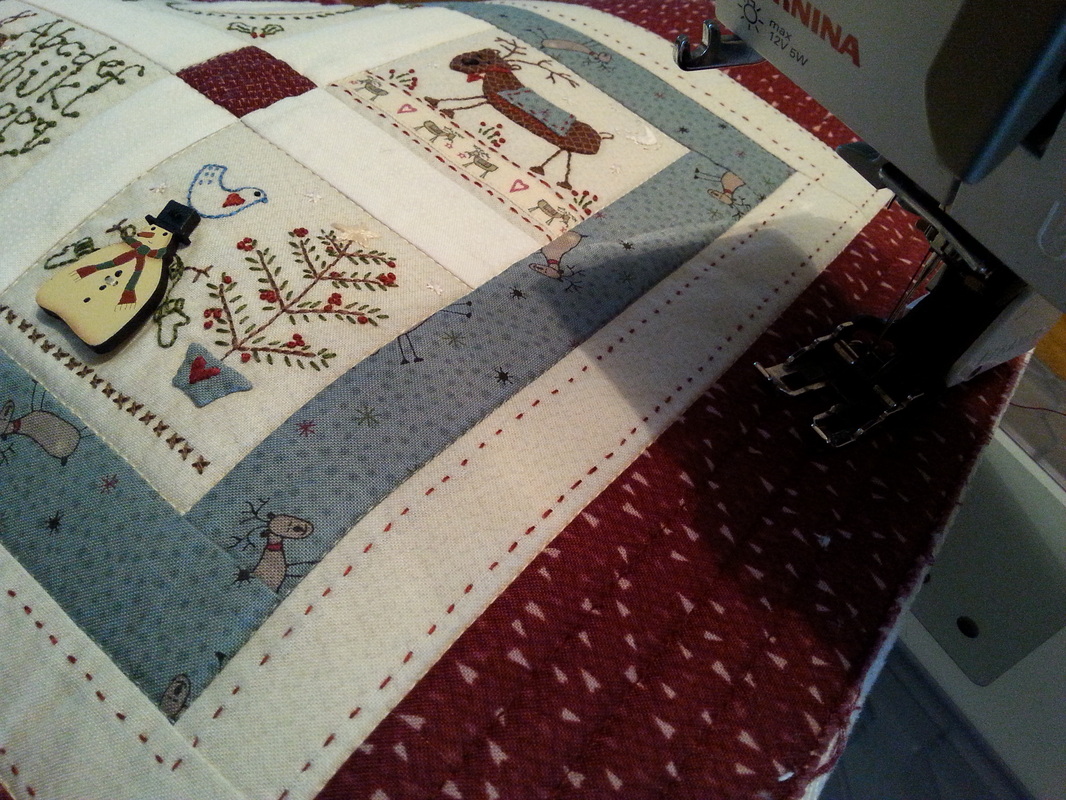
These beautiful hand-dyed Valdani Threads arrived in the post all the way from Australia - I've been taking part in this Thread Club organised by Lynette Anderson Designs for 3 months now.  These cute personalised thread spools will also be put to good use too! 
Picture
0 Comments

A Family Of Owls

27/3/2015

0 Comments

 
I had a few scraps of fabric leftover from the "Happy Flappers" quilt that I'd recently made, and put them to good use making another project for Mollie Rose. I used a pattern called "A Family Of Owls" by Claire Turpin Designs, and spent a happy sewing day with steam-a-seam lite making applique templates. (I'd bought this pattern as a PDF download from Claire's etsy shop, and her patterns are also available from Under The Mulberry Tree in Australia). The applique templates are firstly traced onto the lite steam-a-seam 2 in reverse, and roughly cut out. Then the backing layer is peeled away. The fusbible webbing is then ironed onto the back of the fabric and cut aout accurately on the traced line. I prefer to use "perfect scissors" for this, by Karen kay Buckley (I love them so much I've got 3 pairs of them in different sizes!). The top layer of paper can then be peeled away....
Picture
Picture
...the applique shapes were then all fused into place onto the background fabric, then I layered this onto some muslin with cotton wadding inbetween the 2 layers. Finally it was time to machine applique the shapes into position, and as I had already layered this up, it was quilted at the same time, using matching coloured Mettler quilting threads. The eyes were embellished with black buttons, that were securely sewn on by hand. Once all the applique was in place, I quilted around each owl using white Aurifil thread 40wt thread...
Picture
Picture
...I used a piece of the backing fabric for the top half of the cushion backing, and inserted a zipper. Then the cushion back and front were machined together 1/8" from the raw edges. I made a scrappy binding using a mixture of 2 fabrics - I especially like stripey bindings. This was machined into place, using the single-fold method...
Picture
Picture
 ...I made sure that I added one of my labels and inside is a plump feather pad. Here is the finished cushion, ready for the birthday girl!
Picture
Picture
0 Comments

The Making Of "Happy Flappers" Quilt

25/3/2015

1 Comment

 
A few weeks ago I was asked to make a quilt for a colleague, for her grand-daughter's first birthday. We found the perfect kit online from The Bramblepatch, called Happy Flappers, which uses fabric from the range "Happy Flappers" by Riley Blake Designs. The kit included all the fabric to piece the top, fabric for the applique owls and leaves, fabric for the binding, and even included the fusible webbing for the applique too. The main part of the quilt is pieced together very simply in rows...
Picture
Picture
...the applique panel is completed separately, then inserted between the pieced rows. The pattern included traceable templates for the owls and the leaves. Once these were traced, fused and cut out, they were fused onto the background fabric and machine appliqued into place. I used a selection of Mettler fine embroidery threads in complimentary colours, a slightly smaller than usual stitch length, and a Schmetz Microtex needle size 60 for the machine applique. I used stitch-and-tear stabiliser on the back to give the fabric some support whilst the applique was being sewn into place...
Picture
Picture
...my friend wanted her grand-daughter's name "Mollie Rose" appliqued onto the quilt too, and I used some extra fabric in a co-ordinating print from the same fabric range for the letters. These were traced onto fusible webbing which was then fused to the back of the fabric. The letters were cut out exactly on the traced lines, the backing paper was removed and the letters were then fused to the quilt top, and machined into place. Again, stitch and tear stabiliser was placed under the fabric that the letters were stitched onto. Once the applique was completed, the loose ends of the threads were secured, and the stitch-and tear was easily removed...
Picture
Picture
...the letters I used were from the book "Winsome Baby" by Nancy Halvorsen. The letter templates in the book are already reversed, which makes tracing them onto fusible webbing so much easier! You really don't need anything fancy for this part of the construction - I simply used a retractable HB pencil for tracing these templates that I bought from my local supermarket. I managed to get a quick photograph of the quilt top before it was layered with the wadding and backing fabric...
Picture
Picture
...I decided to quilt this very simply, starting by stitch in the ditch, then quilting some straight rows across the width of the quilt with a pink King Tut quilting thread. I quilted around the outside of the letters too, then free motion quilting around the owls and leaves was done with a cream King Tut quilting thread...
Picture
Picture
...this stripey fabric for the binding was included in the kit. There was enough fabric to cut the binding strips 3.5" wide. I used the double fold binding method for this quilt, and mitred the corners. I really like using a wider binding on quilts. I added one of my labels to the back of the quilt and then folded the binding over to the back of the quilt and stitched it into place by hand...
Picture
Picture
...and here it is, on the final photoshoot, before it was wrapped up and delivered to Mollie Rose, ready for her first birthday.
Picture
1 Comment

Mollie Rose

24/3/2015

1 Comment

 
This is the "secret"project that I made a few weeks ago, for a very special little girl called Mollie Rose. Her grand-mother is a work colleague, and I was commissioned to make this for Mollie's first birthday. This was a kit from The Bramblepatch and uses a range of fabrics called "Happy Flappers" by Riley Blake. The owls are machine appliqued onto the background fabric and the letters were added to personalise the quilt for Mollie. I've taken lots of pictures of this project in all it's stages - the piecing, applique, quilting, and binding and I'll share those on here in a couple of days. 
Picture
Picture
Picture
1 Comment

Forest Friends

22/3/2015

1 Comment

 
Yes that postman has been to Foreman Towers again! This time he delivered a parcel from Coast & Country Crafts and Quilts, as I'd ordered another beautiful kit "Forest Friends" by Lynette Anderson Designs. This includes the pattern, the fabrics, skeins of embroidery threads, ribbon trimming AND these gorgeous hand painted buttons too. I've used a very fine Pigma Micron pen (size 01 in light brown) to trace the designs onto the background fabric...
Picture
Picture
...once the tracing was done, the fabrics were cut and pieced together using a fine Mettler thread and a Schmetz Microtex size 60 needle and was ready for the stitchery. This project uses some simple hand embroidery stitches using 2 strands of DMC embroidery thread - back stitch, satin stitch and colonial knots. Then it's embellished with these beautiful hand painted buttons (the buttons were all included in this kit, but there are also instructions in the pattern for making applique shapes if you don't have buttons). The narrow border is finished with 2 rows of running stitch...
Picture
Picture
...the quilting was also kept very simple for this project. I used Aurifil 40wt thread and a size 70 Schmetz Topstitch needle, and quilted "stitch in the ditch" first, then quilted straight rows 0.5" apart on the outer border. I prefer pillow backs with a zipper, so made the back a bit different from the instructions that came with the pattern. I used the backing fabric that was included in the kit for the binding too, and used the single fold method of binding. Once this was machined into place, I hand stitched the binding to the back of the cusion. I added one of my labels before the binding was stitched into place...
Picture
Picture
...and here is the finished cushion. It's stuffed with a plump  used a feather pad which I bought from Barratts of Woodbridge. I was raining yesterday when this was finished, so I had to do my photoshoot indoors. I've really enjoyed making this selection of cushions by Lynette Anderson Designs. 
Picture
1 Comment

Simply Blessed - Block 5 "Family"

9/3/2015

2 Comments

 
It's a  good job Mr F hasn't seen the "regular international customer" sticker on the parcel that the postman delivered a few weeks ago! This is block 5 of "Simply Blessed" by Rosalie Quinlan Designs. This BOM was bought online from "Under The Mulberry Tree" in Australia as I couldn't find a stockist here in the UK. I really was in stitchery heaven getting this block completed!...
Picture
Picture
...the centre piece was stitched using Cosmo Seasons variegated thread shade 8049. The next step is the appliqué with these gorgeous Tilda fabrics. I've overlapped the sheets of appliqué paper and pinned them together to make them large enough. I've used a pencil to trace around the templates and cut them out with my Karen Kay Buckley perfect scissors...
Picture
Picture
...once the templates were fused into place, I cut out the shapes leaving a small margin all around the outside edge, then I was ready for some appliqué with a glue stick and those apliquick rods (there is a great tutorial how to use these here on Lynette Anderson's blog). The appliqué shapes were then hand sewn into place, using a neutral coloured YLI silk thread and a very fine appliqué sewing needle. A few drops of Roxanne's basting glue held each layer in place...
Picture
Picture
...the borders were machined into place, and block 5 was completed. This has been a beautiful project to sew, and I've really enjoyed every part of it - the stitchery, the applique and the piecing. Can't wait for block 6 to arrive!
Picture
2 Comments

Diamond Anniversary

8/3/2015

0 Comments

 
At the weekend I was busy playing around with fabrics and lace and zippers and EQ printable fabric sheets, and a very special wedding photograph. This pieced together and quilted with my favourite Aurifil thread... 
Picture
Picture
...once the cushion front was quilted, it was embellished with some vintage buttons. I even managed to find a sparkling "diamond" button for this special project! Then I was busy sewing the binding into place. The binding was folded over to the back, and hand sewn into place. This picture shows a close-up of the quilting, the lace trimming, and the vintage buttons, including the very sparkly one....
Picture
Picture
...and finally here my latest project. I bought a nice plump feather cushion pad from a local shop, Barretts of Woodbridge, to put inside this gorgeous cushion cover. This was a commission for a friend who wanted a unique gift for her in-laws to celebrate their diamond wedding anniversary. 
Picture
0 Comments

Valdani Threads 2

7/3/2015

0 Comments

 
Mr Postman you really are VERY naughty.... look what he's delivered today! Month 2 and some more beautiful hand-dyed Valdani threads and wooden spools from the Thread Club Lynette Anderson Designs.
Picture
0 Comments

Christmas Friends

1/3/2015

4 Comments

 
A few weeks ago I did a little bit on online shopping from Patchwork Chicks here in the UK, and couldn't resist another kit to make this delightful cushion called "Christmas Friends" by Lynette Anderson Designs. Everything was included in the kit - the fabrics (also designed by Lynette), the embroidery threads and a hand[painted snowman button. I stupidly mis-laid the reindeer ribbon that trims one of the blocks, and Karen came to the rescue! Thanks Karen - you saved the day!...
Picture
Picture
...the pattern was placed on my lightbox, and the stitchery designs were traced very carefully onto the background fabric with a very fine Micron Pigma pen. When the designs were all traced, a piece of weaveline interfacing was fused to the back of the fabric. I added a quick dab of Sewline fabric glue to the back of the reindeer ribbon and it was pressed into position on one of the mini stitchery blocks. The glue eliminates the need for pins and is easy to stitch over. I used a longer stitch for the top-stitching, approx 3mm then pieced the cushion front, pressing all seams as I went along...
Picture
Picture
...I did most of the stitchery while I was having some "me" time while Mr F was having a lay-in a couple of weeks ago. I'm very glad that I'd invested in those apliquick rods from The Fat Quarters. They certainly make these small applique pieces much easier to make. The Santa mini block had a "fuzzy" beard for Santa, and the Snowman block was embellished with a hand painted snowman button...
Picture
Picture
...I was able to get the cushion front quilted this afternoon. Using my favourite thread, Aurifil, in matching colours. I quilted this very simply "stitch-in-the-ditch" then some straight rows 0.5" apart on the outer border. I prefer to make cushion covers with zipper closures, so used the backing fabric that was included in the kit for the binding and part of the cushion back, and used a double layer of muslin for the lower part of the cushion back....
Picture
Picture
...and here is the finished cushion, made with a combination of techniques. Machine piecing, hand embroidery, hand applique, and machine quilting. Another project completed, now just what shall I start next?
Picture
4 Comments
    Picture

    About me...

    Hi - welcome to my quilting blog! My passions are my family, my dog, my friends and sewing, not necessarily in that order! 
    ​​I live in Suffolk, not far from the coast, surrounded by the beautiful countryside.  
    ​If you want to share or pin any of my pictures, please link back to my blog.

    Picture
    Picture
    Picture
    Picture
    Picture
    Picture
    Picture
    Picture
    Picture
    Picture
    Picture
    Picture
    Picture
    Picture
    Picture
    Picture
    Picture
    Picture
    Picture
    Picture
    Picture
    Picture
    Picture
    Picture
    Picture
    Picture
    Picture
    Picture
    Picture
    Picture
    Picture
    Picture

    Archives

    January 2023
    December 2022
    November 2022
    October 2022
    September 2022
    August 2022
    July 2022
    June 2022
    May 2022
    April 2022
    March 2022
    February 2022
    January 2022
    December 2021
    November 2021
    October 2021
    September 2021
    August 2021
    July 2021
    June 2021
    May 2021
    April 2021
    March 2021
    February 2021
    January 2021
    December 2020
    November 2020
    October 2020
    September 2020
    August 2020
    July 2020
    June 2020
    May 2020
    April 2020
    March 2020
    February 2020
    January 2020
    December 2019
    November 2019
    October 2019
    September 2019
    August 2019
    July 2019
    June 2019
    May 2019
    April 2019
    March 2019
    February 2019
    January 2019
    December 2018
    November 2018
    October 2018
    September 2018
    August 2018
    July 2018
    June 2018
    May 2018
    April 2018
    March 2018
    February 2018
    January 2018
    December 2017
    November 2017
    October 2017
    September 2017
    August 2017
    July 2017
    June 2017
    May 2017
    April 2017
    March 2017
    February 2017
    January 2017
    December 2016
    November 2016
    October 2016
    September 2016
    August 2016
    July 2016
    June 2016
    May 2016
    April 2016
    March 2016
    February 2016
    January 2016
    December 2015
    November 2015
    October 2015
    September 2015
    August 2015
    July 2015
    June 2015
    May 2015
    April 2015
    March 2015
    February 2015
    January 2015
    December 2014
    November 2014
    October 2014
    September 2014
    August 2014
    July 2014
    June 2014
    May 2014
    April 2014
    March 2014
    February 2014
    January 2014
    December 2013
    November 2013
    October 2013
    September 2013
    August 2013
    July 2013
    June 2013
    May 2013
    April 2013
    March 2013
    February 2013
    January 2013
    December 2012
    November 2012
    October 2012
    September 2012
    August 2012
    July 2012
    June 2012
    May 2012
    April 2012
    March 2012
    February 2012
    January 2012
    December 2011
    November 2011
    October 2011
    September 2011
    August 2011
    July 2011
    June 2011
    May 2011
    April 2011
    March 2011
    February 2011
    January 2011
    December 2010
    November 2010
    October 2010

    RSS Feed

    Picture
    Picture

    Blogs I follow

    A Quilt Lady
    A Quilting Life
    Abyquilt
    Anne-Grethe's quiltblog
    Anne Marie Quilt
    Bente Malm Quilte-Design
    Bloom
    Cinderberry Styitches
    Daisy made it
    Dilly Dimple
    Karis Quilterier
    Evas Quilterom
    Erickaeckles
    Fantasia Yarns
    Gail Pan Designs
    Hanne's Quilt Corner
    Halfpenny Home
    I'm a Ginger Monkey
    J-quilts
    Just Jude Designs
    Kviltstina
    Leanne's House
    Liv Aagots Quilteblogg
    Lily's Quilts
    Litamora's Quilt & Design
    Lynette Anderson Designs
    Merete's Quiltestue
    Mona's quiltblog
    Pam's Paradise Stitching
    Pia Si Sia
    Random Ramblings
    Sigrun's blog
    Sølvi's blog
    U-handblog
    ZewNice

     UK shops

    These are the UK shops that I use to purchase my quilting supplies - fabrics and threads etc.
    Bramblepatch
    Buttonberry
    Coast and Country Crafts
    Craft Den
    Cross Patch
    Emma's Fabric Studio
    Fiona's Fabrics
    Glenroy Designs
    Halfpenny Home
    Hulu
    J-quilts
    KIS Quilting
    Patchwork Chicks
    Quilter's Cloth
    Quilters Haven
    Sew and So's
    The Eternal Maker
    The Fat Quarters
    The Quilt Room
    U-handbag

    Australian links

    Cookies and Cream Craft
    Homespun magazine
    Little Quilt Store
    Quilt Fabric Delights
    Under The Mulberry Tree

    Scandinavian links

    Lapp-Elisa Quilts HB
    Lappedesign
    Lappedilla AS
    Myquilt
    Northern Quilts
    Quiltegården
    Quiltekroken
    Quiltemagasinet
    Quiltespecialisten
    Sy-Sammen