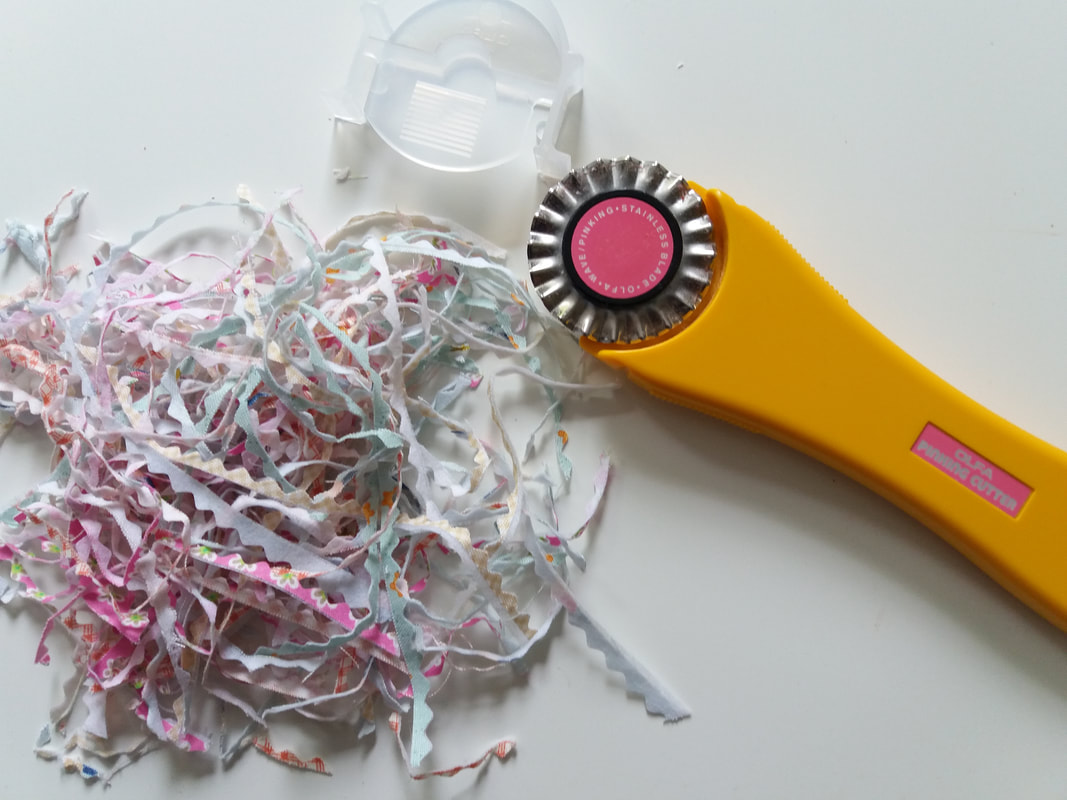
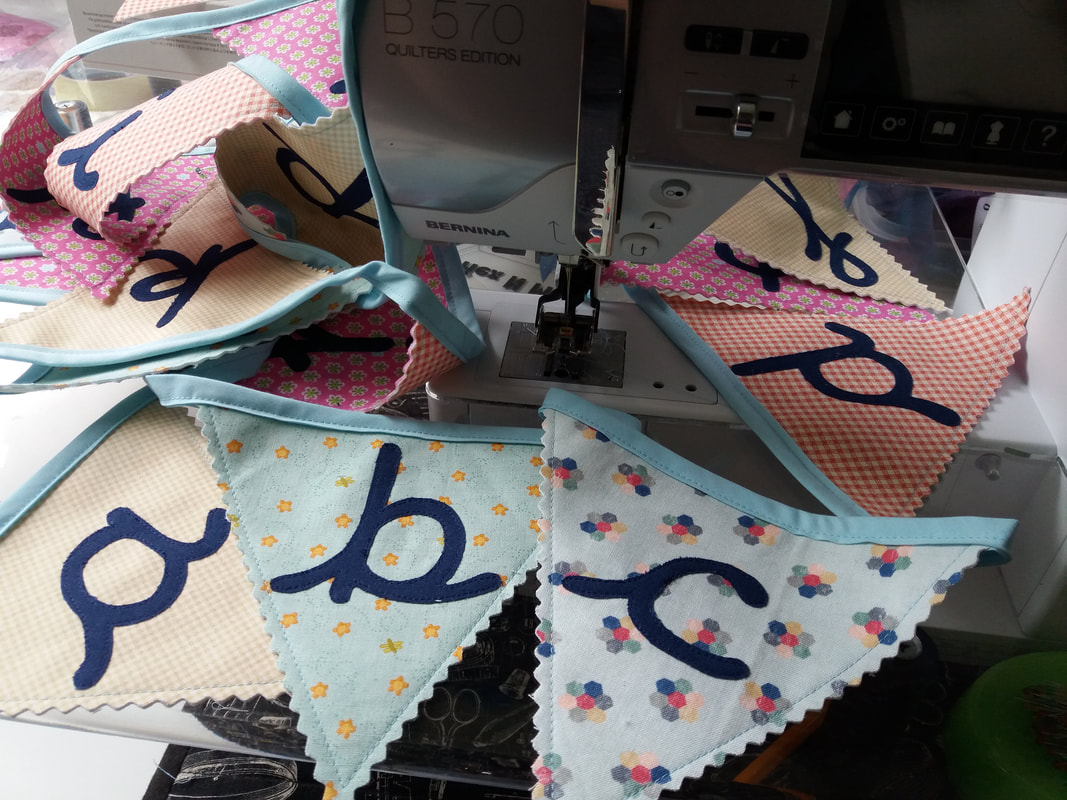
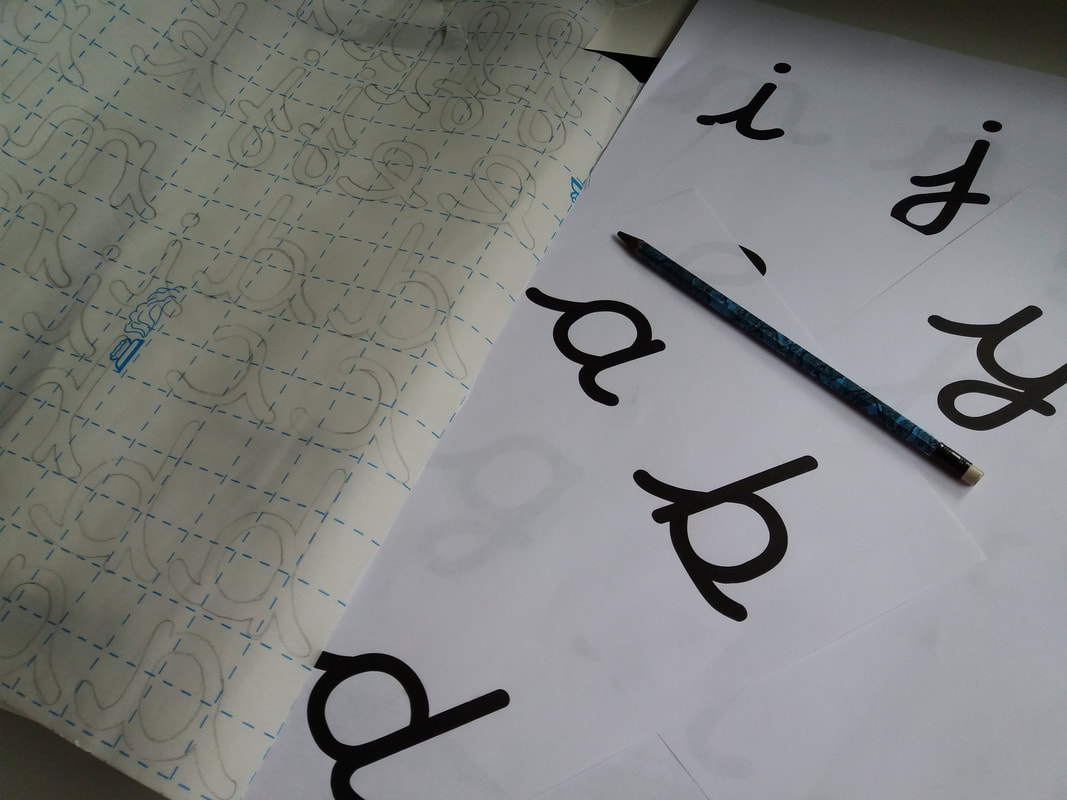
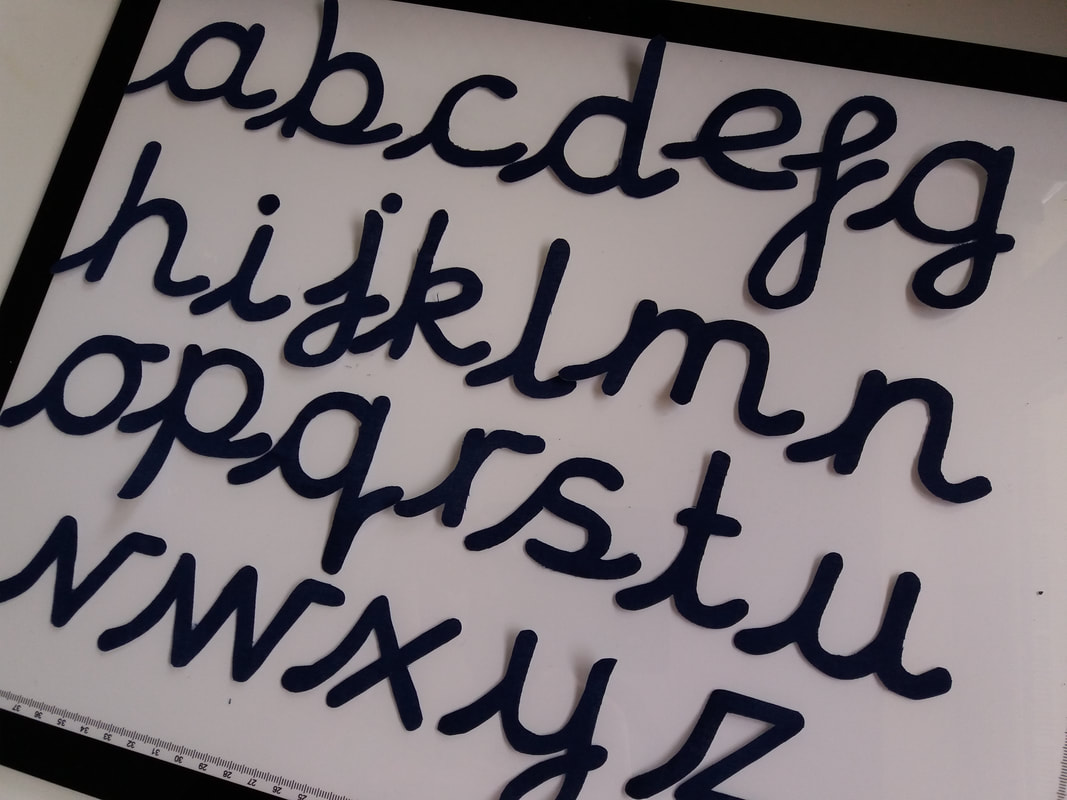
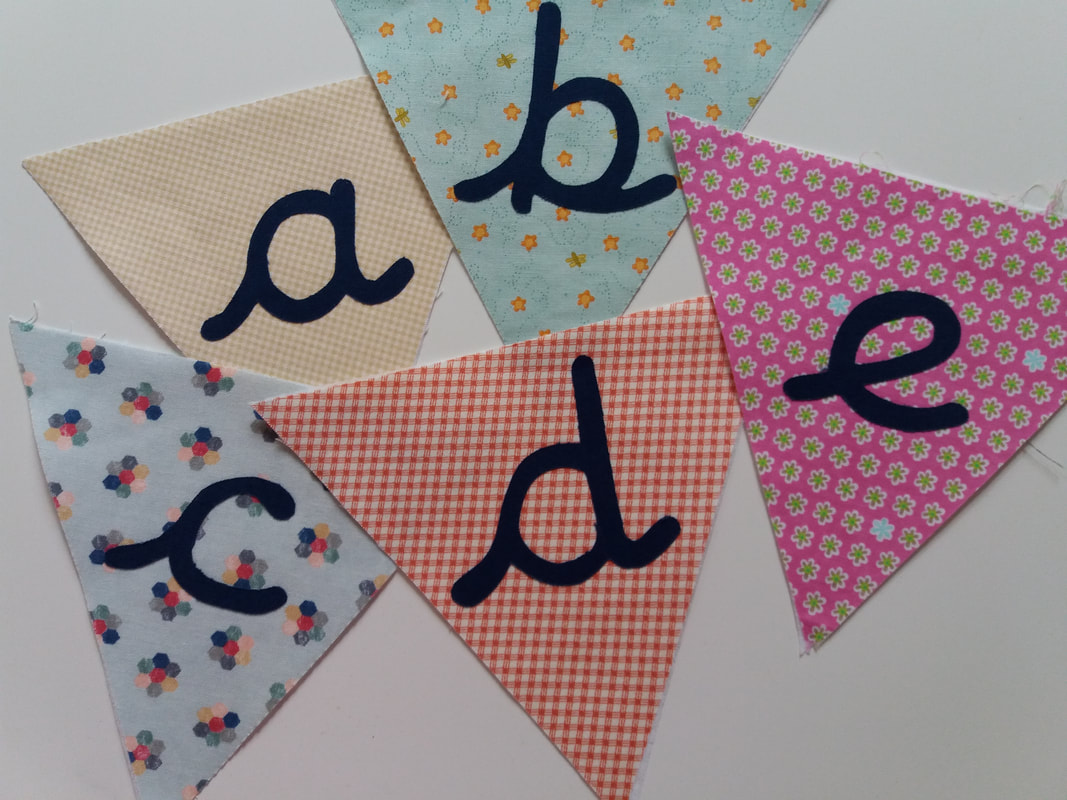
Oh and I failed to mention on yesterday's blog post that my daughter wanted the bunting to be reversible - so that meant 52 letters had to be traced, cut, fused and stitched and to 52 bunting flags! Once all the letters had been raw-edge appliqued into place with an Aurifil 50wt navy blue thread (I chose that colour to match the fabric letters) 2 flags were pinned right sides together, machine stitched a quarter inch from the raw edge with an Aurifil 50wt thread (I changed colour, and used a pale blue for this), then the side edges were trimmed using a rotary cutter with a pinking blade to prevent fraying. This was much easier than stitching a pair of flags wrong sides together and then turning then them right side out... 
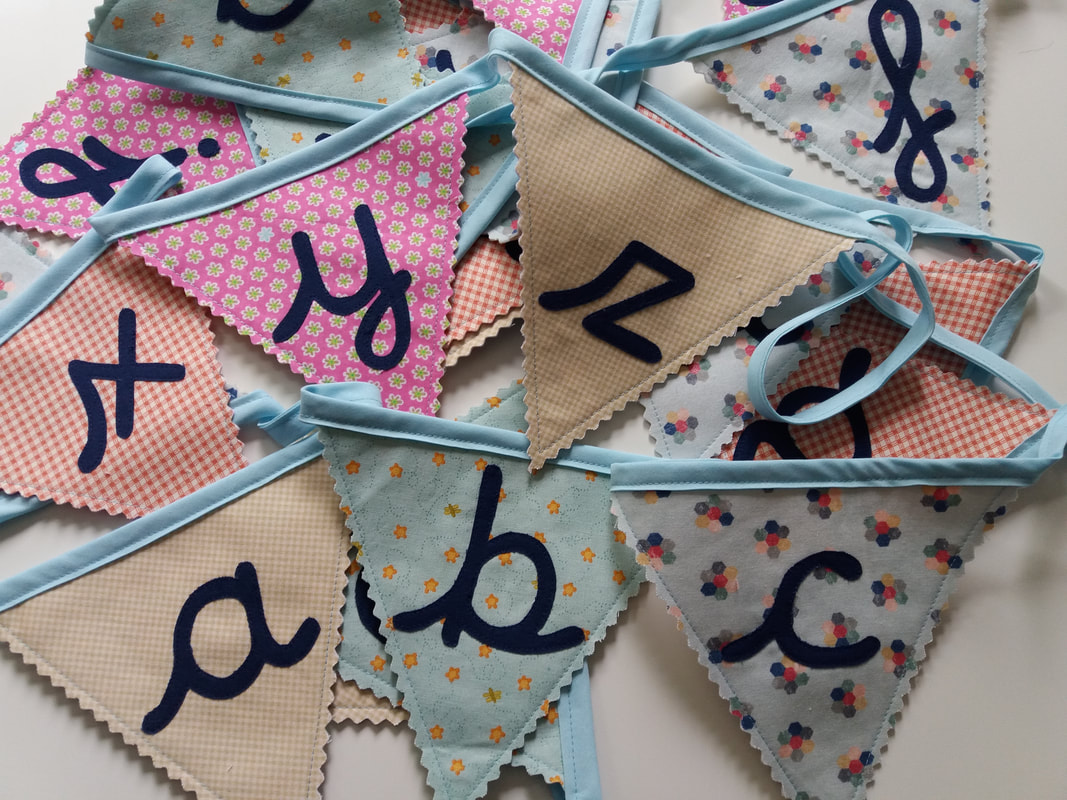
…finally I attached the bunting flags to pre-made blue bias binding. I used a fabric glue rather than pins as I thought that was a bit safer! I used the same pale blue thread to attach the binding. This cursive font was just so time consuming, but the finished effect is great. ... …and it's finished - it's as easy as ABC!! My daughter's class room will look very pretty once this has been hung up. Apart from the pink floral fabric that was in my stash, the other fabrics and the ready-made binding were bought a couple of weeks ago from Sew and So's in Bungay, especially for this project.
0 Comments
When your daughter asks you to make some alphabet bunting for her new classroom, it sounds like a simple task - and THEN she presents you with a cursive font!! This font just has SO many curves! Using a lightbox and the printed font facing wrong side up so the letters can be traced in reverse onto steam-a-seam lite, the letters were traced leaving a small gap between each one... ...the steam-a-seam letters were roughly cut out, fused onto the wrong side of the fabric, and cut out exactly on the drawn line. This navy blue fabric will contrast well with the prints that I'm using for the bunting... ...the backing paper is peeled off the letters, and they're pressed into place. I'd already fused some lightweight interfacing onto the back of a 6" strip of fabric, and using a Tri-Recs triangular ruler, cut out several triangles for the bunting. Next step is to stitch these letters into place using raw edge applique, but I'm not looking forward to stitching all those curves!!
Here's another little peek inside my sewing studio! I often get asked about how I display my quilts in my sewing studio. Decorative quilt hangers can be really expensive and difficult to source in the UK (especially larger ones) so I resorted to buying curtain rods with a decorative finial. They're easily available from hardwear shops and DIY stores, and they're usually very reasonably priced too... ...the extendable rods are great, as you can see in the pictures above and below, the rod has been extended so 2 quilts can be displayed together. I like to change my quilts around to match the seasons, so my festive ones will be displayed later in the year... ...all of these quilts are patterns by the Australian designer Lynette Anderson. The quilts in the first picture are "A Dog's Life", and "Home, Family & Friends". The quilts in the second picture are "Stitched by Me" and "Anderson's Farm". When "Seaside Town" is back from tbe longarm quilter I'll have to reorganise my display!!
Yesterday this popped up as a memory from 2 years ago on my FB page - these were kits that I'd bought from the Festival of Quilts back in 2016. "Flying Santa" table runner and "Let it Snow" table topper both by Lynette Anderson Designs while "Vintage Bouquet" quilt and "Bouquet" cushion, were both by Jo Colwill of Cowslip Workshops. I've only made the Let it Snow table topper so far - the other kits are waiting patiently for me to make them. These may well be hoarded away ready for my retirement!! Honestly, you have no idea how many kits are stored away in boxes under my sewing table waiting for that time when my full-time job is far behind me, and my days are filled with spending quality time with my family, special friends, and a little bit of sewing thrown in too!!
Another little treat was lurking in my recent parcel from Oz! These "Frosty" floss spools are so cute, and are available from Lynette's online shop Little Quilt Store in Australia, and they will be perfect for storing thread for festive projects. I've quite a collection of wooden floss spools, and my top tip is to write the thread shade on the back with a pencil, which can easily be rubbed off so the spool can be reused for another colour. I've used larger wooden spools for storing lace, ric-rac and ribbon trimmings too. Now I just might have to make a special "festive" themed floss spool holder for these cute little chaps!
My parcel that arrived from Australia on Monday was absolutely bulging at the seams! As well as the cute Winter Playground kit, there was also the kit for One Stitch at a Time - Lynette's latest pattern for a cushion, embellished with hand embroidery and hand applique (this is the same design as on her 2018 calico bag that also arrived yesterday)! There was one more treat inside the parcel, and I'll share a picture of that tomorrow. (If you fancy making one of these cushions too, the kits and patterns are available from Lynette's online shop Little Quilt Store, and it won't be long before they're available here in the UK too).
It's always exciting when a parcel arrives in the post from Australia, and Monday's delivery was no exception! Winter Playground is the latest 6-part BOM from Lynette Anderson Designs, and uses a combination of machine piecing, hand embroidery and hand applique. The kit arrived with the set of 6 patterns, the background fabrics, starter pack and a set of gorgeous Valdani threads. This is available from Lynette's online shop Little Quilt Store, and is also available from several quilt shops here in the UK. This will be a super project to take along to my Tuesday evening sewing group after our summer break.
I've been searching for somewhere to photograph my quilt top (The Sopwell Ladies Basket Society Quilt) - and decided the fence at the end of my road would just have to do!! I just needed to do a quick photo shoot before I decide how to get it quilted. This quilt has been keeping me busy for the past few months - lots of techniques were used in the large blocks, including machine piecing, hand embroidery, and hand applique. This was designed by Gail Pan, an Australian designer, and was bought as a kit including all the fabrics and the set of patterns from Cross Patch, an online quilt shop based in Wales, here in the UK. The majority of the fabrics in this kit are from the Sequoia collection, by Edyta Sitar of Laundry Basket Quilts for Andover Fabrics. This has been an absolute pleasure to make, and it definitely won't be the last one of Gail's designs that I use! I've already got plans for making one of her festive ones, although I won't be starting that one just yet as I have a few other projects on my to-do list first!
Starting your working week by having a day off is certainly the best way to beat those Monday morning blues!! We'd planned a day out with our eldest daughter, and set off on a trip to Beccles. A quick visit to Urban Jungle to peruse the plants was followed by a quick drive to the town, and a leisurely look around the shops. We decided to have lunch at Twyfords Cafe. It was a lovely sunny day so we sat outside in the cafe garden, and enjoyed a delicious lunch - Beth and me both chose the salad bowl with crayfish tails - it was absolutely yummy. There were all sorts of delicious treats on the menu so we'll definitely be back for more!
"Indian Tile" - I started this GORGEOUS tile on a class with Alexandra Waylett at my local quilt shop Kis Quilting Ltd back in July, and it's finally completed and ready to be framed. I learnt so many techniques - fusing sheer fabrics, stitching with washable film, free motion embroidery with metallic threads, and even wielding a soldering iron! This afternoon I've added some sequins and beads (thanks to my local Hobby Craft) and I've bought a deep framed box to display it in. This will be proudly displayed in my sewing studio to prove that I can be a bit "arty" haha!
|
About me...Hi - welcome to my quilting blog! My passions are my family, my dog, my friends and sewing, not necessarily in that order! Archives
January 2025
Blogs I followUK shopsThese are the UK shops that I use to purchase my quilting supplies - fabrics and threads etc.
Australian linksScandinavian links |