Nicola Foreman Quilts
  • BLOG
  • BAGS
  • CUSHIONS
  • QUILTYSTUFF
  • QUILTS
  • TABLERUNNERS
  • WALL HANGINGS
  • CONTACT ME

Simply Blessed - Block 8 "Enough"

30/5/2015

1 Comment

 
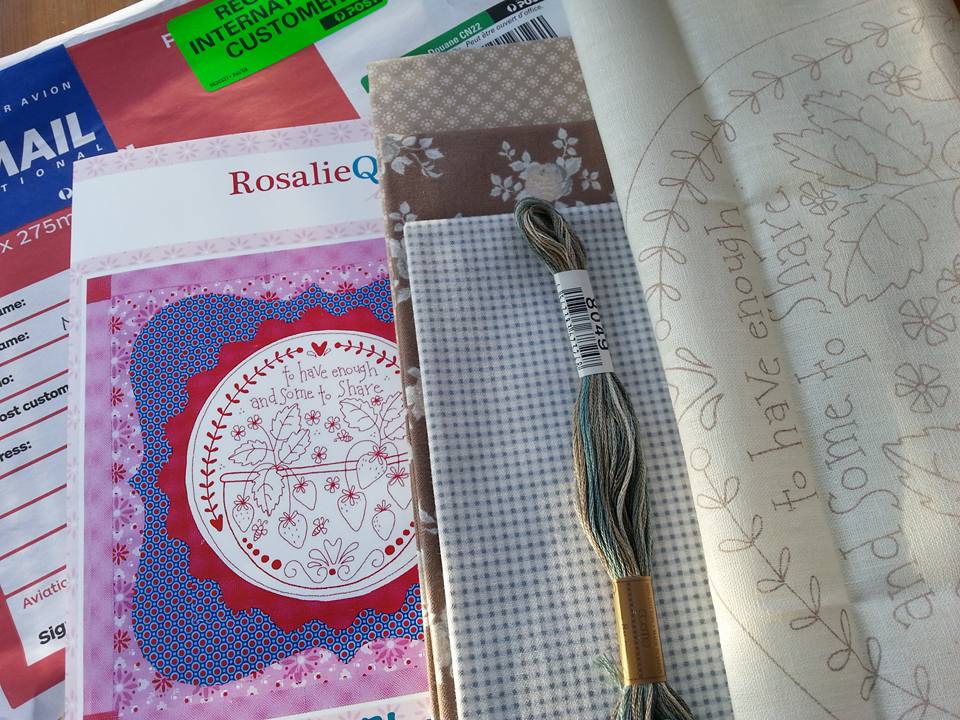
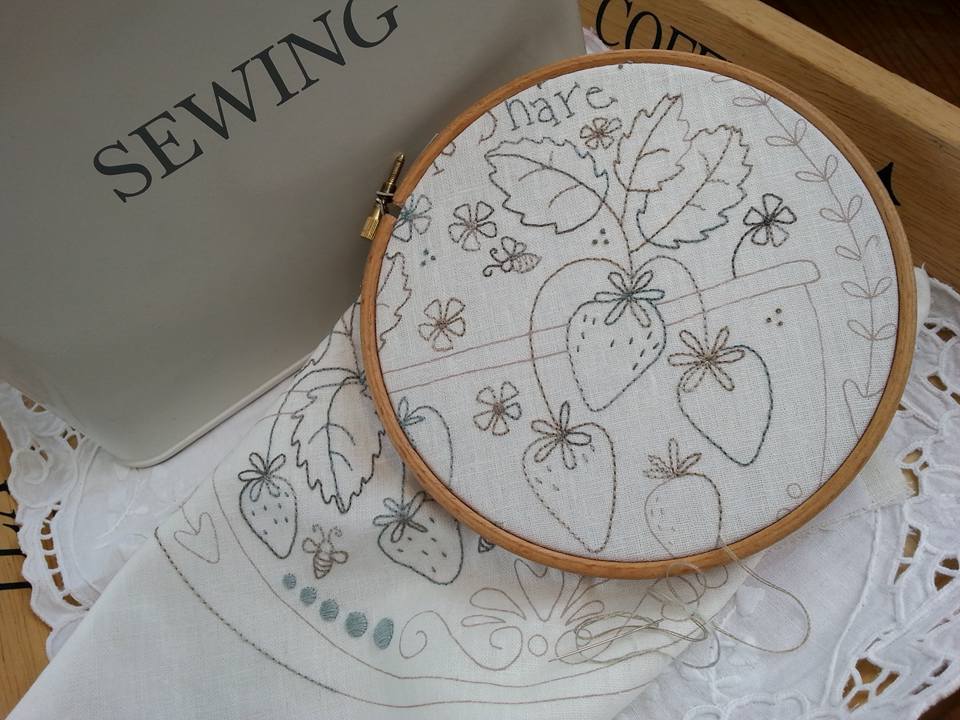
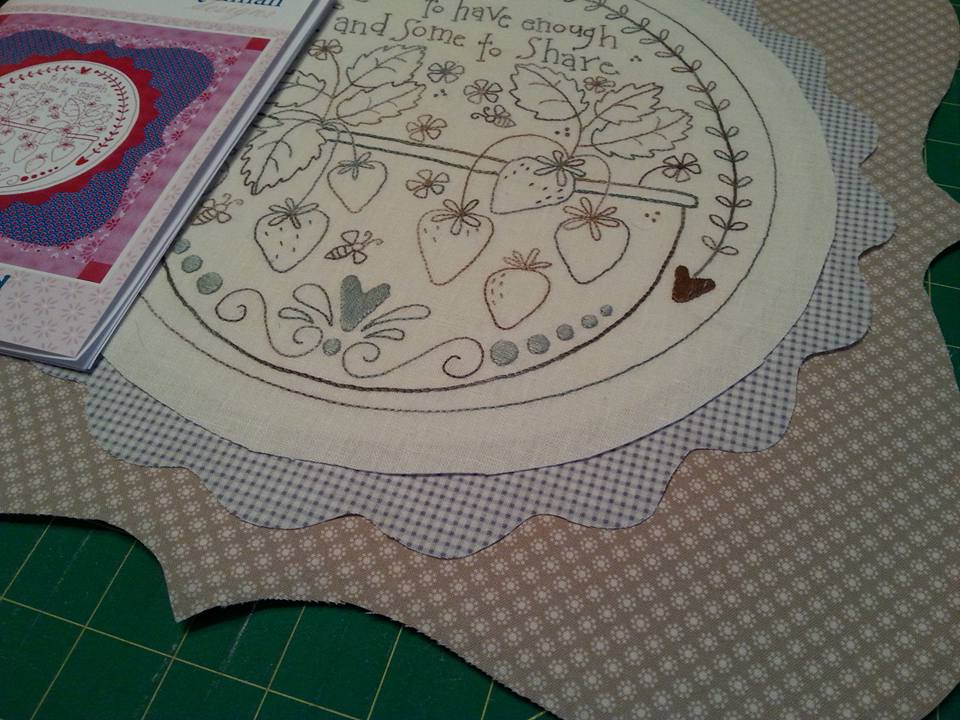
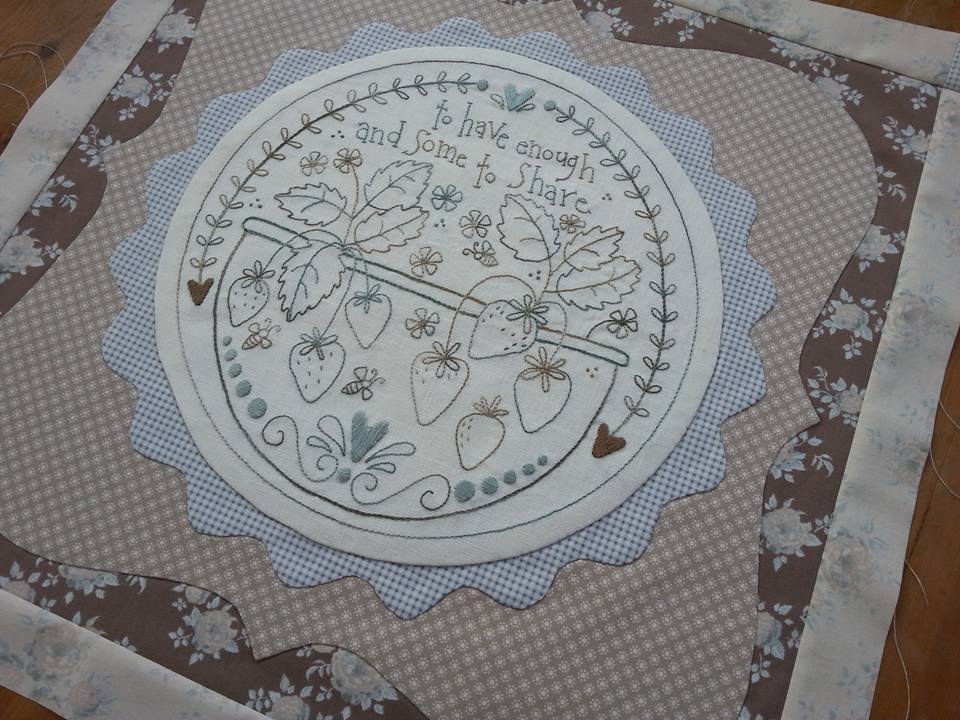
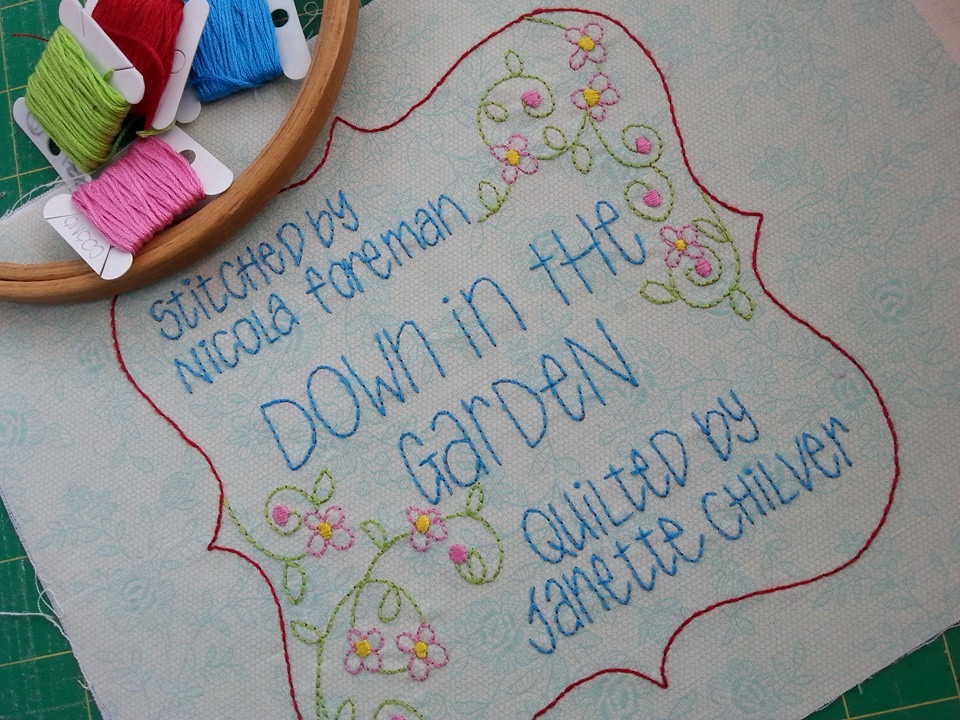
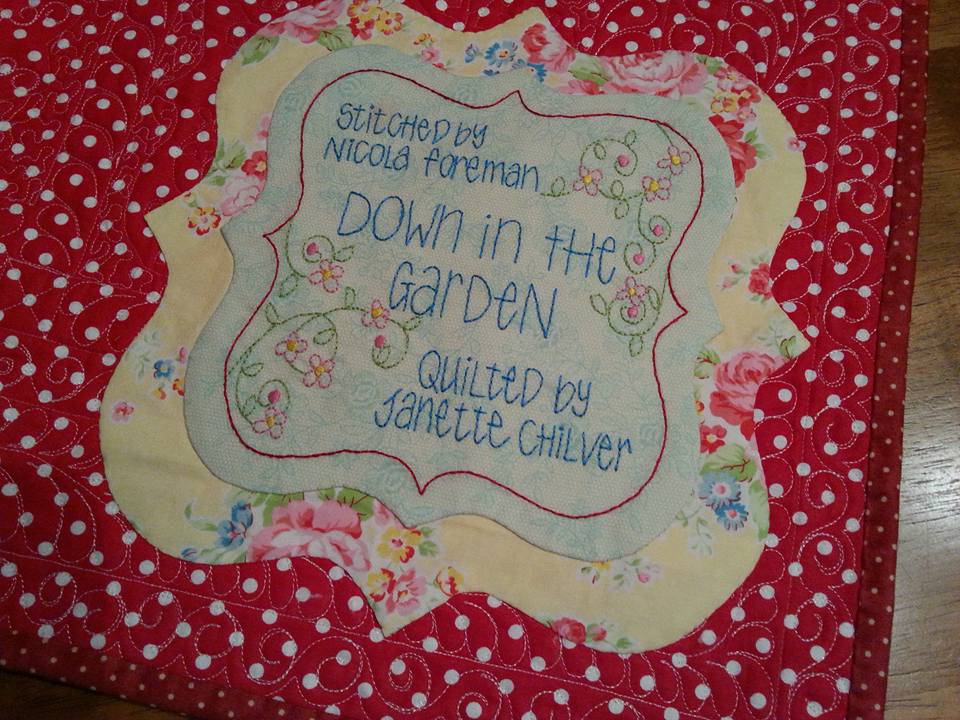
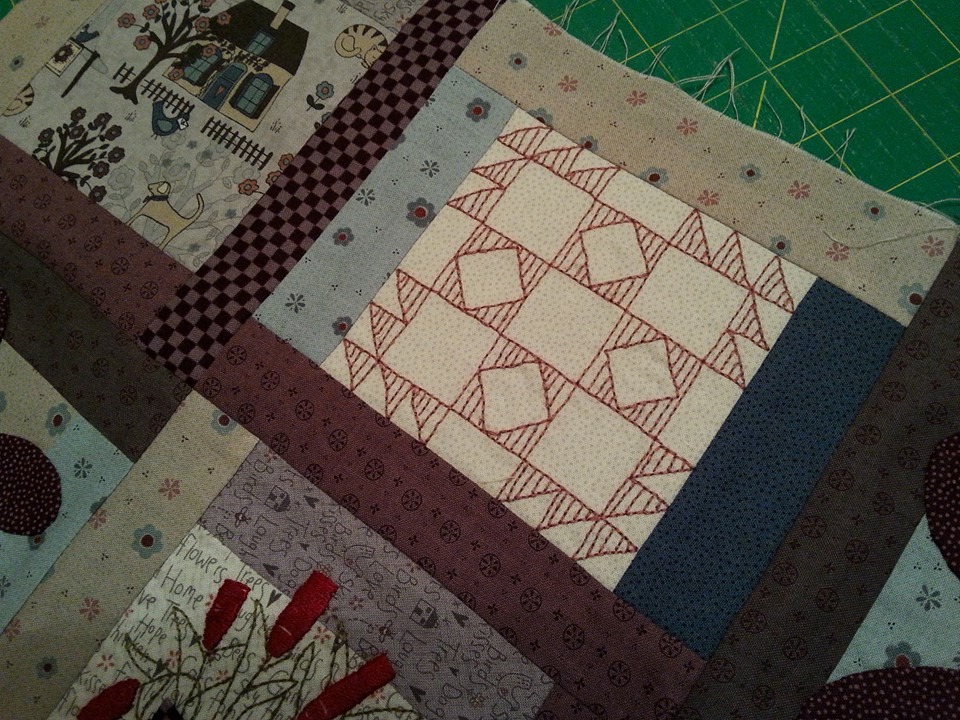
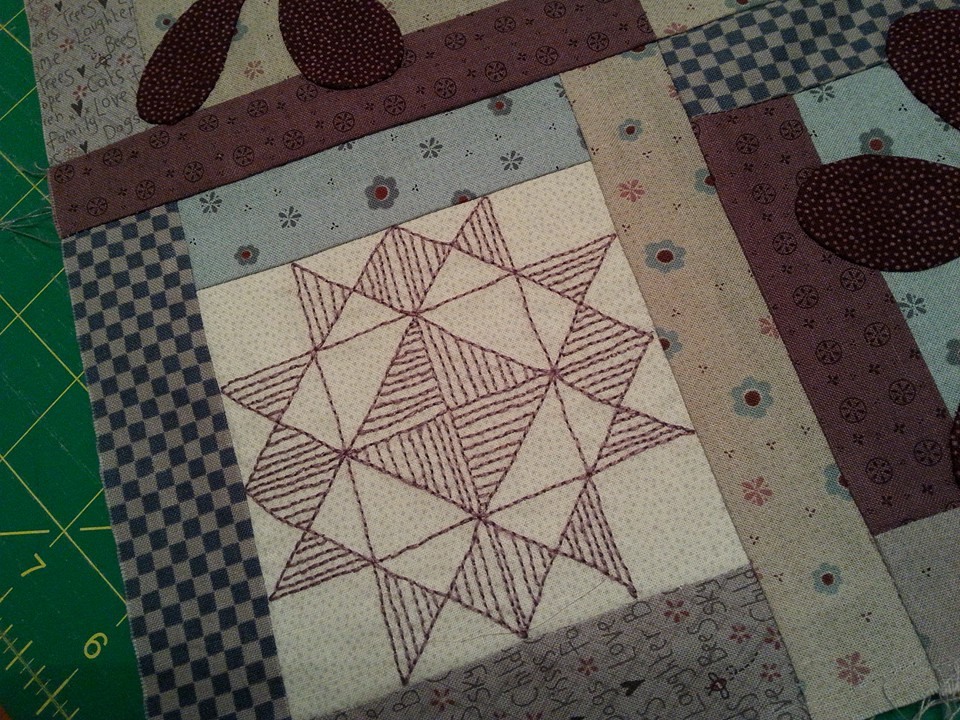
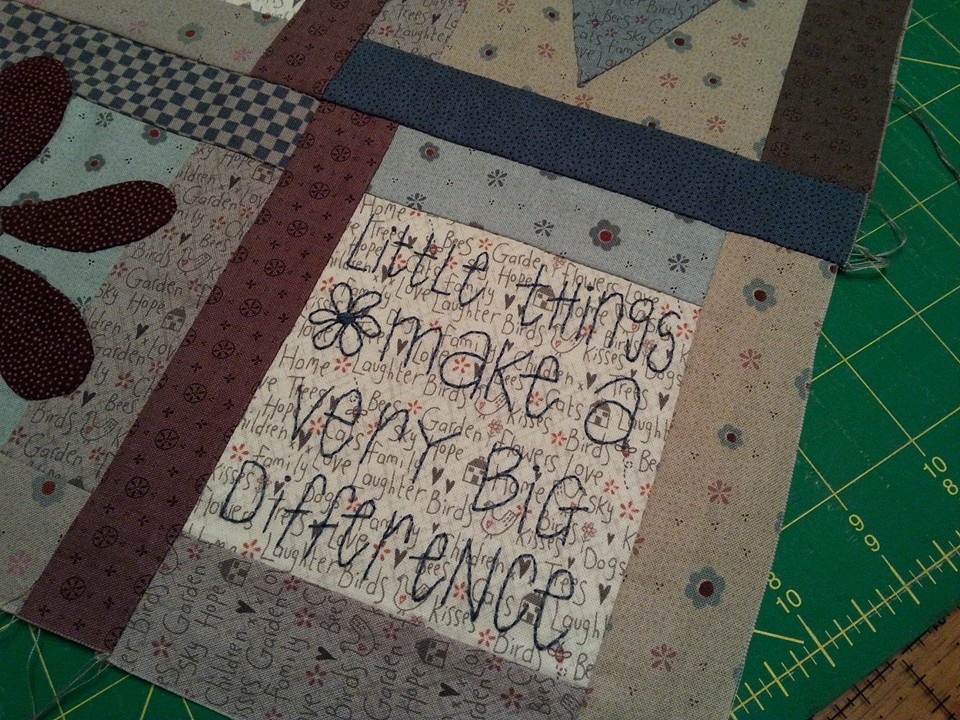
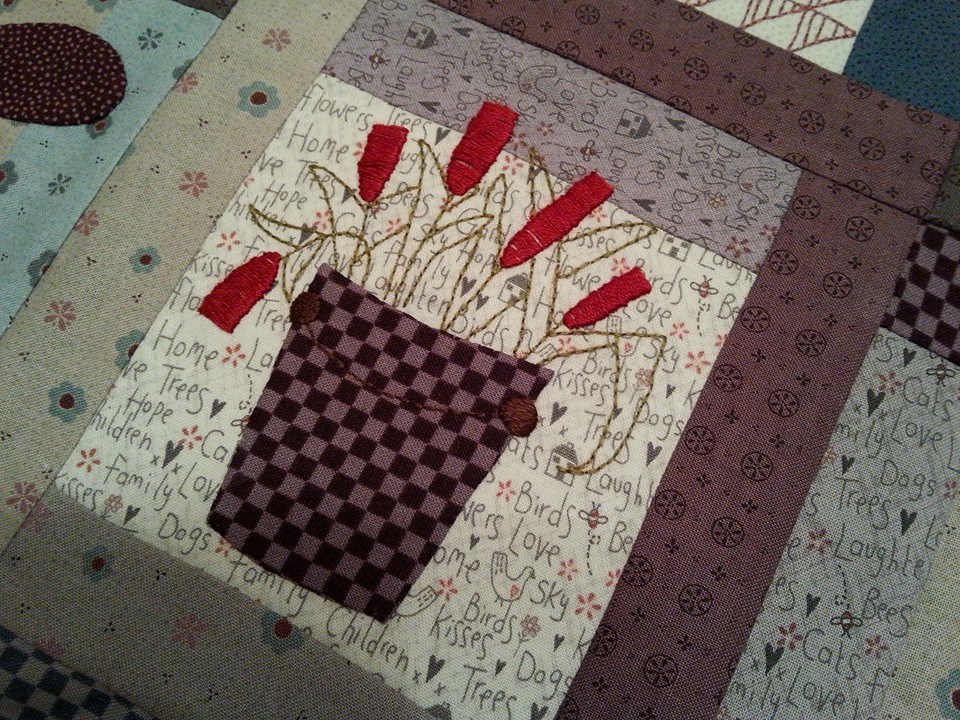
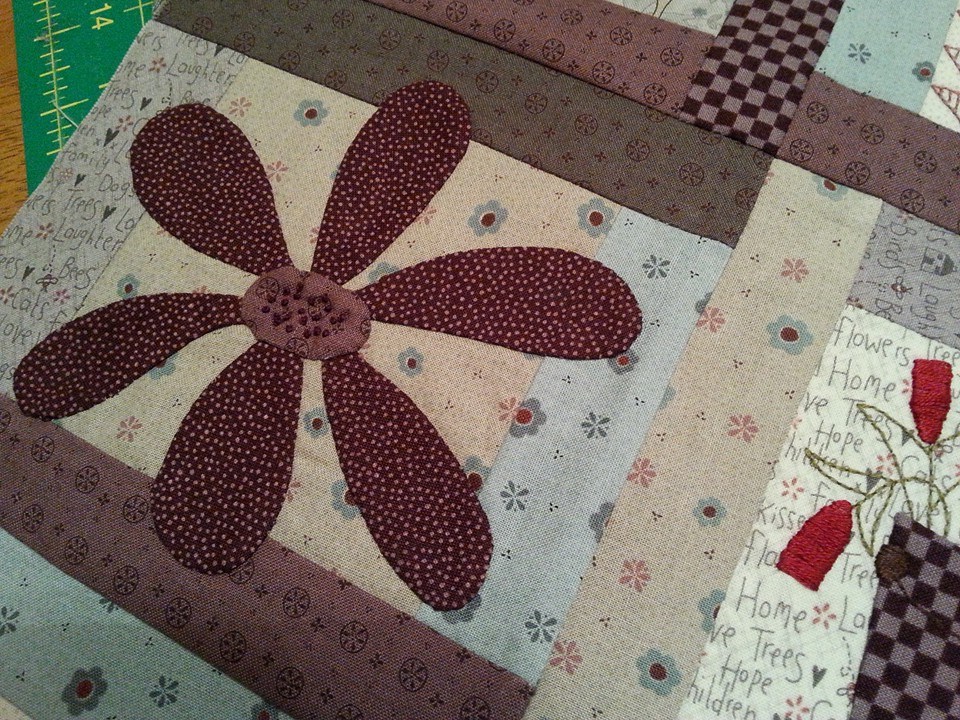
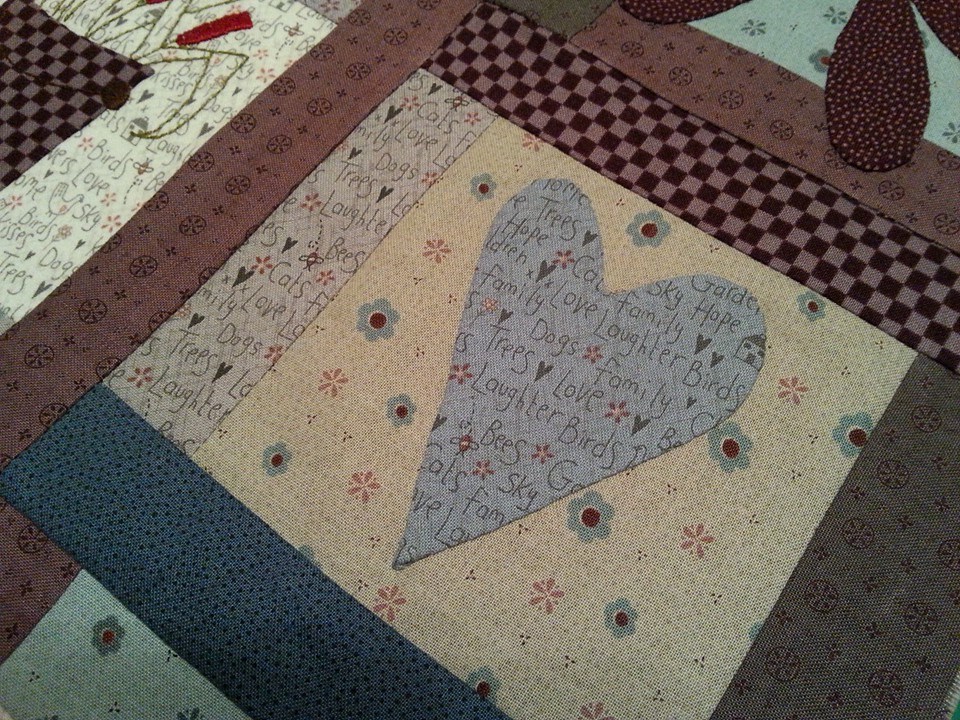
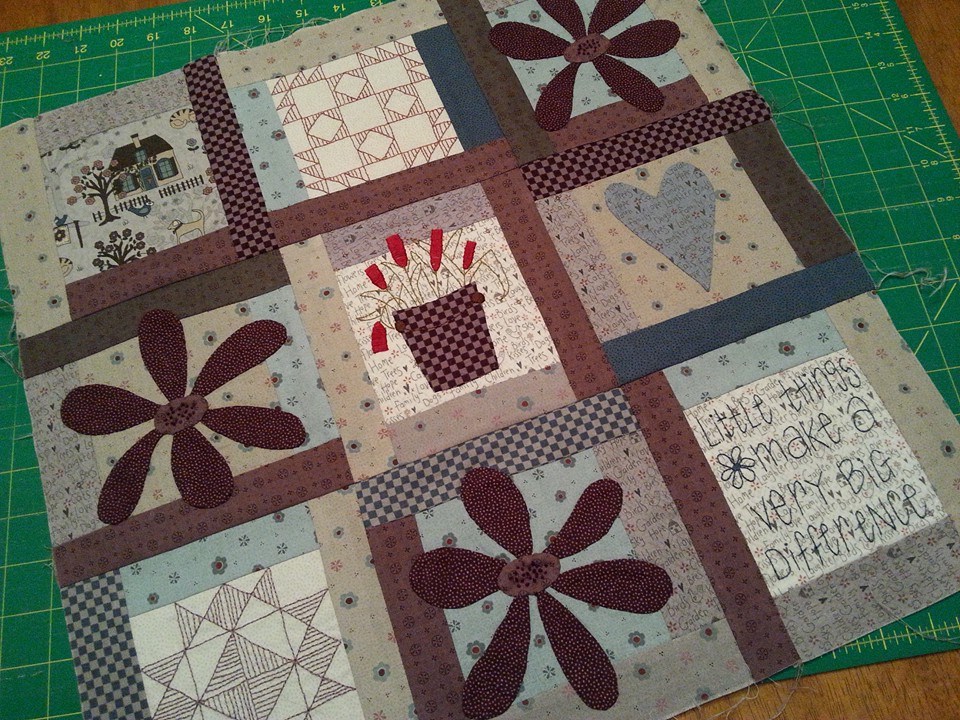
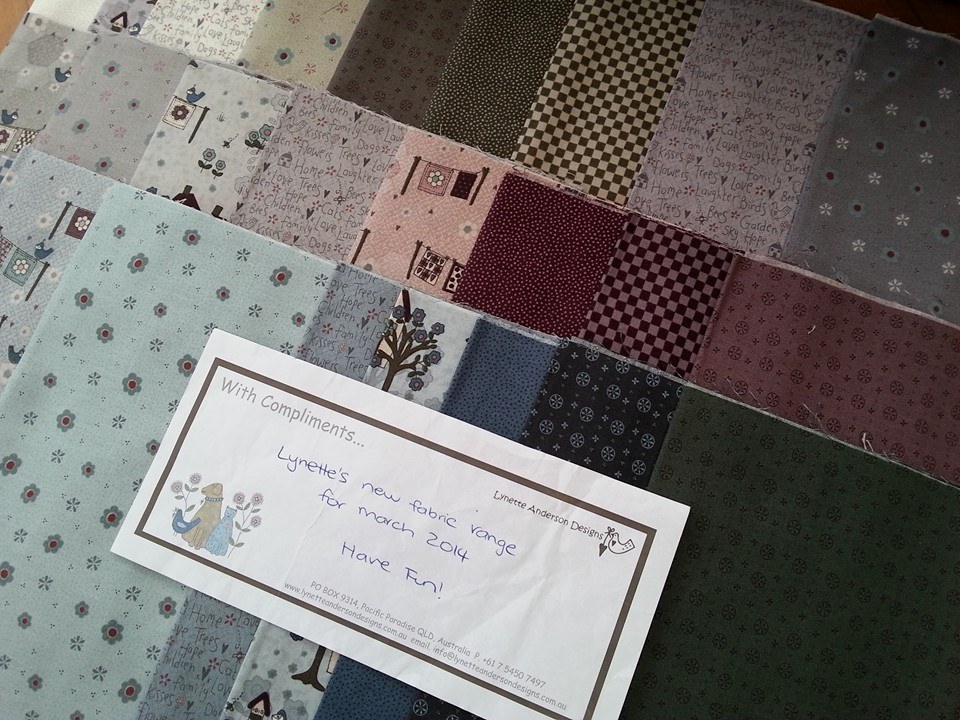
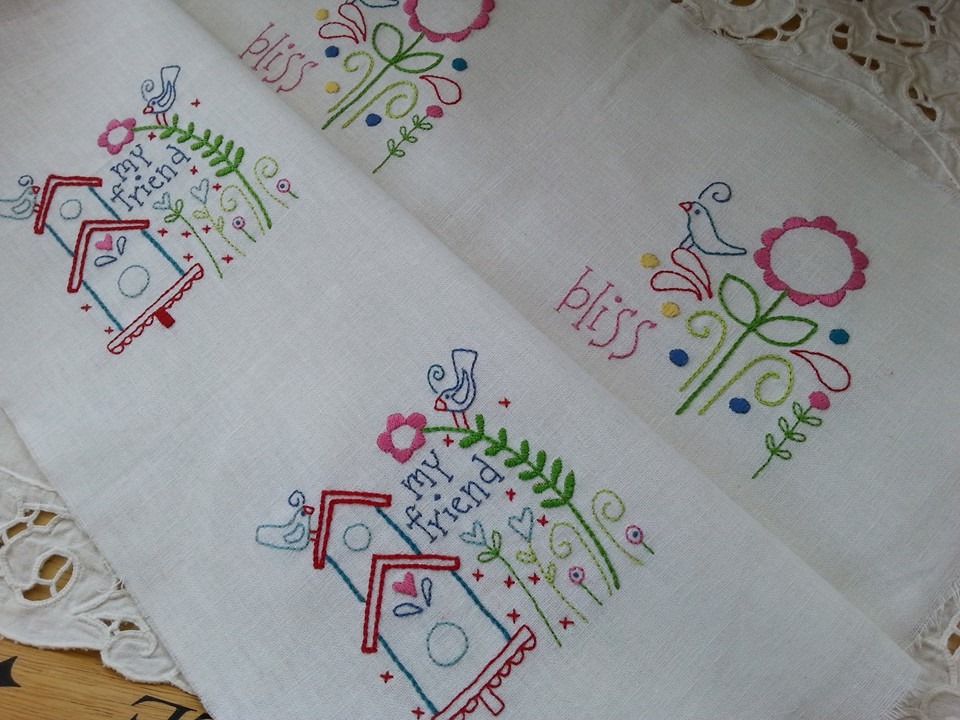
Block 8 of "Simply Blessed" by Rosalie Quinlan Designs, bought as a BOM from Under The Mulberry Tree, arrived from Australia about 3 weeks ago, and I couldn't wait to get started on it! These beautiful Tilda fabrics are complemented with Cosmo Seasons variegated thread shade 8049. The satin stitch areas were completed with a pale aqua and pale brown DMC thread from my thread box, to avoid a "stripy" effect. I spent early mornings before work, and evenings after supper, completing the stitchery by hand, which is so relaxing to do. This uses very simple stitches, backstitch, satin stitch and chain stitch. Then the next step was to get the appliqué completed...
Picture
Picture
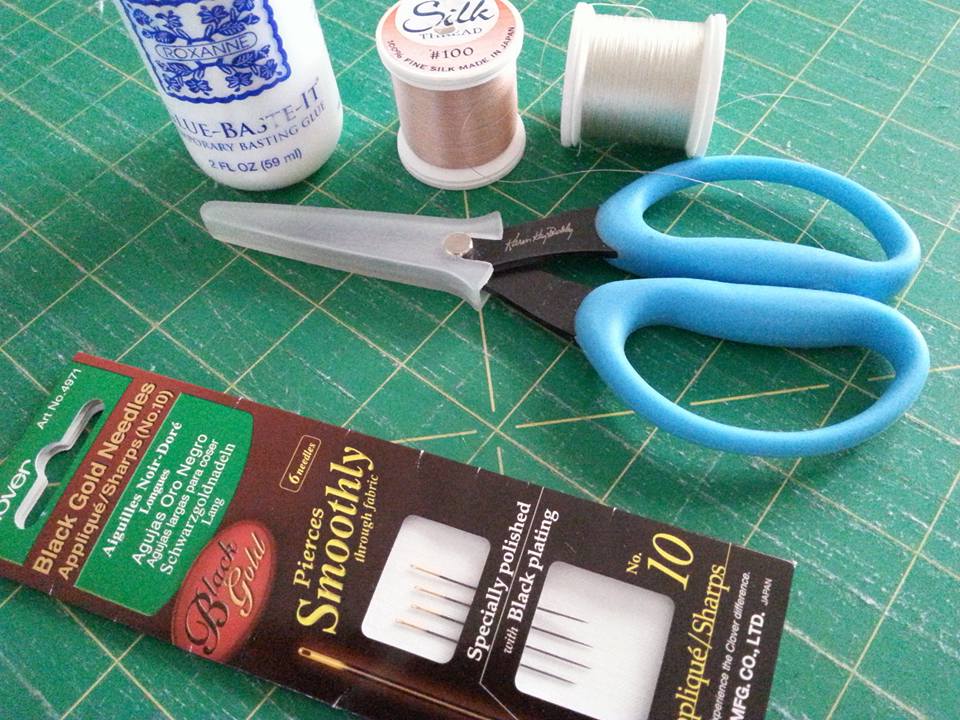
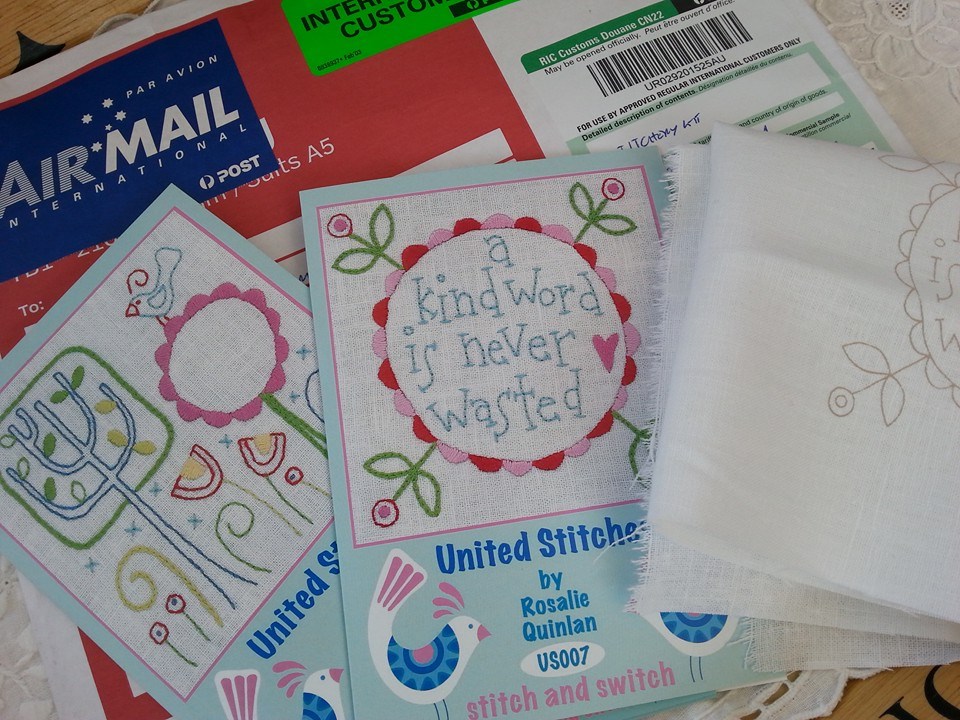
...I traced the applique template shapes onto fusible water-soluble applique paper, which was then fused to the back of the fabric and the stitchery piece too. using the glue-stick method, the edges of the applique shapes were glued and turned under, then stitched into place in layers using a neutral coloured YLI silk thread. I often get asked about what equipment I use, and I always recommend buying the best you can afford. Some appliqué essentials that are in my sewing box are as follows: these Clover Black Gold appliqué needles have been in my sewing box for such a long time and they really are brilliant. The black shafts stop the needles from "falling" out of the fabric when you're stitching. Roxanne's basting glue is perfect for dabbing onto the back of the appliqué shapes to secure them before they are stitched into place. I've got several pairs of these Perfect Scissors by Karen Kay Buckley, and they really are the best for cutting out precisely. YLI silk thread is extremely fine, and I've got a few reels in neutral colours, and again they have been in my sewing box for simply ages. All of these were purchased from my local quilt shop Quilters Haven...
Picture
Picture
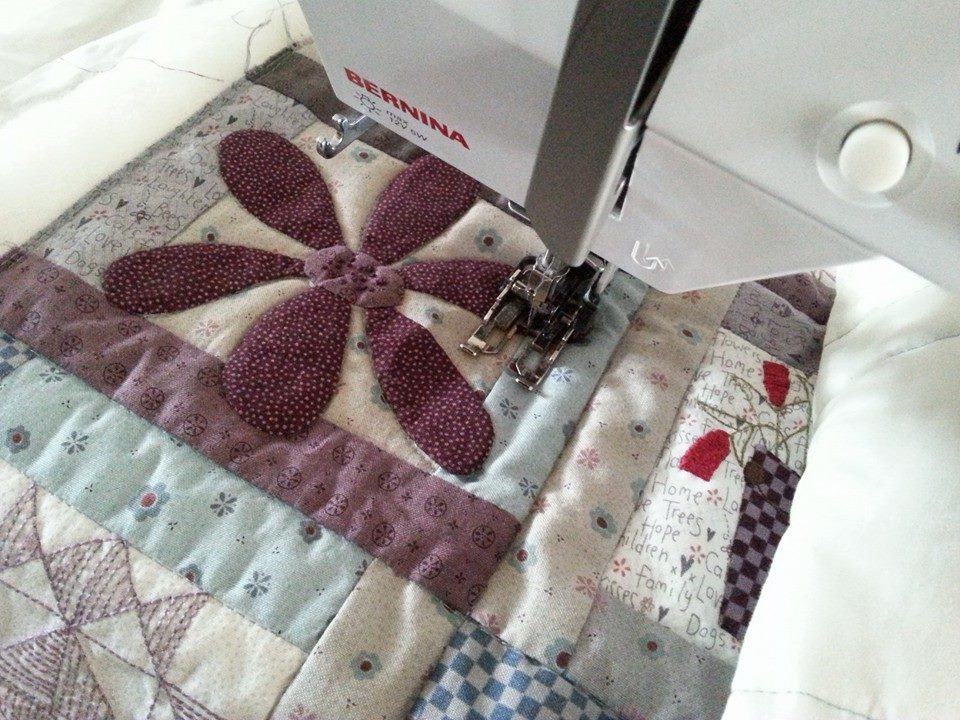
...once the applique layers were secured by stitching them by hand with the YLI silk thread, the borders were machined into place. I always use Schmetz Microtex needles size 60 for precision piecing, and I've been using a mid-grey mettler thread for piecing this project together. Only one block left now, which hopefully will be on it's way to me soon! I'm determined not to start sewing these blocks together until all 9 are completed!
Picture
1 Comment

United Stitches - US007 and US008

29/5/2015

0 Comments

 
The next set of stitcheries, US007 and US008 from United Stitches by Rosalie Quinlan Designs arrived from Under The Mulberry Tree in Australia. I ironed a piece of weaveline (a soft, fusible interfacing) to the back of the pre-printed linen, and made a start on US007. I really enjoy stitching with these gorgeous Cosmo threads as they have a fabulous sheen...
Picture
Picture
...once US008 was also completed, they were been pressed and packed away in my "United Stitches" project box. US009 and US010 have been dispatched and are on their way over from Oz. I can't wait for them to arrive!
Picture
Picture
0 Comments

Valdani Threads - Month 5

24/5/2015

0 Comments

 
Month 5 of The Thread Club by Lynette Anderson Designs arrived all the way from Australia, and this month's collection of Valdani threads hasn't disappointed. These threads are hand dyed, and the subtle changes in colour are gorgeous. This is a great way to try threads in colours that I wouldn't normally use, and a great way to build up a fantastic thread collection. These cute personalised thread spools will be put to good use with these threads!
Picture
0 Comments

Red Red Red - A Perfect Quilted Tote

17/5/2015

0 Comments

 
My latest project is red, red, red - red spots, red paisley, red polka dots, red florals, and even the Aurifil quilting thread is red! I wanted this project to have a bit more structure, so I layered a very thin layer of polyester wadding onto a piece of fast-to-fuse. My Bernina 230PE quilted through the layers with no problems at all. This quilt-as-you-g method meant I could use all my red scraps...
Picture
Picture
...some red vintage buttons were stitched to one of the patchwork squares for decoration, and I used lots of spotted fabrics for the lining and the pocket panel. I added a clip for my keys. A button magnet is stitched to the facing so the bag can be secured. The facing was slip stitched to the lining by hand, and I added one of my labels too. Scrappy handles completed the look that I wanted...
Picture
Picture
...and here is the finished tote bag. The pattern is "Perfect Quilted Tote" by Elizabeth Hartman, and is available from her online store (there is a link on her website). This is really roomy, and will hold lots of shopping! 
Picture
0 Comments

Down In The Garden - Quilt Label

13/5/2015

2 Comments

 
I decided to prepare a label ready for the "Down In The Garden" quilt, and used one of the templates from Block 1 as the basis for the label. Leanne Beasley had included a few templates and stitchery ideas for labelling this quilt in part 10 of this BOM, but I needed something a little bit bigger! So I started off by tracing the outline of one of the designs from Block 1 of "Down In The Garden" by Leanne Beasley using a pencil, then ruled lots of lines across the template. The words were added "DITG" is from block 5, then I added the title of the quilt, my name, and Janette's name as she has played such a huge part in this quilt with her exquisite quilting, using the ruled lines as a guide. Some flowers from the original stitchery design were the last thing to be added. When I was happy with the pattern for the label, I traced over the pencil lines with a very fine black marker pen. Finally I had a pattern for the quilt label that I was able to use on my light box. I traced the outline with a Pigma Micron pen, and then added the details. Soft fusible interfacing (weaveline) was fused to the back of the background fabric, and I used 2 strands of embroidery thread to stitch over the traced design, that were left over from the original stitchery designs of the quilt...
Picture
Picture
...I used the applique paper and glue stick method of turning over the edges of the applique (and my apliquick rods of course!). I used a neutral coloured silk thread to secure it in place on the back of the quilt. These hand embroidered labels are so simple to stitch and really do finish off the quilt. The back looks almost as pretty as the front!
Picture
2 Comments

Waverley Cushion

10/5/2015

2 Comments

 
I've used the pattern "Waverley Bag" by the Australian designer Leanne Beasley, and used fabric from the "Quilter's Garden" collection by another Australian designer, Lynette Anderson to make my latest project. After all the mini blocks were machine pieced together, I was ready to start the stitchery. The first mini block was fussy cut from Lynette's beautiful fabric...
Picture
Picture
...I traced the stitchery designs with a Pigma Micron pen. Two strands of DMC threads in co-ordinating colours were used for the back stitch. Mini block 2 is "Mineral Wells" and mini block 7 is "Beacon Lights"...
Picture
Picture
...wise words were stitched in the final mini block. Mini block 5 had an appliqued bucket of tulips. The applique shapes were made using the applique paper and glue stick method, and hand stitched into place with a silk thread. Then the stitchery was added...
Picture
Picture
...3 very large appliqued daisies were scattered over the cushion (mini blocks 3, 4 and 8) with colonial knots stitched randomly onto the centres, and an applique heart was added to mini block 6...
Picture
Picture
...once all the stitchery and applique was completed, The cushion top was layered up with some backing fabric and wool wadding. The layers were spray basted together using 505 spray, and then the cushion top was quilted very simply with Aurifil thread. "Stitch in the ditch" around the centres of the mini blocks and I also quilted around the appliqued daisies and the heart...
Picture
Picture
...fabrics from t same collection were used for the backing. A neat enclosed zipper was used to close the back of the cushion, and single fold binding was used to cover all the raw edges. This was machined onto the front of the cushion, and then folded to the back and slip stitched by hand...
Picture
Picture
...a plump feather pad was used to fill the cushion cover. I had a quick photo shoot in the garden before it started raining again! This is now being put away ready for my mum for her birthday later in the summer. Hope she'll like it ;) 
Picture
2 Comments

Down In The Garden Is Home!

7/5/2015

1 Comment

 
Look what I collected from the longarm quilter yesterday! It was really too blustery to get a decent outdoor photograph so this is the best I could do. "Down In The Garden" is a quilt that was a BOM designed by Leanne Beasley that I started back in 2013 and finally completed in 2014. This was machine pieced and hand embroidered. A few weeks ago I delivered it to the incredibly talented Janette at J-Quilts and she has certainly done the most fabulous custom quilting. I'll get the binding done at the weekend and will add some more pictures then.
Picture
1 Comment

Sewing Bag For Bits And Bobs

5/5/2015

0 Comments

 
You can never have too many bags! I'd made a tote bag over the weekend to keep ll my sewing projects in, and decided to make a smaller zippered bag to keep my sewing bits and bobs in. I used the pattern "Anna's Sminkepung" by the Norwegian designer AnnAKa and some fabrics from the "Quilter's garden" collection by Lynette Anderson Designs. Lynette sent me a bundle f these fabrics to play with a couple of years ago and I've really enjoyed sewing with them over the past few days. This has already been filled up with some threads and a hoop and a needle case and a pair of scissors - and is tucked into my sewing tote bag ready for my next hand sewing session! And I've already got my next project lined up with more of these beautiful fabrics!
Picture
0 Comments

Perfect Quilted Sewing Bag

4/5/2015

0 Comments

 
A few weeks ago my postman delivered a super parcel from Patchwork Chicks - "Hexagon Sewing Bag" by Lynette Anderson Designs. This super kit contains absolutely everything you need to make this small bag including the fabrics, wadding, embroidery threads, paper hexagons and even the wooden buttons. I traced the design onto the background fabric using a Pigma Micron pen and my lightbox...
Picture
Picture
...a small piece of weaveline interfacing was included in the kit and this was fused to the back of the stitchery design, then I was ready to get this in my hoop and start the stitchery and applique - and yes, I used my apliquick rods, applique paper and gluestick for these small pieces of applique! A final press when it was finished, and it was ready to be appliqued onto the pocket of the bag...
Picture
Picture
...I decided to make my bag bigger than the pattern suggested as I often have several projects on the go at once, and my friend Lynette had kindly send me a bundle of fat eighths of the same "Quilters Garden" fabric a couple of years ago, so I added them to the fabrics in the kit and sorted through my huge collection of patterns for a suitable bag. I decided to use the pattern "Perfect Quilted Tote" designed by Elizabeth Hartman...
Picture
Picture
...this is made using the QAYG method, and was quilted with Aurifil thread. I used pellon wadding for the bag, as this gives a more structured finish. Once the front panel was completed, I appliqued the stitchery design onto the front, then made another panel for the back of the bag...
Picture
Picture
...this pattern has excellent instructions for a pocket panel, with a pocket that closes with a zipper, and a slip pocket too, which has a bound edge and is reinforced with some lightweight fusible interfacing. I added a key fob which I thought would be useful for clipping a pair of scissors onto...
Picture
Picture
...and here's the completed bag, ready to be filled with my hand sewing projects so they're all together ready for when I want to do some hand sewing! I'm sure it won't take long to put all my hand sewing bits and bobs in here. This really was a simple bag to make, with very well-written instructions, and I'll definitely be making more of these with this pattern.
Picture
0 Comments

United Stitches - USoo5 and US006

2/5/2015

0 Comments

 
A couple of weeks ago, US005 and US006 of United Stitches by Rosalie Quinlan arrived all the way from Under The Mulberry Tree in Australia, and I couldn't wait to get started on these little stitcheries! I fused some soft interfacing to the back of the screen printed linen, popped the first one in my hoop and I was ready for an evening of stitching!...
Picture
Picture
...these Cosmo threads really are beautiful to stitch with. I was having a few issues with the thread shredding, but a new packet of John James embroidery needles soon solved that problem! Once US005 was completed, it was time to make a start on US006. Both stitchery designs are printed twice, so I can make 2 wall hangings for my daughters...
Picture
Picture
...and then it was time for a quick photo-shoot this morning, and then I can start stitcheries US007 and US008. Once these are all completed, they will will be cut into 4.5" blocks, and pieced together with Rosalie Quinlan Designs "Chirpy Lola" fabric range.
Picture
0 Comments
<<Previous
    Picture

    About me...

    Hi - welcome to my quilting blog! My passions are my family, my dog, my friends and sewing, not necessarily in that order! 
    ​​I live in Suffolk, not far from the coast, surrounded by the beautiful countryside.  
    ​If you want to share or pin any of my pictures, please link back to my blog.

    Picture
    Picture
    Picture
    Picture
    Picture
    Picture
    Picture
    Picture
    Picture
    Picture
    Picture
    Picture
    Picture
    Picture
    Picture
    Picture
    Picture
    Picture
    Picture
    Picture
    Picture
    Picture
    Picture
    Picture
    Picture
    Picture
    Picture
    Picture
    Picture
    Picture
    Picture
    Picture

    Archives

    January 2023
    December 2022
    November 2022
    October 2022
    September 2022
    August 2022
    July 2022
    June 2022
    May 2022
    April 2022
    March 2022
    February 2022
    January 2022
    December 2021
    November 2021
    October 2021
    September 2021
    August 2021
    July 2021
    June 2021
    May 2021
    April 2021
    March 2021
    February 2021
    January 2021
    December 2020
    November 2020
    October 2020
    September 2020
    August 2020
    July 2020
    June 2020
    May 2020
    April 2020
    March 2020
    February 2020
    January 2020
    December 2019
    November 2019
    October 2019
    September 2019
    August 2019
    July 2019
    June 2019
    May 2019
    April 2019
    March 2019
    February 2019
    January 2019
    December 2018
    November 2018
    October 2018
    September 2018
    August 2018
    July 2018
    June 2018
    May 2018
    April 2018
    March 2018
    February 2018
    January 2018
    December 2017
    November 2017
    October 2017
    September 2017
    August 2017
    July 2017
    June 2017
    May 2017
    April 2017
    March 2017
    February 2017
    January 2017
    December 2016
    November 2016
    October 2016
    September 2016
    August 2016
    July 2016
    June 2016
    May 2016
    April 2016
    March 2016
    February 2016
    January 2016
    December 2015
    November 2015
    October 2015
    September 2015
    August 2015
    July 2015
    June 2015
    May 2015
    April 2015
    March 2015
    February 2015
    January 2015
    December 2014
    November 2014
    October 2014
    September 2014
    August 2014
    July 2014
    June 2014
    May 2014
    April 2014
    March 2014
    February 2014
    January 2014
    December 2013
    November 2013
    October 2013
    September 2013
    August 2013
    July 2013
    June 2013
    May 2013
    April 2013
    March 2013
    February 2013
    January 2013
    December 2012
    November 2012
    October 2012
    September 2012
    August 2012
    July 2012
    June 2012
    May 2012
    April 2012
    March 2012
    February 2012
    January 2012
    December 2011
    November 2011
    October 2011
    September 2011
    August 2011
    July 2011
    June 2011
    May 2011
    April 2011
    March 2011
    February 2011
    January 2011
    December 2010
    November 2010
    October 2010

    RSS Feed

    Picture
    Picture

    Blogs I follow

    A Quilt Lady
    A Quilting Life
    Abyquilt
    Anne-Grethe's quiltblog
    Anne Marie Quilt
    Bente Malm Quilte-Design
    Bloom
    Cinderberry Styitches
    Daisy made it
    Dilly Dimple
    Karis Quilterier
    Evas Quilterom
    Erickaeckles
    Fantasia Yarns
    Gail Pan Designs
    Hanne's Quilt Corner
    Halfpenny Home
    I'm a Ginger Monkey
    J-quilts
    Just Jude Designs
    Kviltstina
    Leanne's House
    Liv Aagots Quilteblogg
    Lily's Quilts
    Litamora's Quilt & Design
    Lynette Anderson Designs
    Merete's Quiltestue
    Mona's quiltblog
    Pam's Paradise Stitching
    Pia Si Sia
    Random Ramblings
    Sigrun's blog
    Sølvi's blog
    U-handblog
    ZewNice

     UK shops

    These are the UK shops that I use to purchase my quilting supplies - fabrics and threads etc.
    Bramblepatch
    Buttonberry
    Coast and Country Crafts
    Craft Den
    Cross Patch
    Emma's Fabric Studio
    Fiona's Fabrics
    Glenroy Designs
    Halfpenny Home
    Hulu
    J-quilts
    KIS Quilting
    Patchwork Chicks
    Quilter's Cloth
    Quilters Haven
    Sew and So's
    The Eternal Maker
    The Fat Quarters
    The Quilt Room
    U-handbag

    Australian links

    Cookies and Cream Craft
    Homespun magazine
    Little Quilt Store
    Quilt Fabric Delights
    Under The Mulberry Tree

    Scandinavian links

    Lapp-Elisa Quilts HB
    Lappedesign
    Lappedilla AS
    Myquilt
    Northern Quilts
    Quiltegården
    Quiltekroken
    Quiltemagasinet
    Quiltespecialisten
    Sy-Sammen