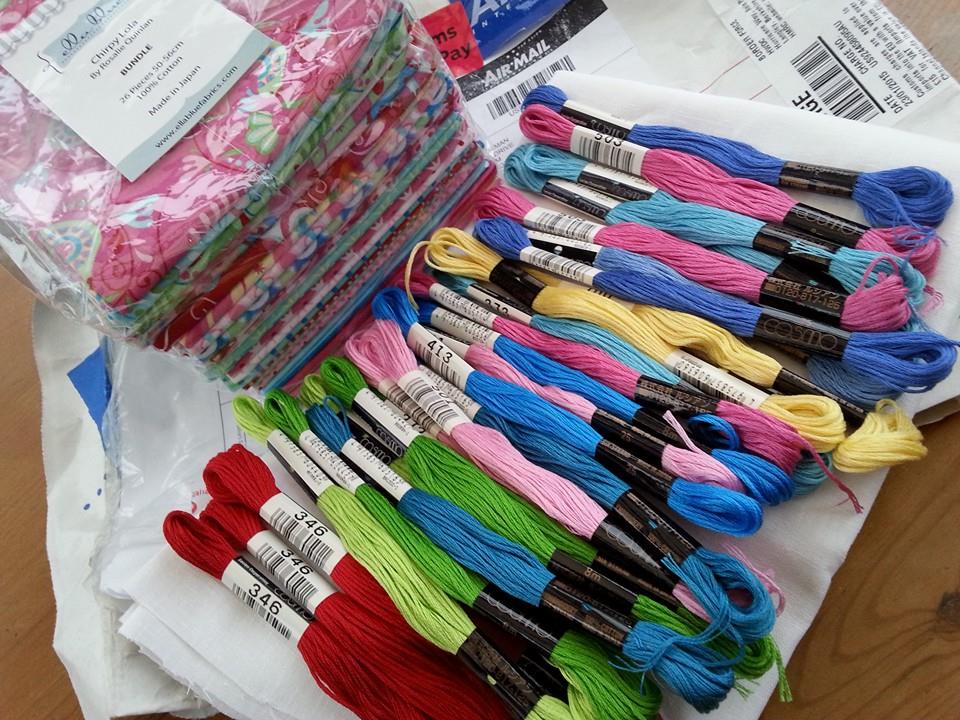
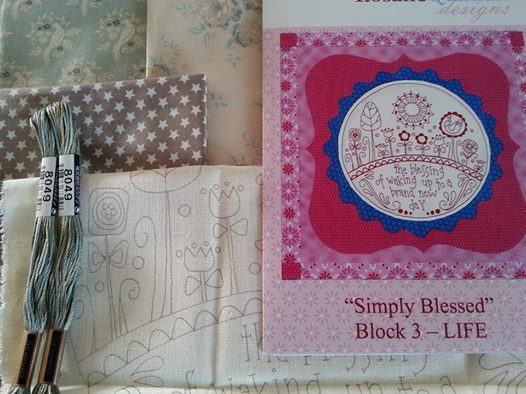
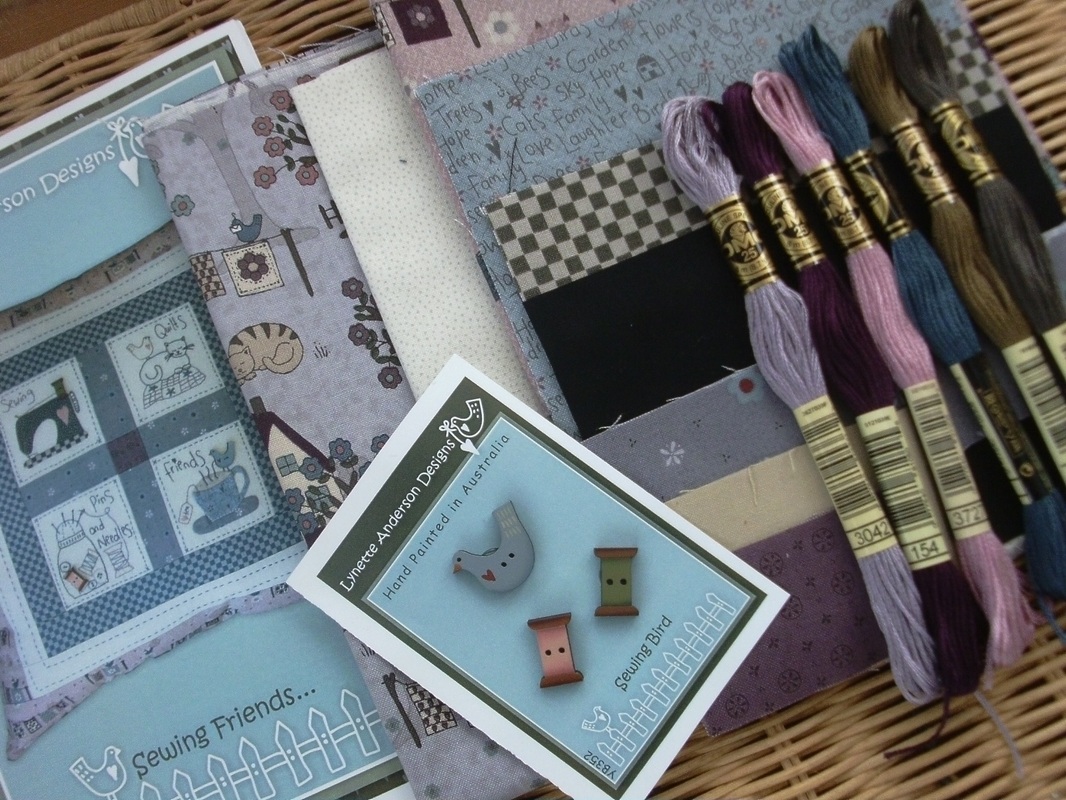
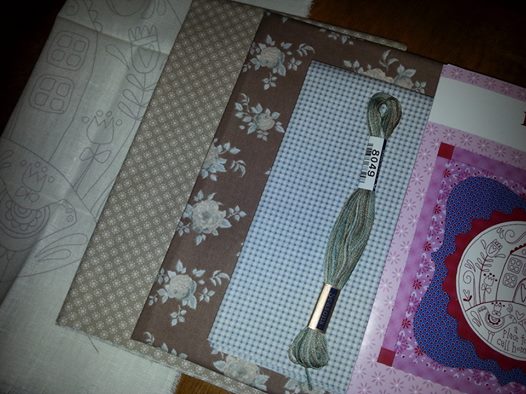
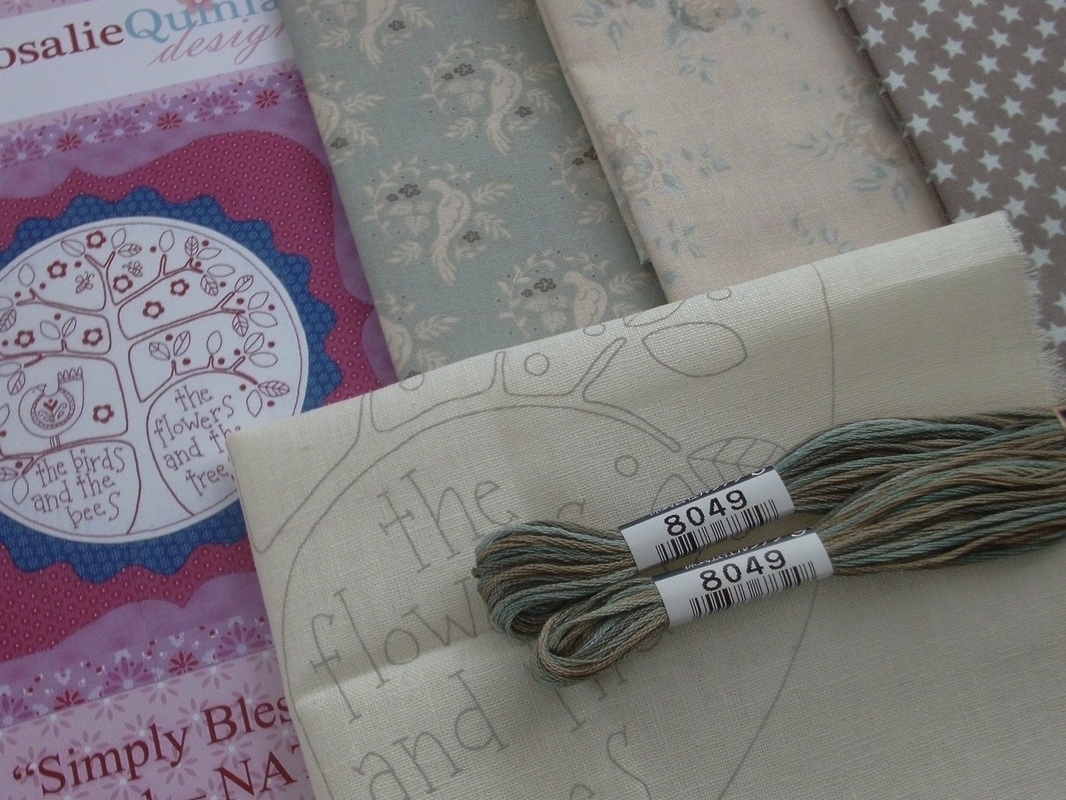
Ohhhh just look at this parcel that the postman delivered yesterday. It had travelled all the way from Australia, and contained 26 skeins of the most GORGEOUS Cosmo threads and a FQ bundle of Chirpy Lola fabric, ready for a BOM "United Stitches" by Rosalie Quinlan Designs. I've signed up with Under The Mulberry Tree do this BOM (I'd order "Simply Blessed" from them too, and was very impressed with their service) and now I'm just waiting for the starter kit to arrive. I'm going to be very busy stitching this year, and might have to invest in a new thimble and another packet of hand embroidery needles too!
2 Comments
Just before Christmas, this block arrived in the post - block 3 of "Simply Blessed" by Rosalie Quinlan Designs. This as a BOM that I'd signed up to from Under the Mulberry Tree. This is the Tilda version, and includes the pre-printed linen, all the fabrics needed to make each block, and skeins of Cosmo variegated thread shade 8049. It was the perfect hand sewing project for over the Christmas holidays... ...it was very relaxing doing the hand stitching. For the applique I used applique paper that I'd bought from Patchwork Chicks here in the UK. The design is traced on the applique paper, cut out exactly on the traced line, then fused onto the wrong side of the fabric. I've cut around the shape leaving a quarter inch margin all around... ...I've used a fabric glue stick apliquick rods to turn the fabric over and press it into place. I bought these apliquick rods from The Fat Quarters, and I'm really enjoying using them. The finished result is lovely smooth curves! This is then hand sewn onto the background fabric. My friend Teresa loaned me her rods for me to play with, but she didn't tell me how addictive they were! Once the edges of the fabric are turned over, the shape is glued to the background fabric with Roxanne's basting glue... ...once the appliqué is completed, I've used a fine applique needle and a neutral silk thread to stitch each layer into place. Then the borders of the block are machine stitched into place, with a mid-grey coloured Mettler fine embroidery thread and a Schmetz Microtex size 60 needle... ...the seams are pressed, and the block is completed. That's all the blocks finished for the fist row! Last week block 4 arrived in the post, and I'll make a start with the embroidery of that one over the weekend.
Well I just couldn't resist making one more of these quick and easy table runners! I used a few left over scraps from a brown batik quilt that I made last year, and the pattern "Mini Charm Mix" (a free download from the Fat Quarter Shop website). This pieced together really quickly. I used pellon felted polyester wadding as it's really thin and ideal for runners and place mats. 505 spray was used to spray baste the layers together... ...a Mettler silk finish thread was used for the quilting. I started with "stitch in the ditch" and then using the edge of the walking foot as a guide, I quilted straight rows half an inch apart. Strips of brown batik were cut for single fold binding, and stitched 3/8" from the raw edge of the runner... ...the straight row quilting is really simple to do, as there's no pattern to worry about, and is very relaxing to do. I stitched a label to one of the corners on the back of the runner before stitching the binding on. The binding was then folded over to the back of the runner and stitched into place by hand... ...this will be used on my dining table when the quilt with the same fabrics is used on the back of the sofa. As I have a large open plan lounge/diner, these will look great together.
Before I packed my festive-themed fabrics away for a few months, I played around with a few scraps. These small 2.5" squares were cut from a Charm pack of "Figgy Pudding" and the background fabric is "Fruit Cake" both by Basic Grey for Moda. The pattern is "Mini Charm Mix" and is a free download from the Fat Quarter Shop website. I used a light grey Mettler fine embroidery thread and a Schmetz Microtex needle size 60 for piecing this together... ...the runner was quilted with a grey Aurifil 40/2 weight quilting thread and a Schmetz Topstitch needle. I stitched in the ditch then used the edge of the walking foot as a guide and quilted rows half an inch apart. Once the quilting was completed, I cut strips of fabric 1.5" wide and stitched this along the edge of the quilt, 3/8" away from the raw edge and mitering the corners... ...once the binding was machined into place, it was pressed and folded to the back of the runner and hand titched into place. One of my labels was machine stitched across one of the corners before the binding was sewn on... ...and here's the completed festive runner. Only another 11 months and this will have pride of place on my dining table. It matches the "Figgy Pudding" Christmas cushions that I made a few weeks ago too. This pattern really is so simple to piece together. And it's a great way of using up scraps too, and I've certainly got lots of those!
Do you remember the quilt that I made with the Mango Salsa Tonga Treats a couple of years ago? Well I had some left-over scraps, and when I was cleaning out my fabric boxes I thought they were too smal to do much with, but then I saw this pattern on the Fat Quarter Shop website called "Mini Charm Mix" and decided to make a new table runner. The scraps were trimmed into 2.5" squares and I was busy making lots of 4-patch units... ...some of the seams are only a scant 1/4" but I was desperate to use every last scrap! I always use Schmetz Microtex needles size 60 when I'm piecing batiks, and I used a very fine Masterpiece thread in my machine too. There was lots of piecing and pressing and more piecing and more pressing and finally I had the top of the runner completed. Once the runner was pieced together, it was layered with a piece of backing fabric and some thin pellon polyester wadding. This was then quilted very simply in straight rows with a Gutterman Sulky variegated quilting thread, and I used the edge of the walking foot as a guide for quilting the rows... ...a narrow strip of batik was then attached to the edge of the runner and machined into place, to be used as a single fold binding.. I stitched a label onto one of the corners on the back of the quilt before the final piece of binding was attached... ...and here is the completed runner on my dining table. I've got a few scraps left, hopefully enough to make a similar runner for my coffee table - as my lounge diner is a large, open plan room, I like to use co-ordinating runners. Guess what I'll be sewing on my next day off!
Sewing Friends is a pattern designed by Lynette Anderson, and combines her usual mix of applique and stitchery. I bought this kit from Coast and Country Crafts and Quilts, here in the UK and the kit contains the pattern, all the fabrics for piecing and applique (also designed by Lynette and are from her "Quilters Garden" collection), the beautiful painted buttons to embellish it with AND the embroidery threads too. I used a Micron Pigma pen to trace the pattern onto the stitchery background, fused a small piece of weaveline on the back, and I was ready to start stitching... ...I used a small wooden embroidery hoop to keep the background fabric taught. These hand painted buttons are the perfect embellishments... ...two of these mini-blocks also have applique, and my friend Teresa very kindly loaned me her apliquick rods to have a play with. I really haven't got to grips with needle-turn applique, and recently discovered the applique apaper and glue stick method with I found much easier. So I had a go with these rods, and quickly became addicted - so much so that I ordered my set from The Fat Quarters... ...once these mini-blocks were completed, I was able to get the main block pieced together. This kit uses this beautiful fabric range "Quilters garden" (also designed by Lynette Anderson). I used a fine embroidery thread in pale grey by Mettler for the piecing, along with a Schmetz Microtex size 60 needle for the piecing... ...then changed to a Schmetz Topstitch size 70 needle and an Aurifil thread 40/2 weight for the quilting. I changed the pattern slightly and made the back with an enclosed zipper, I used some extra "Quilters Garden" fabric for the cushion back and the binding... ...here it is finally completed with a nice plump feather cushion pad inside. This really is so pretty. I'm getting quite a collection of Lynette's cushions for my sewing corner - poor Mr F is worried that I may soon need a special sewing room all for myself! And my daughters are worried that the next time they come home from uni I might have taken over one of their bedrooms!!!
*There is a great video tutorial on Lynette's blog demonstrating how to use the apliquick tools. A few weeks ago the second block of Simply Blessed arrived in the post from Australia (I'd ordered this online from Under The Mulberry Tree after seeing this version made with Tilda fabrics and I simply couldn't resist it!) and I quickly set to work with the hand embroidery. This BOM includes all the Tilda fabrics needed to make each block, and includes the pre-printed linen, and the variegated Cosmo thread too. This embroidery thread (from the Cosmo seasons range) is absolutely beautiful to stitch with... ...I traced the outline of the template onto fusible appliqué paper, cut out the middle and fused the paper on to the back of the stitchery that I'd already completed a few days ago. Using a pair of "Perfect" scissors, (these are fantastic scissors, by Karen Kay Buckley) I then cut approx 1/4"inch away from the paper. Carefully clipping the curves, taking care not to clip into the paper, I then used a fabric glue stick to draw a line of glue around the outline and carefully folded the edges of the fabric over the edge of the paper. I've used a wooden skewer for this so I don't get glue on my fingers. I've used a neutral coloured YLI silk thread for the appliqué to secure the first layer into place... ...once all the layers of applique were completed, I added the borders that were cut from fabric that I received with Block 1 a few weeks ago, and added the corner stones.I used a Mettler fine embroidery thread for piecing the borders and corner stones... ...this is beginning to look really pretty. My youngest daughter has taken a fancy to this, as it really is "her colours" so maybe this one will end up in her bedroom when it's completed!
I recently did some online shopping from Under The Mulberry Tree, and while I was browsing their website, I saw this. I just couldn't resist this BOM by Rosalie Quinlan - I'd seen it on her FB page a few weeks ago, and decided to go for it - so I've signed up to get it in this version, made with Tilda fabrics. The kit included these beautiful varigated "Seasons" Cosmo threads, shade 8049, and the handkerchief linen is pre-printed... ...this variegated Cosmo thread is beautiful and is really lovely to stitch with. Once the stitchery was complete, it was time to do the applique, and there's lots of hand applique on this block. I used fusible applique paper, and a Sewline glue stick, which certainly made this part a lot easier... ...I used a neutral coloured YLI silk thread and Clover gold eye appliqué needles for this project. The next step is a narrow border, and corner stones sewn into place... ...and here is Block 1 of "Simply Blessed" completed. This is going to be super when it's finished!
|
About me...Hi - welcome to my quilting blog! My passions are my family, my dog, my friends and sewing, not necessarily in that order! Archives
January 2025
Blogs I followUK shopsThese are the UK shops that I use to purchase my quilting supplies - fabrics and threads etc.
Australian linksScandinavian links |