Nicola Foreman Quilts
  • BLOG
  • BAGS
  • CUSHIONS
  • QUILTYSTUFF
  • QUILTS
  • TABLERUNNERS
  • WALL HANGINGS
  • CONTACT ME

My Floss Organiser - Plastic Pockets

30/4/2016

0 Comments

 
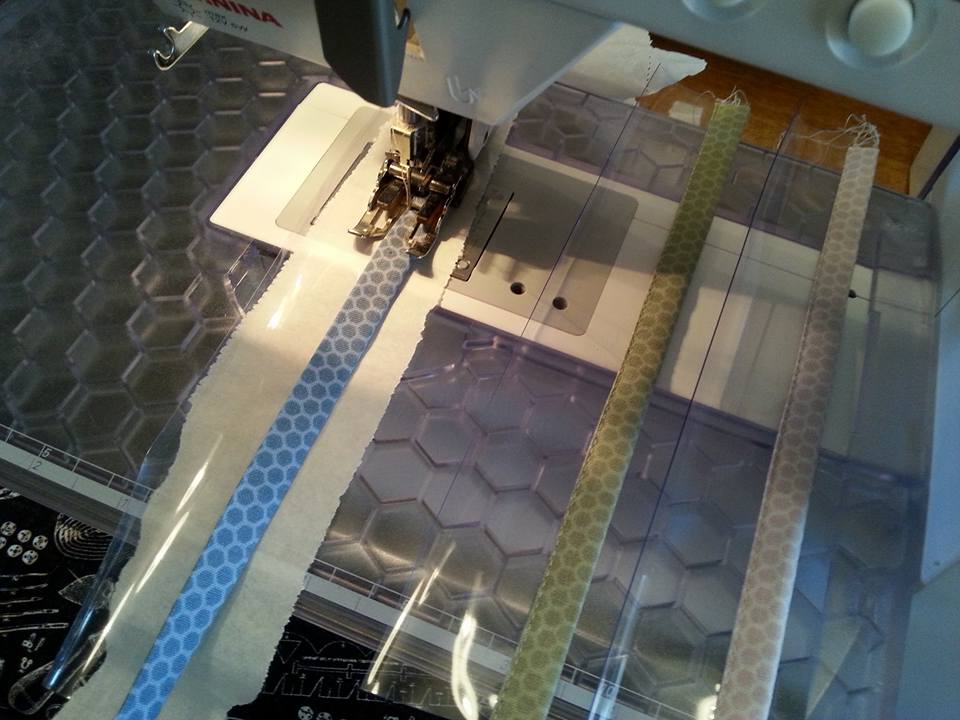
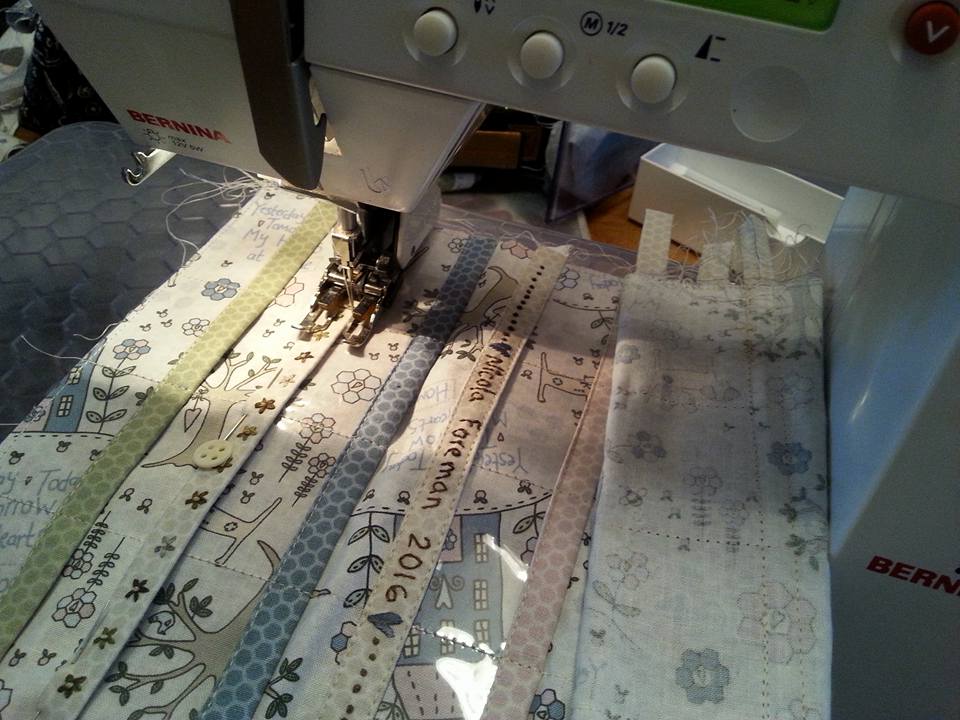
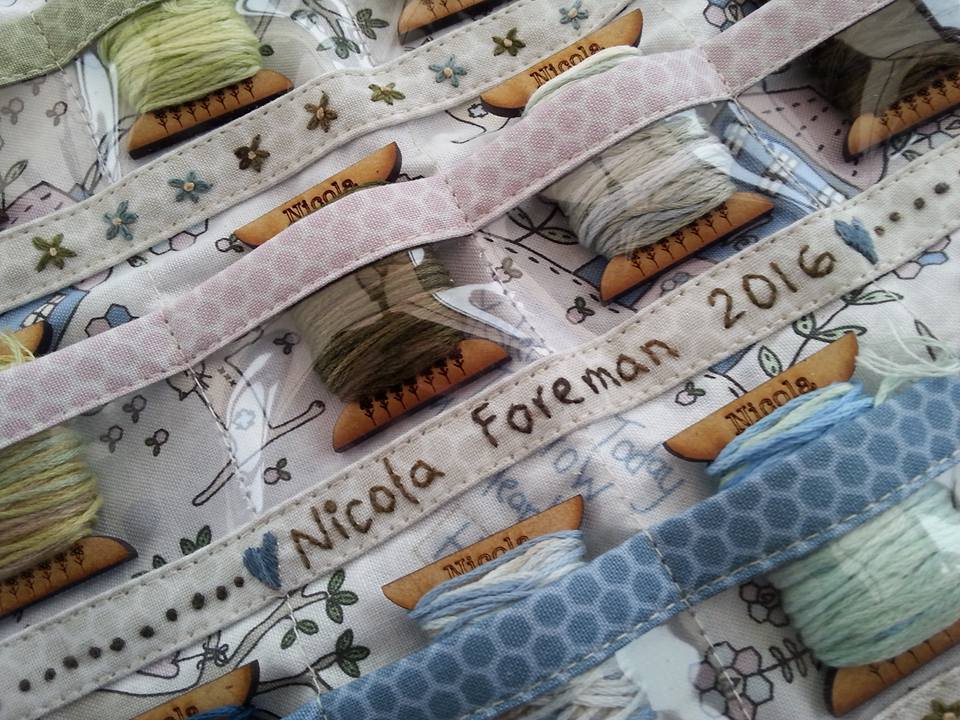
I've recently been making the latest pattern by Lynette Anderson Designs, called My Floss Organiser. The inner part of the organiser has 24 small plastic pockets, to keep spools of thread in. (I'd already got some plastic in my craft box that I'd bought a few years ago from Norway, but if you're here in the UK I'd suggest you try Amazon UK for clear vinyl - I recently bought some more from there, and it was about £2.50 for a metre... it comes folded, and you just need to warm it up with a hairdryer to get the creases out!). Firstly, the plastic strips are cut to size, and the top edge is covered with a strip of binding. This is done the same way as binding on a quilt, but I have machined the folded edge into place. My top tip for sewing the binding strips to the top edge of the plastic pockets is to use very thin paper underneath the plastic, to stop it sticking to the stitch plate, feed dogs and extension table. This paper was wrapped around the plastic when I bought it, and it's perfect for this. I've used fabrics from Lynette's My Hearts at Home collection for this project. My other top tips are to use a very fine, sharp needle (my favourite is a Schmetz Microtex size 60) and a walking foot. I used a Clover Hera Marker to mark the placement lines for the pockets. Then I machined along the lower edges of the plastic pockets to secure them into place, using a walking foot and a slightly longer than usual stitch...
Picture
Picture
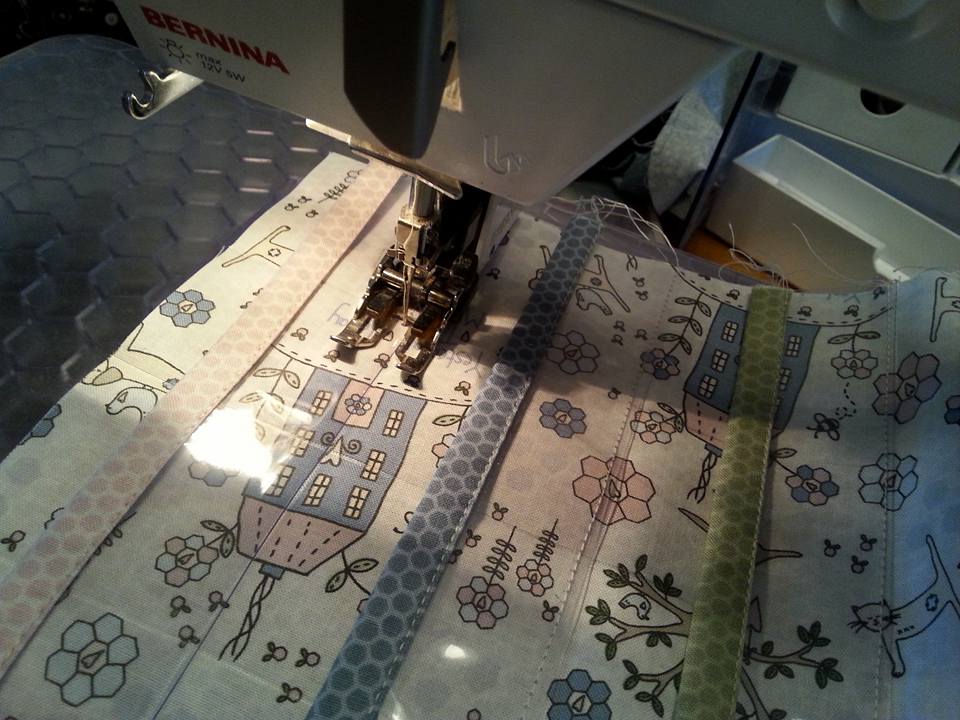
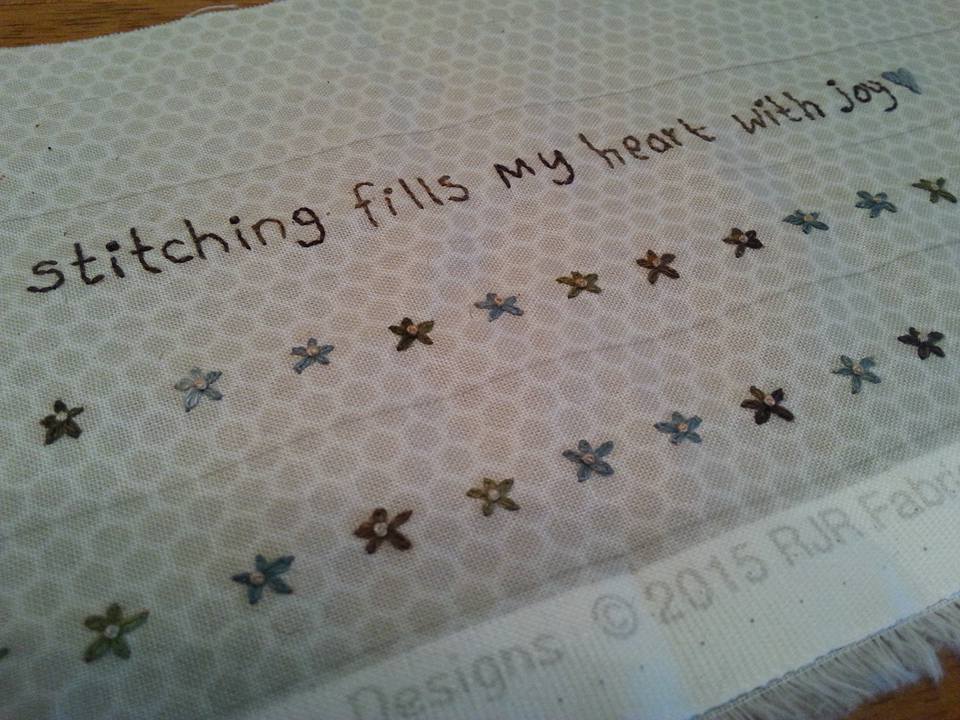
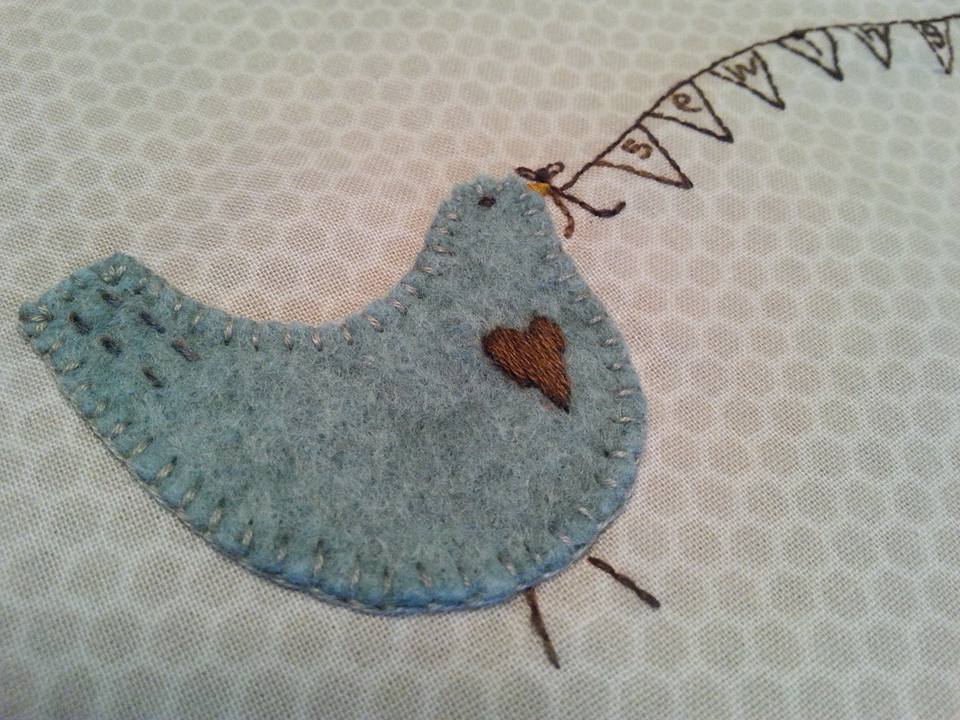
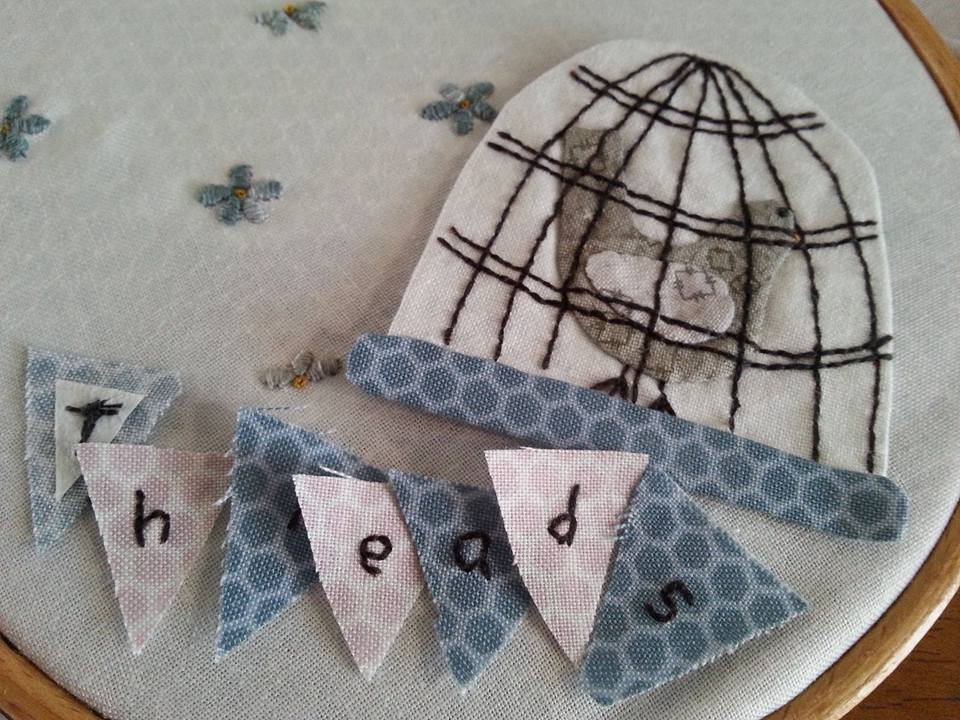
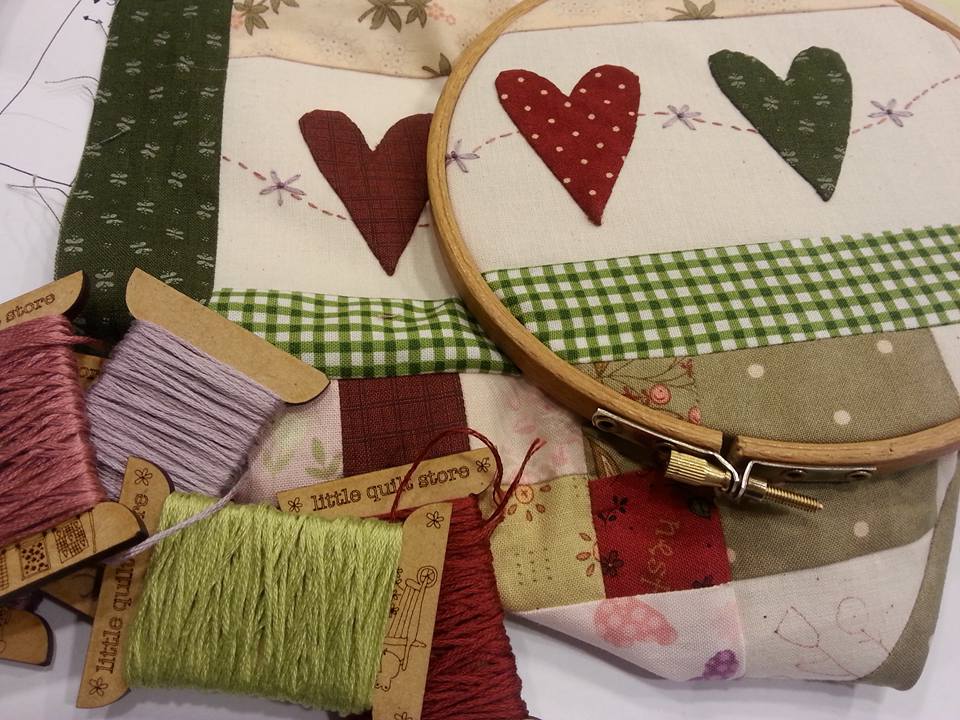
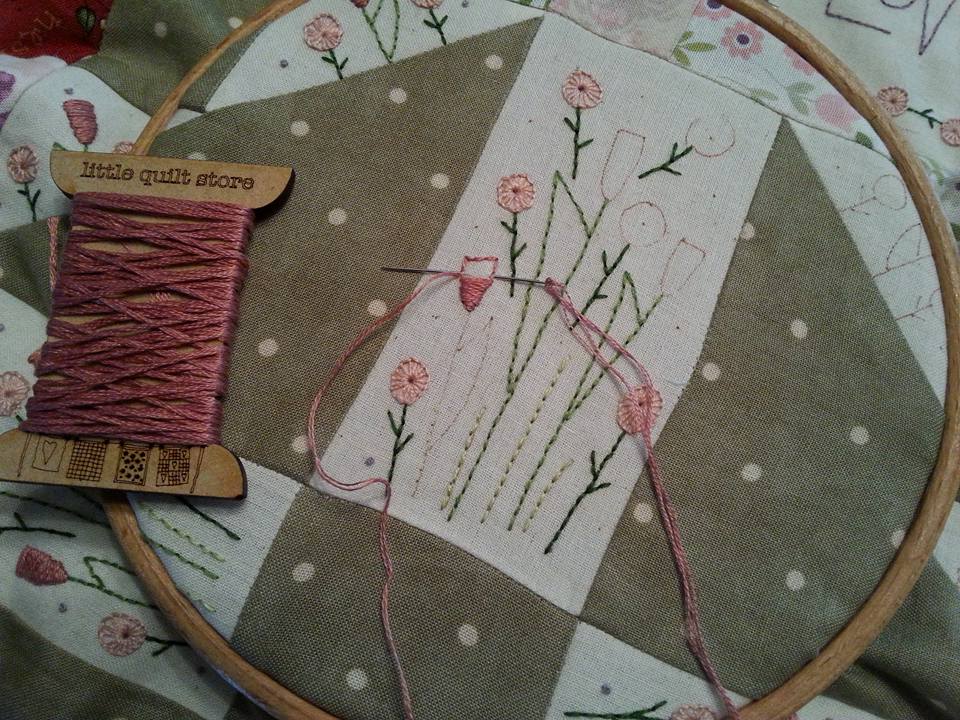
...then I machined down the centre of the fabric and plastic, through all layers, and then again 2" from the centre line on each side, to make the small pockets ready for the wooden spools. I used a walking foot, and it didn't stick to the plastic at all. The next step is to make some embroidered ribbon strips to cover the lower edge of the plastic pockets. I prepped the background fabric by ruling a line with a pencil, as it would be easier putting a larger piece of fabric in an embroidery hoop for the stitchery rather than stitching on narrow pieces of fabric. I traced the stitchery design using a Micron Pigma pen and a light box, then I carefully fused a narrow strip of weaveline half an inch wide along the back of each ruled area, and completed the embroidery by hand, using Valdani hand-dyed threads... 
Picture
Picture
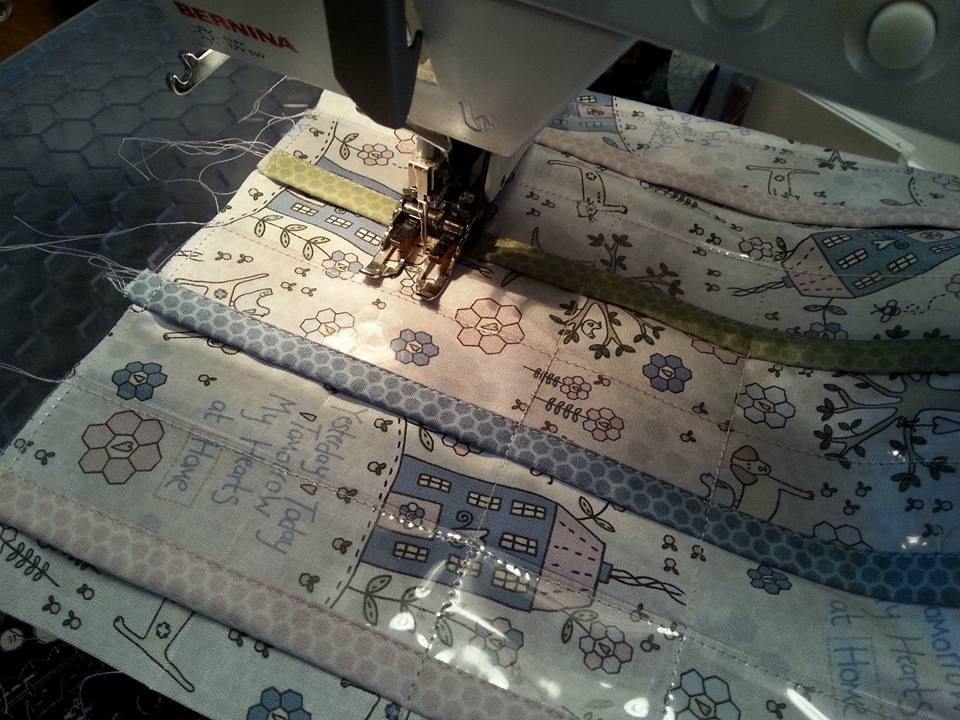
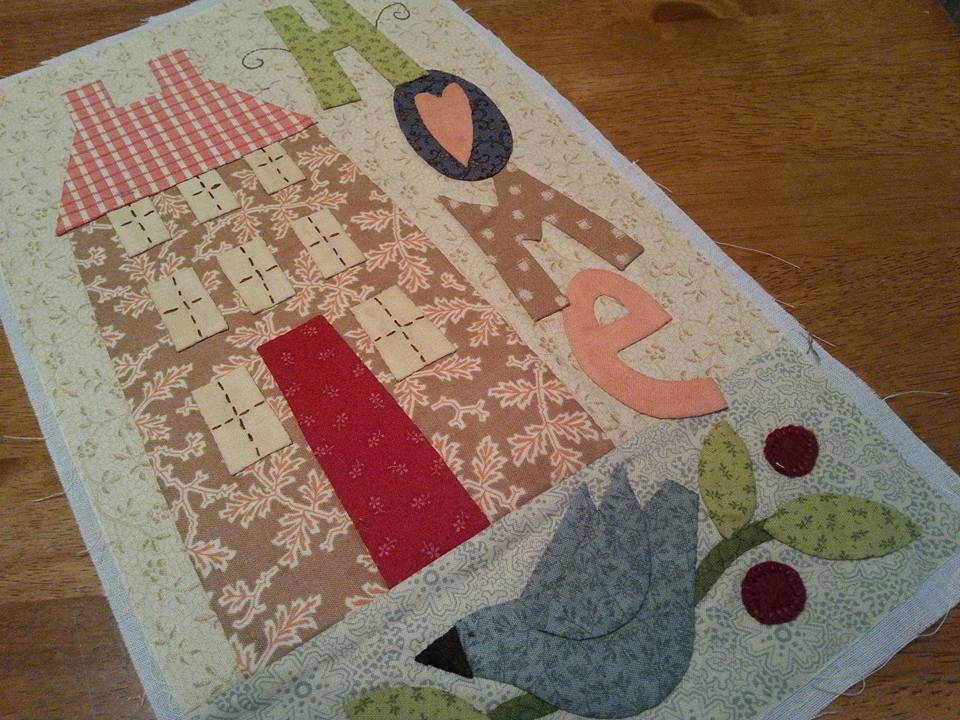
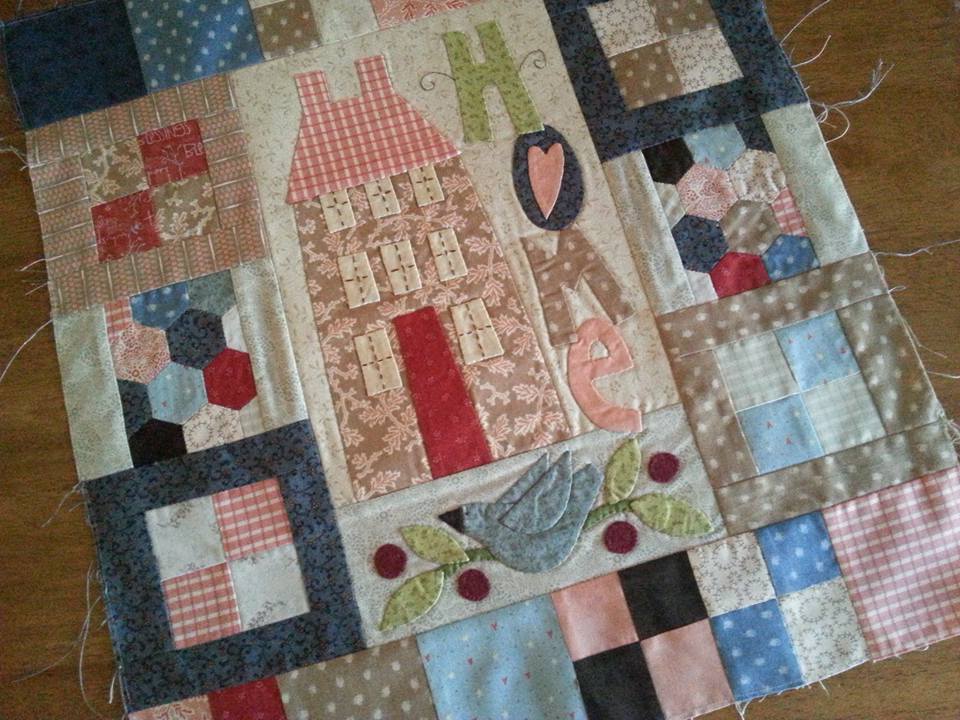
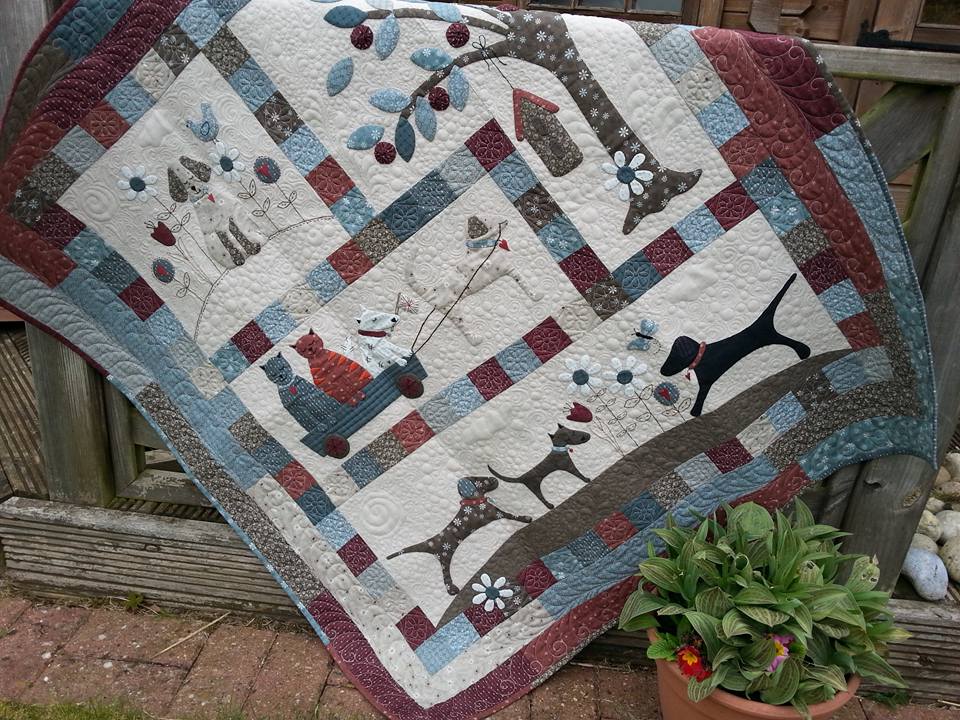
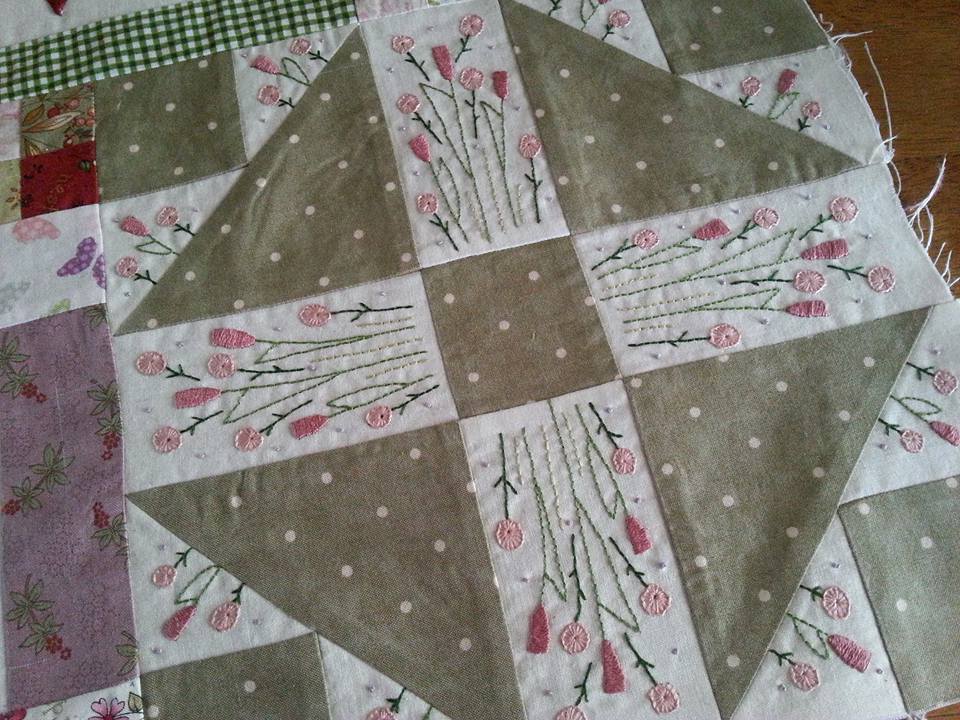
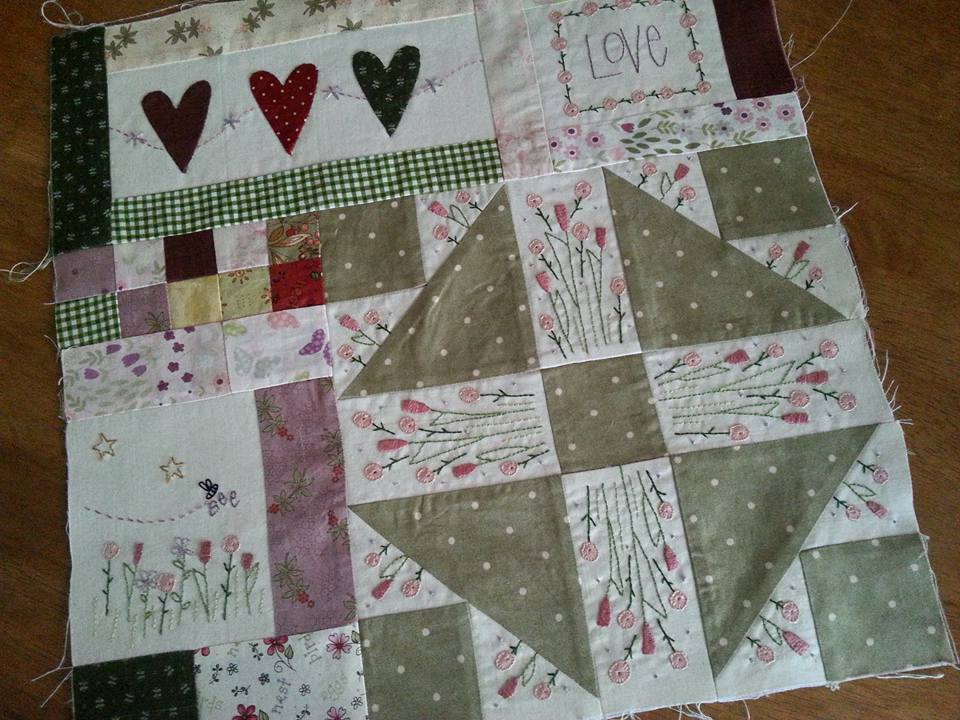
...the edges of the embroidered ribbon strips were folded over, pressed, and placed over the bottom edges of the plastic pockets,  and machined along both sides - I used the walking foot for this, and moved the needle position over to stitch just along the edge of the strip. I love the embroidered ribbon strips, they look so pretty. This project has been made with fabrics from Lynette's "My Hearts At Home" collection, and the fabrics really are very pretty - these were leftover from the gorgeous kit that Lynette sent me to make the "Stitched By Me" quilt, that I made a few weeks ago.
This pattern is available from Lynette's shop, Little Quilt Store, (Lynette has these gorgeous wooden spools too) and if you're here in the UK the patterns are also available with some wooden spools from Julia at Cross Patch.
Picture
Picture
0 Comments

My Floss Organiser - Embroidery and Stitchery

29/4/2016

0 Comments

 
My latest project, My Floss Organiser, by Lynette Anderson Designs, is a beautiful case for storing embroidery threads. My version has been made with with really pretty fabrics from "My Hearts At Home" collection, also by Lynette, and the wool felt was bought from Eternal Maker here in the UK. The outer part of the case is a combination of applique and hand embroidery. I used the applique paper and glue stick method for most of the applique, and the wool felt birds are made using a fusible webbing on the back of the wool felt, and then hand embroidered using blanket stitch...
Picture
Picture
...when I made the appliquéd mini-quilt, the bunting and the bird cage for the Floss Organiser I found it much easier to do the stitchery first, using the applique paper as a stabiliser. The letter "T" below shows the wrong side of the fabric, with the appliqué paper in place. Then I cut out the shapes, and turned the edges over using a glue stick and apliquick rods, ready to stitch them in place by hand, using a very fine YLI silk thread and an applique needle. Once the appliqué and stitchery for the front of the organiser was completed, I trimmed the panels to the right size. The two panels just needed to be stitched to a centre panel of fabric, enclosing one of the ties too, then layered onto a piece of wadding. The little envelope is for storing packets of needles, and the two appliqued wool birds is an ideal location for storing your needles that you're using. I didn't have the same scissor charm that Lynette used but I found something similar in my sewing box. 
If you want to purchase one of these patterns, they are available in Lynette's shop Little Quilt Store, and if you're in the UK Julia at Cross Patch also has them in stock. 
Picture
Picture
0 Comments

Pattern Testing

28/4/2016

0 Comments

 
A few weeks ago, Lynette Anderson Designs asked me to test one of her patterns, and I've been busy stitching away. Can you guess what it is? This project has a mixture of applique and hand embroidery, and I've been using fabrics from Lynette's latest collection My Hearts At Home for this, and I used some gorgeous hand dyed Valdani threads for the stitchery. I'll share some more pictures at the weekend!
Picture
Picture
Picture
0 Comments

Bluebird Lane Block 9 Home

24/4/2016

0 Comments

 
Back in December 2015 the postman knocked on the door, and had the most wonderful parcel for me - block 9 of Bluebird Lane by Natalie Bird of The Birdhouse Patchwork Designs. I finally started the first block just a few weeks ago at the beginning of March, and finally it was time to make the final block, called Home. I'd bought this gorgeous BOM online from Patchwork Chicks here in the UK. They really do have a fabulous website, and Karen the owner is really lovely (I've met her a few times at FOQ in Birmingham when we were helping Lynette set up her stall) and my orders always arrive promptly with a handwritten note inside - it's the little touches like that that mean so much. Anyway, once all the fabrics were pressed and sorted I made the appliqued centrepiece. I'd been trying some new applique needles by Hugs 'n Kisses and they're really lovely to sew with. I used to sew with Clover Black Gold applique needles, and they really are VERY fine, but also tend to snap easily. The Hugs 'n Kisses one are a bit more robust...
Picture
Picture
...the applique was all completed using the applique paper and glue stick method, and using apliquick rods. There are several videos on YouTube demonstrating this method, and the one that I'd recommend is of Lynette Anderson - she talks through each stage really well. Eeekkkk!!! More blasted hexies - they really are the most devillish things to make, and the eagle-eyed ones of you may have noticed that there are some hexagon papers in the picture with the fabrics and patterns - and you may remember that hexagons aren't my best friend - I really don't like them, and this block has a few that are pieced together to make a couple of blocks for the side borders. Well, I took a deep breath, had a cup of tea, and decided to tackle them head-on. Once they'd been pieced together I got my revenge on these pesky little blighters by cutting the edges off - yes, that's right - my rotary cutter sliced right through them and squared them up ready to be pieced together for the borders...
Picture
Picture
...and here it is, the final block for this gorgeous BOM. Now I just need to piece the blocks together and then I'll have the borders to make. That will be rather time consuming, as there are 42 star blocks to piece together. I've got a Bank Holiday weekend coming up soon, so I'm planning to spend a bit of time on them then. Hopefully I can leave my sewing machine up for a few days without Mr F complaining too much!
Picture
0 Comments

A Dog's Life - Completed!

22/4/2016

1 Comment

 
I decided to go with a scrappy binding for this project. This quilt had been made with fabrics from Lynette's "Time With Friends" collection. Strips of fabric left over from the quilt were cut 1.5" wide ready for single fold binding. Rather than joining the strips with a diagonal seam, these were joined end-to-end and then machined to the front of the quilt. There's something rather lovely about a scrappy binding! I used a mid-grey Aurifil 40wt thread for attaching the binding - firstly it was machine stitched to the front of the quilt with a 3/8" from the raw edge, and the corners were mitred. The free edge was pressed over and then slip stitched by hand to the back of the quilt...
Picture
Picture
...drum roll pleeeease - here's the completed quilt "A Dog's Life" (designed by Lynette Anderson Designs). This has been beautifully custom quilted by the amazing Janette at J-Quilts. I made the quilt top a few weeks ago, and it was machine pieced, hand embroidered and hand appliqued using the applique paper and glue stick method. I finally collected this from the longarm quilter a couple of days ago. I finished the binding last night, and just did a quick photo shoot in the garden when I got home from work. This was initially bought last year as a BOM from Cross Patch in Wales, you really must have a look at Julia's website, as she stocks a large range of Lynettes's patterns.
Picture
1 Comment

A Dog's Life - Label

21/4/2016

0 Comments

 
I love making quilt labels, and for A Dog's Life I was inspired by a motif by a book also by Lynette Anderson Designs called "It's Quilting Cats and Dogs". I traced the design onto fabric using a lightbox and a Micron Pigma pen. Weaveline fusible interfacing was ironed onto the back of the fabric, and I used Valdani threads for the embroidery...
Picture
Picture
...the label was appliqued into place on the back of the quilt, and a quilt sleeve was also added so it's ready to hang up. This scrappy binding is looking rather good - I'll share a picture of the finished quilt tomorrow. ​
Picture
0 Comments

Bluebird Lane Block 8 Shearing Shed

19/4/2016

0 Comments

 
Back in November 2015 the next block of Bluebird Lane by Natalie Bird of The Birdhouse Patchwork Designs arrived in the post. I'd seen this gorgeous BOM online on the Patchwork Chicks website and didn't waste anytime at all in signing up. However once the blocks started to arrive I was so busy with other projects, this one had to wait. Anyway, over the past few weeks I've been busy getting these blocks pieced together and it was time to make a start on this one - called "The Shearing Shed" it features some rather cute sheep leaping over the shed - and they're wearing rather gorgeous blankets, maybe to keep them warm after they've been shorn...
Picture
Picture
...I've used a method of applique for this project that uses applique paper, a glue stick and apliquick rods. There are lots of tutorials and videos on how to use these rods - I was very lucky to see Lynette Anderson demonstrating these a couple of years ago at the Festival of Quilts in Birmingham, and the video that I'd recommend is of her doing a demo that you can easily find on YouTube. Anyway, here's the completed block - made with a variety of techniques - machine piecing, hand embroidery with DMC threads and hand applique. Only one more block left, so I think you can guess what I'll be piecing together next weekend!
Picture
0 Comments

Leanne's House - Block 2

16/4/2016

0 Comments

 
Ohh look what was in my sewing bag on Monday evening when I went to the Sewing Group! The pattern for block 2 of Leanne's House by the Australian designer Leanne Beasley Leanne's House had arrived in the post a few days beforehand from Cross Patch in Wales. The block was machine pieced together using Aurifil 50wt thread, the stitchery design was traced with a Micron Pigma pen, and a piece of weave line interfacing was fused to the stitchery background. On Monday evening I made a start on the first mini-block, with some hand embroidery and hand appliqued hearts...
Picture
Picture
...I always use a wooden embroidery hoop to keep my fabric taut, and I have a few in an assortment of sizes ranging from 4" - 8" in diameter. These min-blocks really didn't take too long to stitch, and I spent my evenings relaxing after supper stitching these...
Picture
Picture
...the final mini-block has a lot of embroidery on it - DMC threads are used for this, and a selection of simple embroidery stitches are used - back stitch, satin stitch, circular blanket stitch and colonial knots...
Picture
Picture
...and this afternoon the block was completed. I really love these colours, Julia has put a really great kit together. I have really enjoyed the mixture of applique and embroidery, and can't wait for block 3 to arrive!
Picture
0 Comments

A Sneak Peek Of A Dog's Life

13/4/2016

1 Comment

 
A few weeks ago I left my quilt "A Dog's Life" by Lynette Anderson Designs with my longarm quilter Janette at J-Quilts. As you can see, she's doing an amazing job! I'm really looking forward to collecting this from her next week. I'd bought this as a BOM last year from Cross Patch in Wales. I substituted some gorgeous linen for the background fabric for the blocks, and I used the applique paper and glue stick method of applique for this quilt._
Picture
1 Comment

Bluebird Lane Block 7 Alphabet Sampler 2

10/4/2016

0 Comments

 
The pattern and fabrics for Block 7 of Bluebird Lane by Natalie Bird arrived back in October last year from Patchwork Chicks here in the UK. It was safely packed away with the others, and was in the queue for "projects I really must start"!! Eventually I started this project a few weeks ago - the centre block was pieced together, and the flower and alphabet were appliqued into place, I used the applique paper, glue stick method, along with apliquick rods for this, and the applique pieces are then held in place with a few spots of Roxanne's basting glue. Finally, the applique is secured with hand sewing using a very fine thread (I recommend YLI silk thread or Bottomline, both in a neutral colour to match the background fabric). The "label" has been hand embroidered with DMC threads...
Picture
Picture
 ...unfortunately I really don't like making hexagons, and there are a few of them on this block. And they're only HALF INCH hexagons!! They're my LEAST favourite thing to make, and they were making me use some very bad words!!! Thankfully I had some applique paper pre-cut hexies that I used for these, and once they'd been pieced together by hand, these pesky little blighters were beaten into submission with a blast of steam and a hot iron. Once those pesky hexies (did I say they were only half inch hexagons??!!!) had finally been appliquéd into place, I must admit I was rather pleased with them!...
Picture
Picture
...and here is the finished block. This has been machine pieced, hand appliqued and hand embroidered. Those pesky half inch hexagons gave me a bit of grief, but I'm really pleased with the result!! Now I can get started on block 8. Thankfully there aren't any hexagons on that one!
Picture
0 Comments
<<Previous
    Picture

    About me...

    Hi - welcome to my quilting blog! My passions are my family, my dog, my friends and sewing, not necessarily in that order! 
    ​​I live in Suffolk, not far from the coast, surrounded by the beautiful countryside.  
    ​If you want to share or pin any of my pictures, please link back to my blog.

    Picture
    Picture
    Picture
    Picture
    Picture
    Picture
    Picture
    Picture
    Picture
    Picture
    Picture
    Picture
    Picture
    Picture
    Picture
    Picture
    Picture
    Picture
    Picture
    Picture
    Picture
    Picture
    Picture
    Picture
    Picture
    Picture
    Picture
    Picture
    Picture
    Picture
    Picture
    Picture
    Picture

    Archives

    March 2025
    February 2025
    January 2025
    December 2024
    November 2024
    October 2024
    September 2024
    August 2024
    July 2024
    June 2024
    May 2024
    April 2024
    March 2024
    February 2024
    January 2024
    December 2023
    November 2023
    October 2023
    September 2023
    August 2023
    July 2023
    June 2023
    May 2023
    April 2023
    March 2023
    February 2023
    January 2023
    December 2022
    November 2022
    October 2022
    September 2022
    August 2022
    July 2022
    June 2022
    May 2022
    April 2022
    March 2022
    February 2022
    January 2022
    December 2021
    November 2021
    October 2021
    September 2021
    August 2021
    July 2021
    June 2021
    May 2021
    April 2021
    March 2021
    February 2021
    January 2021
    December 2020
    November 2020
    October 2020
    September 2020
    August 2020
    July 2020
    June 2020
    May 2020
    April 2020
    March 2020
    February 2020
    January 2020
    December 2019
    November 2019
    October 2019
    September 2019
    August 2019
    July 2019
    June 2019
    May 2019
    April 2019
    March 2019
    February 2019
    January 2019
    December 2018
    November 2018
    October 2018
    September 2018
    August 2018
    July 2018
    June 2018
    May 2018
    April 2018
    March 2018
    February 2018
    January 2018
    December 2017
    November 2017
    October 2017
    September 2017
    August 2017
    July 2017
    June 2017
    May 2017
    April 2017
    March 2017
    February 2017
    January 2017
    December 2016
    November 2016
    October 2016
    September 2016
    August 2016
    July 2016
    June 2016
    May 2016
    April 2016
    March 2016
    February 2016
    January 2016
    December 2015
    November 2015
    October 2015
    September 2015
    August 2015
    July 2015
    June 2015
    May 2015
    April 2015
    March 2015
    February 2015
    January 2015
    December 2014
    November 2014
    October 2014
    September 2014
    August 2014
    July 2014
    June 2014
    May 2014
    April 2014
    March 2014
    February 2014
    January 2014
    December 2013
    November 2013
    October 2013
    September 2013
    August 2013
    July 2013
    June 2013
    May 2013
    April 2013
    March 2013
    February 2013
    January 2013
    December 2012
    November 2012
    October 2012
    September 2012
    August 2012
    July 2012
    June 2012
    May 2012
    April 2012
    March 2012
    February 2012
    January 2012
    December 2011
    November 2011
    October 2011
    September 2011
    August 2011
    July 2011
    June 2011
    May 2011
    April 2011
    March 2011
    February 2011
    January 2011
    December 2010
    November 2010
    October 2010

    RSS Feed

    Picture
    Picture

    Blogs I follow

    A Quilt Lady
    A Quilting Life
    Abyquilt
    Anne-Grethe's quiltblog
    Anne Marie Quilt
    Bente Malm Quilte-Design
    Bloom
    Cinderberry Styitches
    Daisy made it
    Dilly Dimple
    Karis Quilterier
    Evas Quilterom
    Erickaeckles
    Fantasia Yarns
    Gail Pan Designs
    Hanne's Quilt Corner
    Halfpenny Home
    I'm a Ginger Monkey
    J-quilts
    Just Jude Designs
    Kviltstina
    Leanne's House
    Liv Aagots Quilteblogg
    Lily's Quilts
    Litamora's Quilt & Design
    Lynette Anderson Designs
    Merete's Quiltestue
    Mona's quiltblog
    Pam's Paradise Stitching
    Pia Si Sia
    Random Ramblings
    Sigrun's blog
    Sølvi's blog
    U-handblog
    ZewNice

     UK shops

    These are the UK shops that I use to purchase my quilting supplies - fabrics and threads etc.
    Bramblepatch
    Buttonberry
    Coast and Country Crafts
    Craft Den
    Cross Patch
    Emma's Fabric Studio
    Fiona's Fabrics
    Glenroy Designs
    Halfpenny Home
    Hulu
    J-quilts
    KIS Quilting
    Patchwork Chicks
    Quilter's Cloth
    Quilters Haven
    Sew and So's
    The Eternal Maker
    The Fat Quarters
    The Quilt Room
    U-handbag

    Australian links

    Cookies and Cream Craft
    Homespun magazine
    Little Quilt Store
    Quilt Fabric Delights
    Under The Mulberry Tree

    Scandinavian links

    Lapp-Elisa Quilts HB
    Lappedesign
    Lappedilla AS
    Myquilt
    Northern Quilts
    Quiltegården
    Quiltekroken
    Quiltemagasinet
    Quiltespecialisten
    Sy-Sammen