Nicola Foreman Quilts
  • BLOG
  • BAGS
  • CUSHIONS
  • QUILTYSTUFF
  • QUILTS
  • TABLERUNNERS
  • WALL HANGINGS
  • CONTACT ME

Vintage-Style Lampshade Cover

1/12/2021

0 Comments

 
What do you do with a plain cream lampshade that needs a bit of a facelift? Make it a posh new coat! I carefully drew around the lampshade onto a large piece of paper, gently rolling the shade along, and adding an overlap. I fused a piece of lightweight interfacing onto the back of some cream patterned fabric then drew around the paper template adding a half inch seam allowance. Next is the fun part - I doodled a heart and some swirls onto the fabric with a Pigma Micron pen - this ink is permanent so you do need a steady hand. I stitched over the design with simple stitches using 3 strands of embroidery thread in a variety of neutral shades...
Picture
Picture
...once the centre embroidery design was completed, I drew a few more twirls on each side, and added my name and the year. Once the embroidery was completed, the fabric was pressed, and cut around the template shape that had been drawn on the back of the interfaced fabric. Seam allowances were pressed along the top and bottom curves, then some ric-rac trimming and vintage lace were stitched in place...
Picture
Picture
...a strip of velcro fastening was stitched to each overlap as a closure, so the cover can easily be removed if necessary. Some vintage buttons were added to the top overlap to add a bit of detail...
Picture
Picture
...the pictures below show what the front and back of the cover will look like when it's in place around the shade... 
Picture
Picture
...and here's the finished cover, attached to the original lampshade. I'm really pleased with how this looks and might have to make a sewing-themed one to display in my sewing studio!
Picture
0 Comments

Roses and Ruching Pincushion

24/11/2021

0 Comments

 
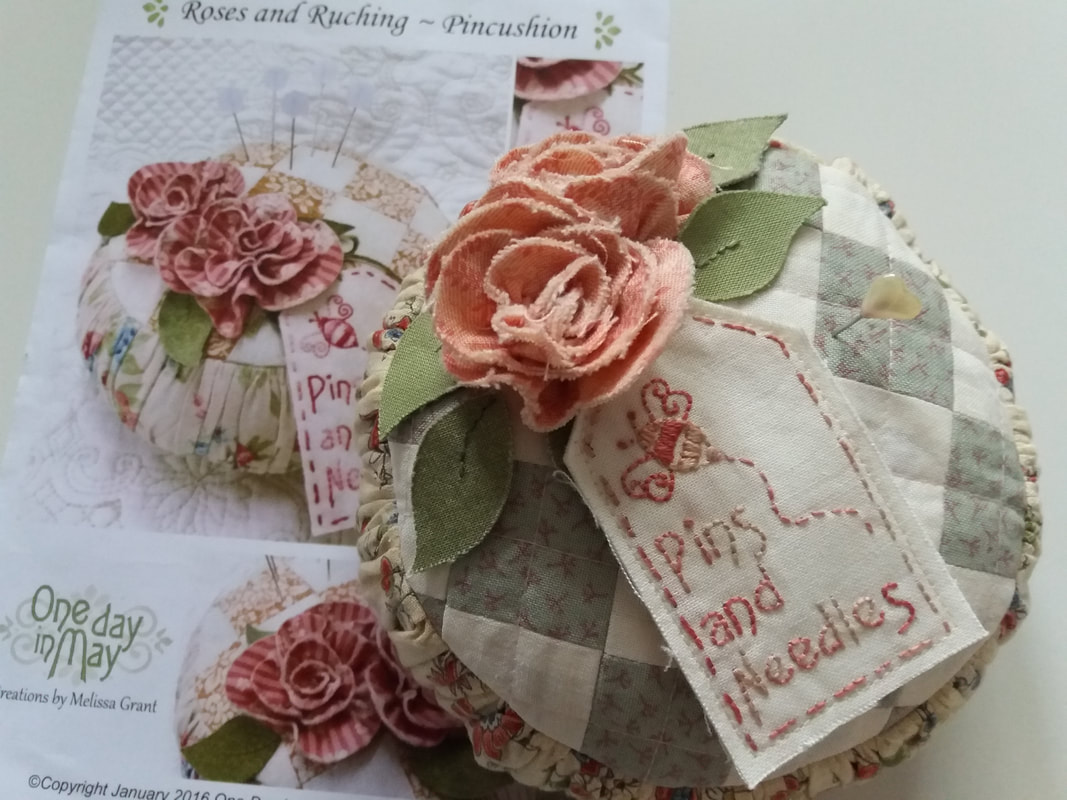
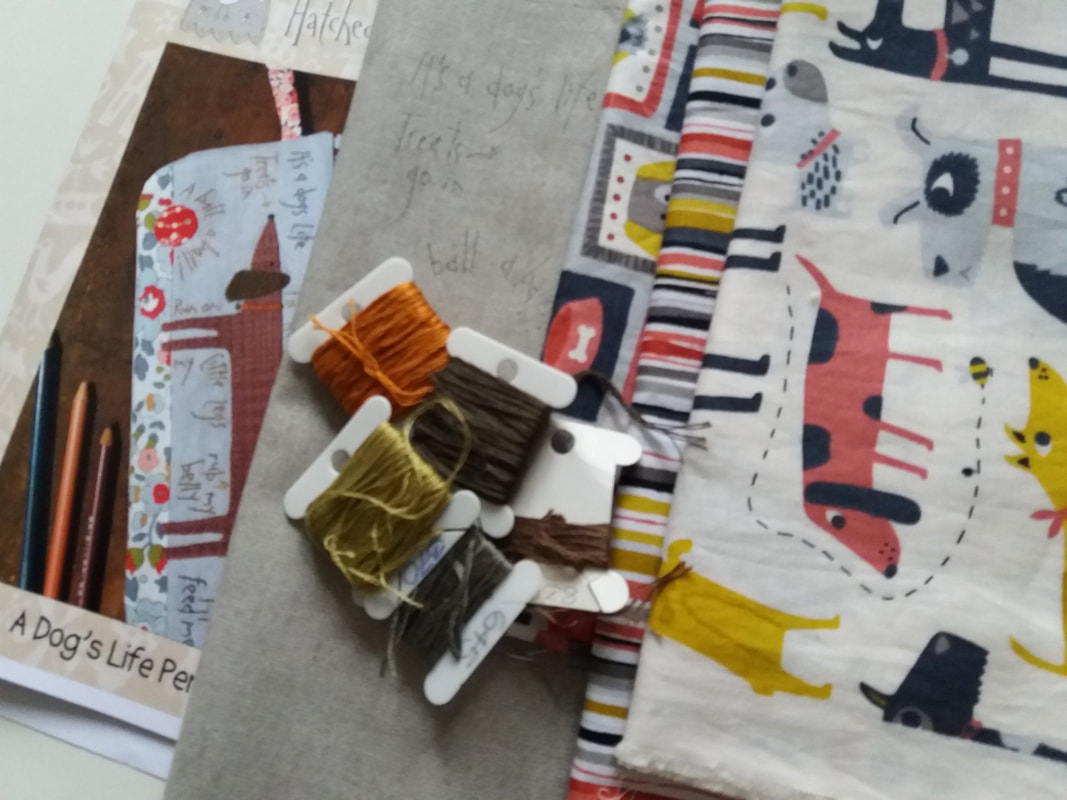
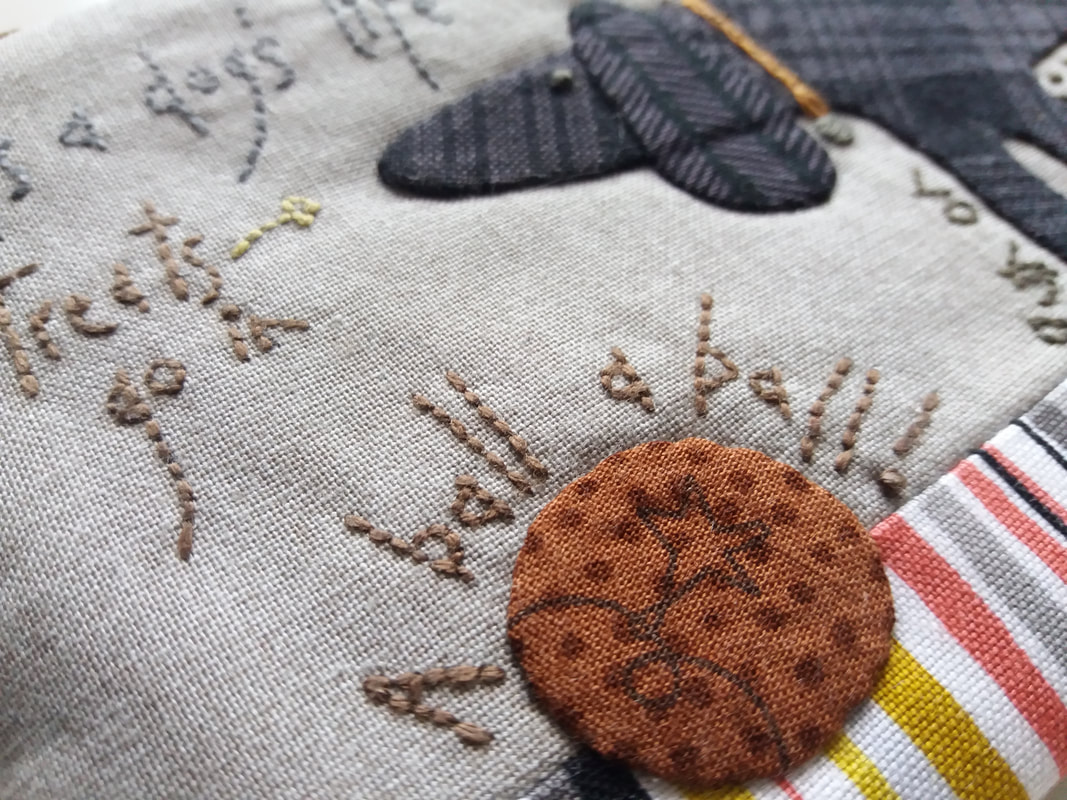
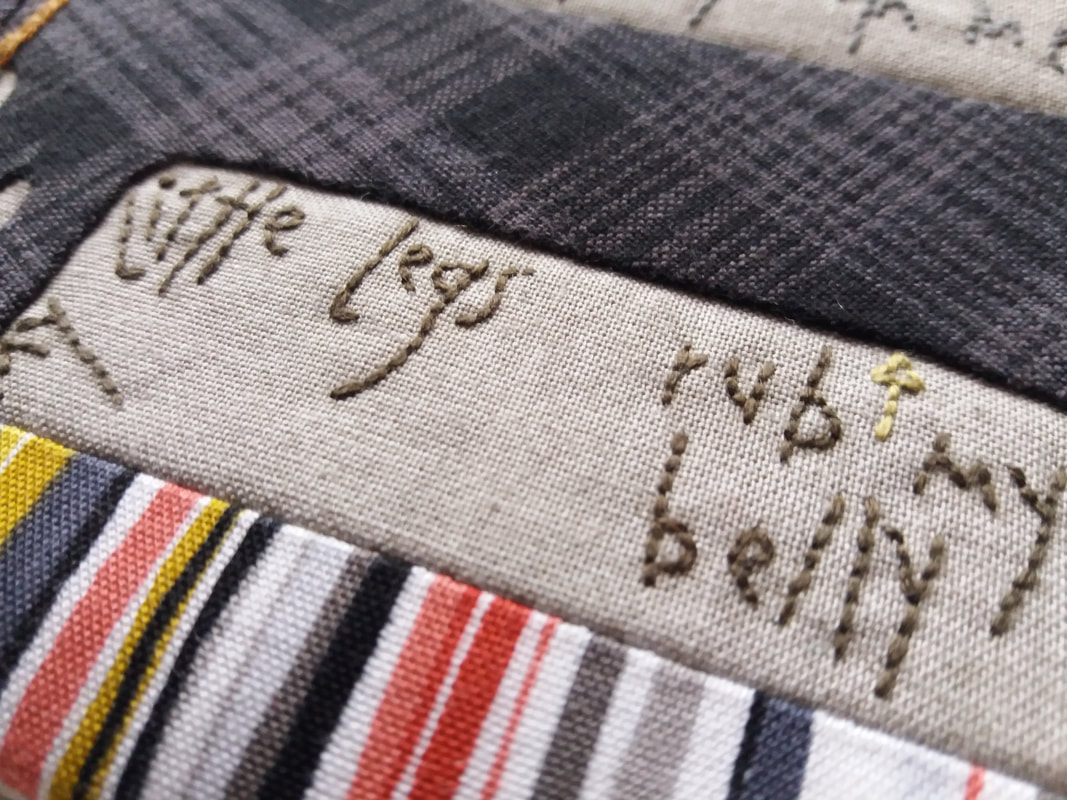
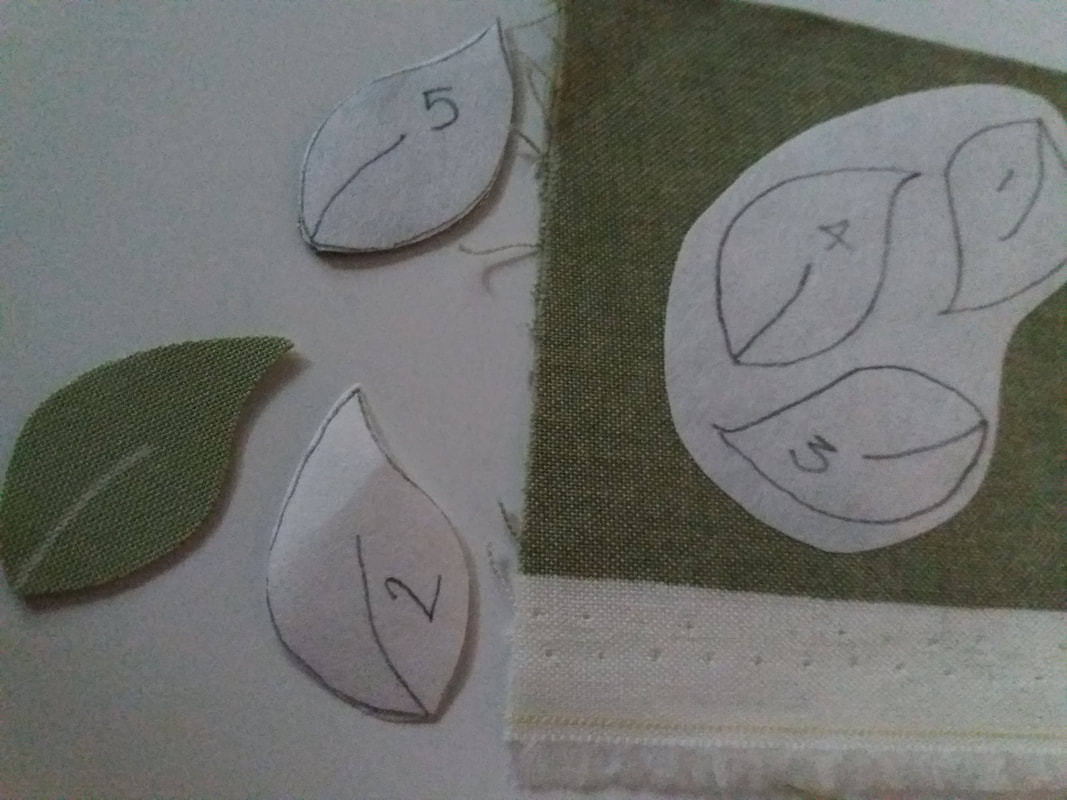
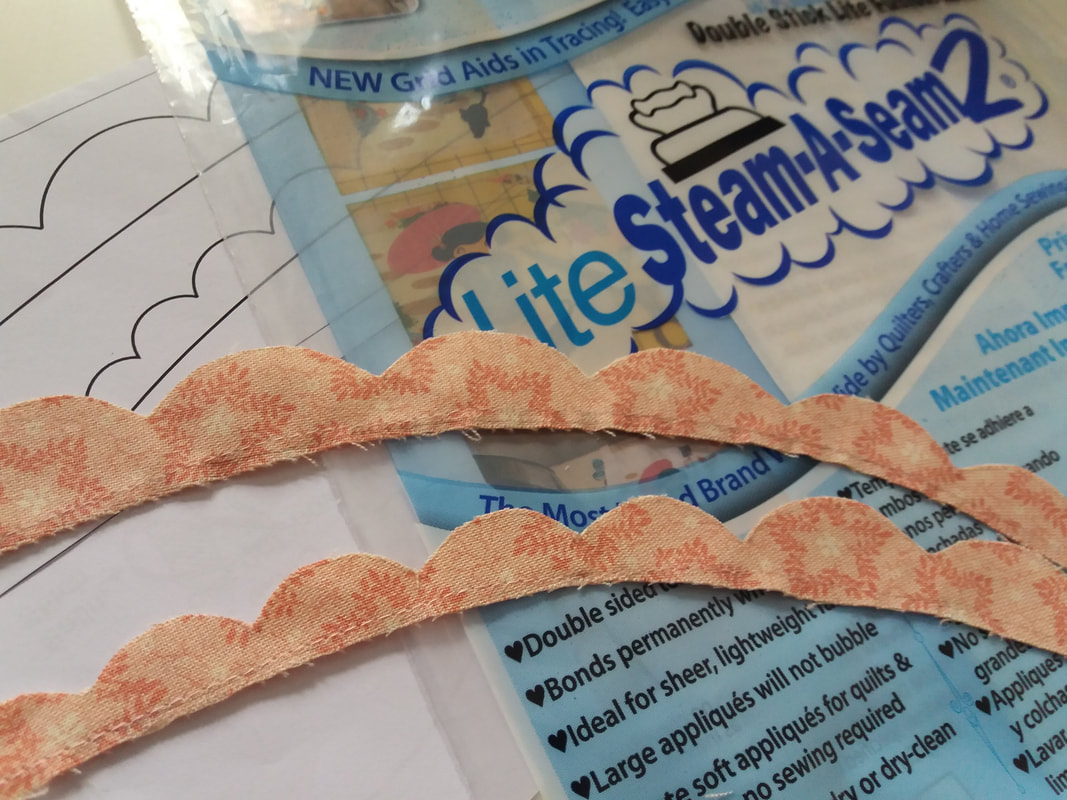
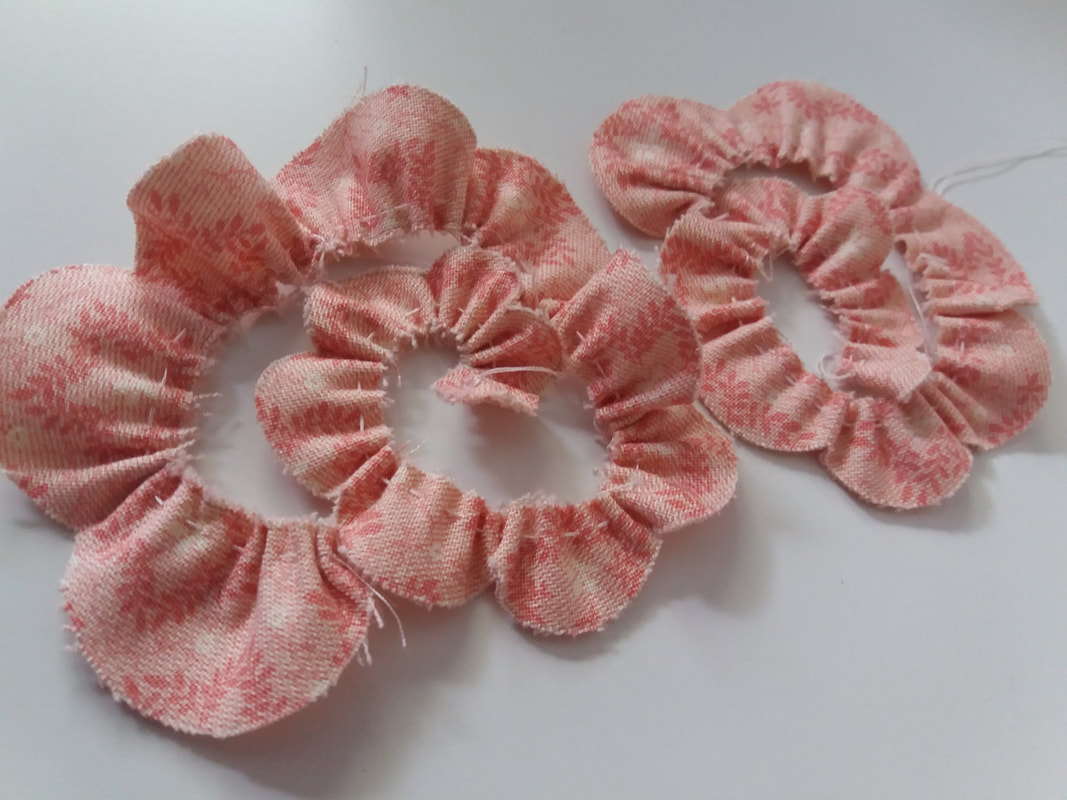
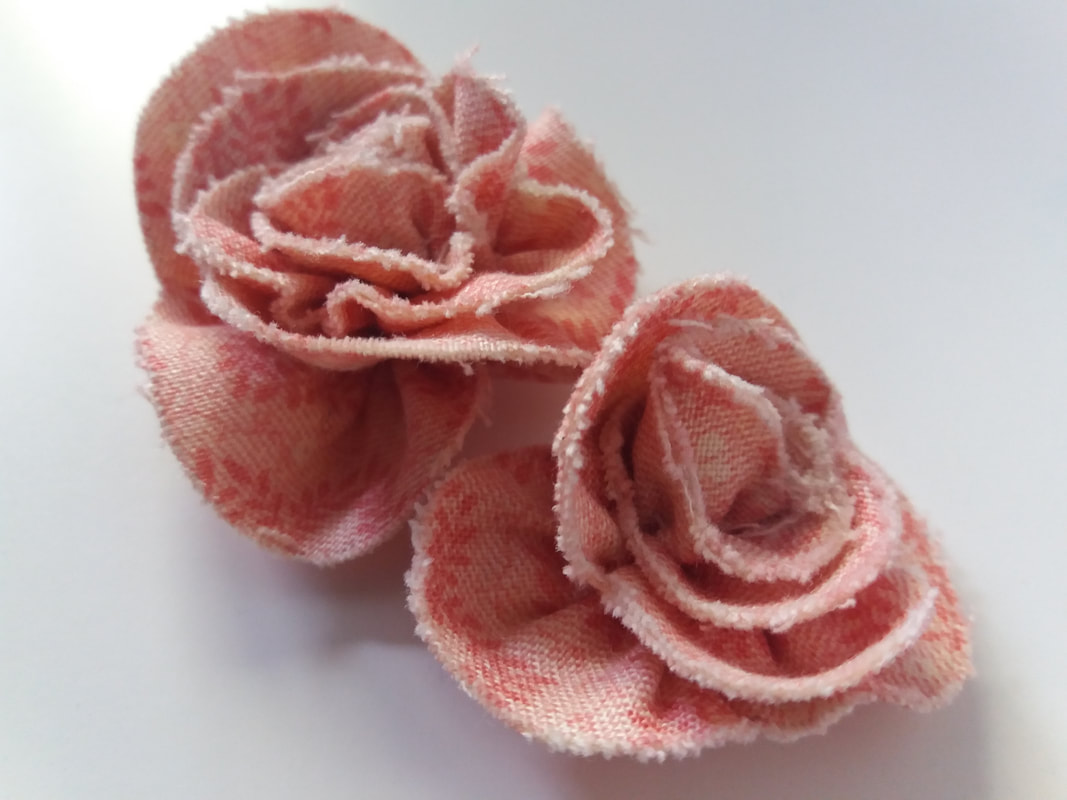
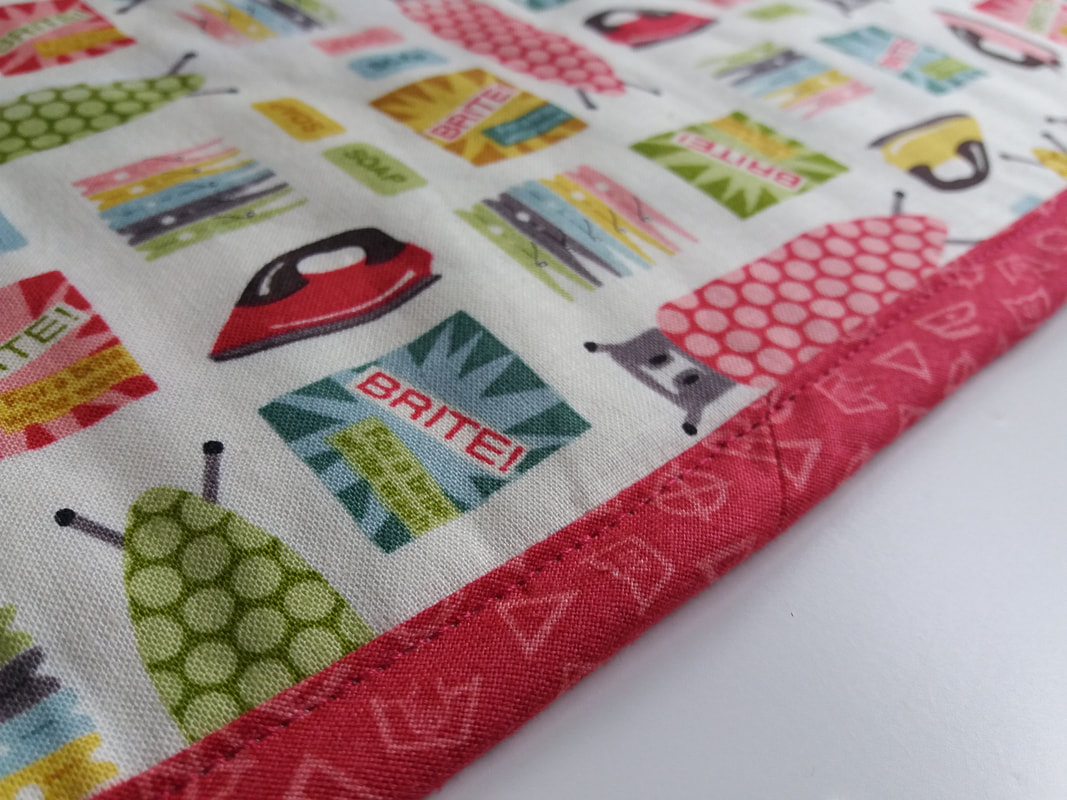
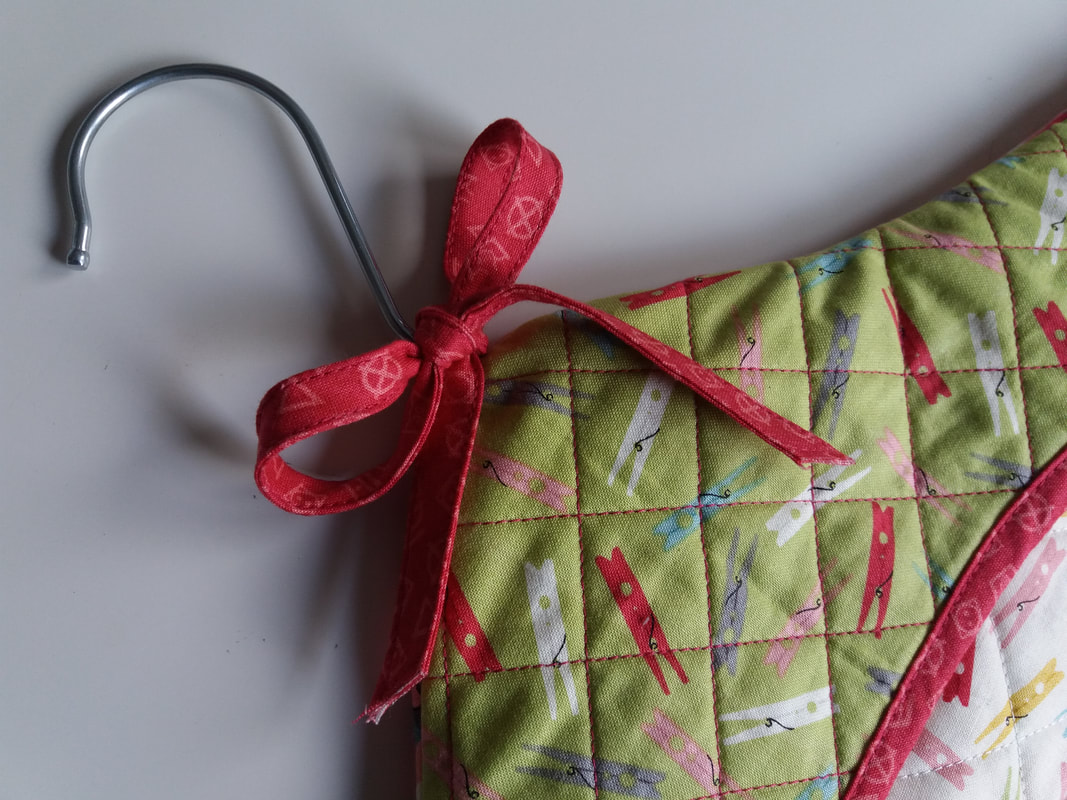
Here's the completed Roses and Ruching Pincushion - this is the second project that I've stitched as a member of the Poppy Patch Posse. This pretty pattern is included in this lovely kit supplied by Poppy Patch, along with all the fabrics, embroidery threads and wadding. I've shared earlier posts on my blog of the hand embroidered label, making the patchwork top, constructing the body of the pincushion and the 3D applique...
Picture
...once the 3D applique has been stitched to the top of this sweet pincushion, I filled it with crushed walnut shells through the opening in the side seam - this was then closed by hand using a fine thread and ladder stitch, ensuring the filling stays in and the stitches don't show. My top tip for buying crushed walnut shells is to try your local quilt shop - it's sold as lizard bedding, and is very ecconomical!...
Picture
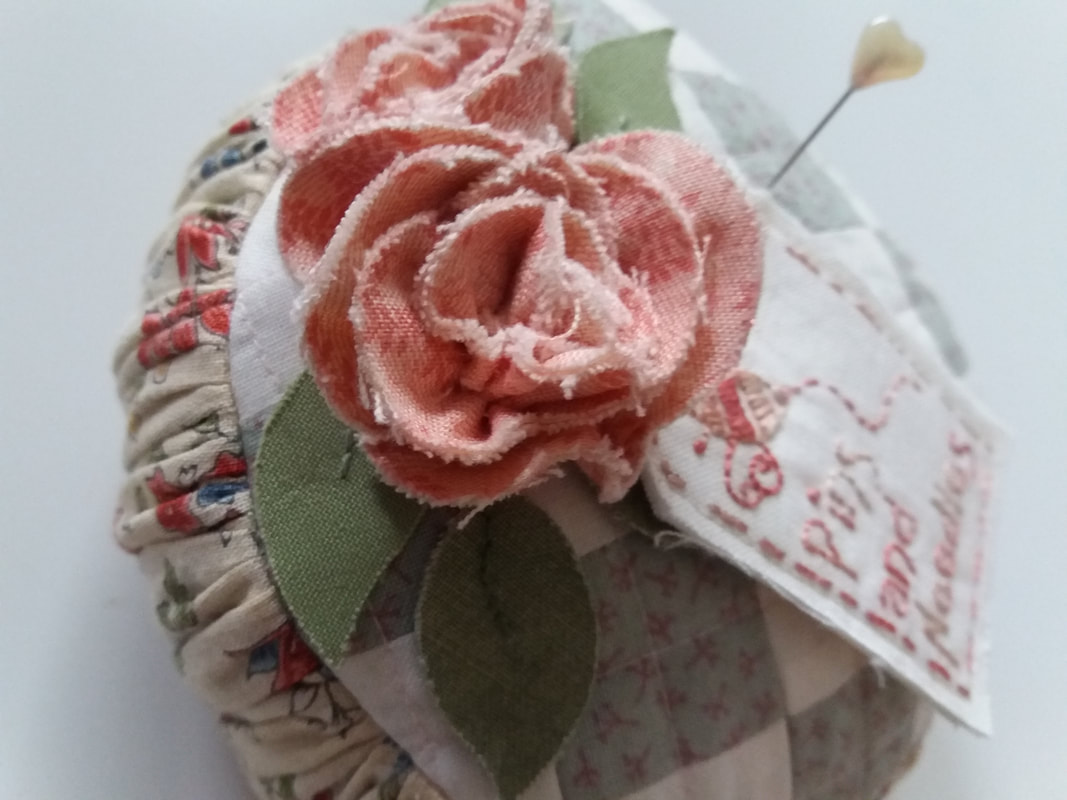
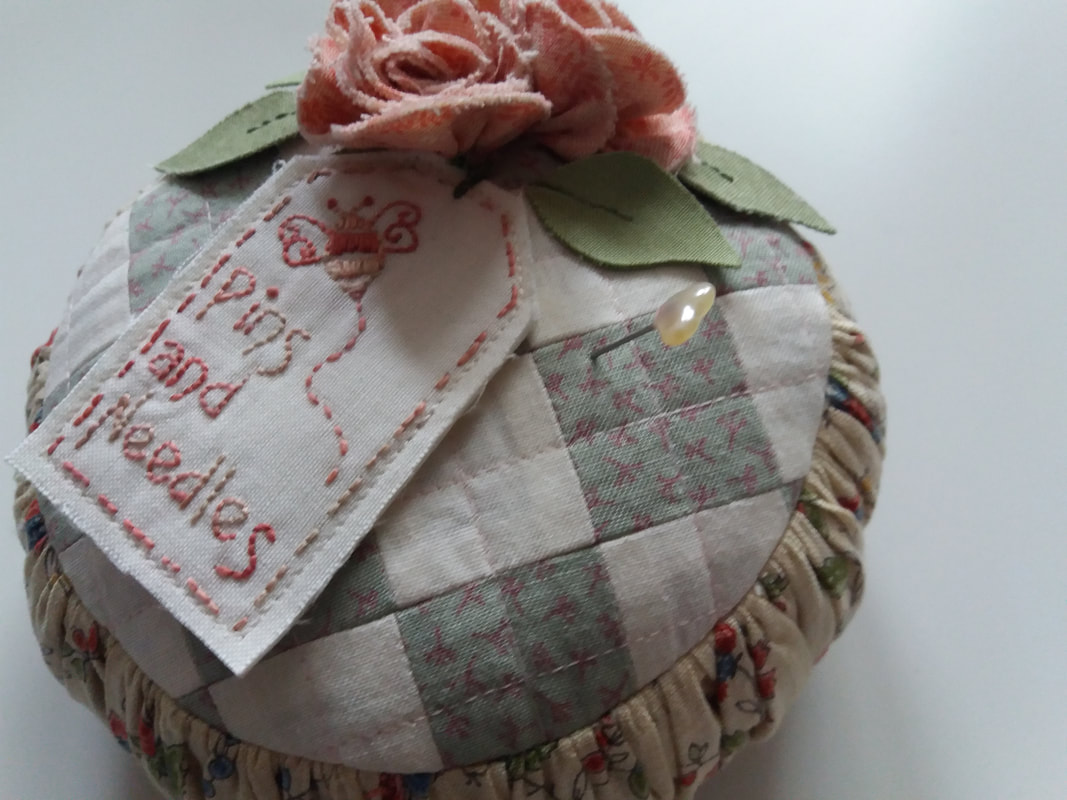
...the hand embroidered label has also been stitched in place, nestling among the roses. This is a really lovely pincushion, which will have pride of place on my sewing table.
If you'd like to make one of these too, the kit for this pincushion was supplied by Poppy Patch - and includes the pattern with full size traceable stitchery design and full size applique templates, all the fabrics, fusible wadding and embroidery threads. The pattern is designed by Melissa Grant of One Day in May Creations. ​
Picture
0 Comments

A Dog's Life Pencil Case

18/11/2021

0 Comments

 
Back in December 2015, I made a baby quilt with these fabrics (from the Patch collection by Henley Studio for Makower UK). I don't normally keep scraps, but these were larger pieces that were put in a "they'll be useful oneday" bag and they were just what I needed for this project! I couldn't resist this pattern by Hatched and Patched - it's A Dog's Life Pencil Case, purchased online from Coast and Country Crafts and Quilts a couple of weeks ago...
Picture
Picture
... this pattern combines 2 of my favourite techniques, hand applique and hand embroidery. The design was traced onto a grey background fabric and I picked a few DMC embroidery threads in colours to co-ordinate with my prints. The hand embroidery was stitched first, then I added the striped "ground" by machine. The original pattern used wool for the applique, however I chose cotton fabrics and used the Apliquick method for turning the edges over. The applique shapes were hand stitched using Aurifil 80wt thread. I fused a piece of Pellon H630 to the wrong side of both the front and the back of the pencil case to give it a bit more structure...
Picture
Picture
...once the zipper is in place the pencil case is machined together and the lining has a gap that is used for turning the pencil case through - although I used fusible wadding on the front and back of the pencil case, I didn't use it for the lining. My favourite stitch for closing seams like this is ladder stitch - small neat stitches that resemble the rungs of a ladder, then when the stitches are pulled together it leaves a nice neat, flat seam, rather than the thicker seam that you'd get with slip stitch...
Picture
Picture
...and you can't see which part of the seam was stitched by hand! Once the lining gap is closed, the lining is puched inside the pencil case and it's ready to be used. As you can see, I even managed to find a zipper in a co-ordinating colour to make my fabrics too - that's the beniefit of have a HUGE collection of zippers..
Picture
Picture
...I pieced the back of the pencil case with the feature print and a piece of grey fabric leftover from the stitchery/applique background, as I wanted the dogs to be the right way up! A small piece of the strip that I used for the "ground" was also used for the zipper tabs - all the instruction for making the tabs and the zipper insersertion are in the instructions, which are really well written and clearly illustrated, making this a simple project for any zipper-phobes!... 
Picture
Picture
...and here's the finished pencil case - filled with my quilting pencils, ready to put in my sewing bag. This would make a great little gift so I may well make more of these!
Picture
Picture
0 Comments

3D Applique

14/11/2021

0 Comments

 
Both the leaves and the roses that are used to embellished on the top of the Roses and Ruching Pincushion are made with 3D applique. They are constructed in the same way, using a piece of fusible webbing that is fused to the wrong side of your fabric. The paper backing sheet is removed then the fabric is folded in half to made a doublesided piece for your applique. The leaf shapes have been traced onto the matt side of a piece of Reynolds Freezer Paper, this is ironed onto your double sided fabric, then cut out on the traced lines. Leaf veins are then drawn on the fabric using a fabric marking pen, ready for stitching on to the top of the pincushion...
Picture
Picture
...the roses are initially made in the same way - I've used Lite Steam-A-Seam 2 as the fusible webbing. Once the traced shape has been cut out of the doublesided roses fabric,a running stitch is made along the raw edge (not along the scalloped edge) and then gathered up...
Picture
Picture
...starting at the smaller end, a bud is shaped with a few securing stitched. The rose takes shape by gently winding the gathered edge around in a spiral, not too tightly, securing the layers with a few stitches as you go. Once the rose is completed, the stitches are secured so it doen't unrvael, then is can be stitched in place on the top of the pincushion.
If you'd like to make one of these too, the kit for this pincushion was supplied by Poppy Patch - and includes the pattern, all the fabrics, wadding and embroidery threads. The pattern is designed by Melissa Grant of One Day in May Creations. 
Picture
Picture
0 Comments

Ironing Board Cover

12/11/2021

0 Comments

 
I've got a small table top ironing board in my sewing studio and it was in desperate need of a new cover, so using one of these gorgeous Wash Day fabrics (by Henry Glass for Makower UK) I've made a new one. Using the old cover as a template, here's the result! I made new padding with cotton batting and Insulbrite as the old one had definitely seen better days, and I also added a layer of wadding underneath the actual cover, so it was a bit more sturdy when I stitched the casing on. My poor old arthritic fingers really didn't like threading the elastic through the casing so I won't make another one in a hurry!...
Picture
Picture
...corded elastic, rather than flat elastic, was used for this project, and I made sure it really was nice and tight before stitching the elastic closed. The layers of wadding and insulbright were also stitched together before adding the cover so the layers don't slip around when it's being used. This particular ironing board has a hole on the back for hanging on a hook, ao it doesn't have to be out all the time, it can be tidied away...
Picture
Picture
and here's my posh new ironing board cover - all ready to be used in my sewing studio. I tend to use my wool pressing mat for most pressing tasks, but this small board will still be very useful. And it's certainly brightened up my ironing station/cutting table! 
Picture
0 Comments

A New Pegbag

10/11/2021

2 Comments

 
Sometimes you make a project and the fabrics are just PERFECT - and this was certainly the case when I decided to make a new pegbag! These fun fabrics are by Henry Glass for Makower UK and had been purchased back in 2013 from the Cross Patch stall at the Autumn Quilt Festival in Duxford. Although I'd made a couple of pegbags at the time (they'd been sold on my stall at a local Christmas Craft Fair) I still had a few pieces leftover. Firstly, I drafted a pattern by drawing a rectangle, then tracing around a coathanger for the shaped top (note to self - this was the smallest coathanger I had in my wardrobe, a child's hanger would be much better for future ones) allowing 1/2" for a seam allowance all around. Rather than make a bag using a single layer of fabric, I've quilted co-ordinating fabrics together with Pellon H630 for the wadding and Aurifil 40wt thread. The front of the peg bag was constructed using 2 sections, bias strips were cut and joined together for binding around the curved opening and the 2 sections were then joined together, making sure there is room for the coathanger to be inserted...
Picture
Picture
...once the front sections were joined together, they were stitched to the back of the peg bag. Again, bias strips were cut and stiched along the raw edges as I like my projects to look as neat on the inside as the outside...
Picture
Picture
...obviously a tiny opening was left at the top of the pegbag to allow the hook to go through for hanging on the washing line. I used a small piece of leftover binding to make a smart bow which has been stitched to the top of the bag to neaten it. The second picture shows the back - this fabric collection really is so pretty...
Picture
Picture
...and here's my finished pegbag - 2 coordinating fabrics were pieced together for the lower portion of the bag. This was such a fun project to make, right from drafting my own pattern to finally stitching on the bow! Now I'll have the poshest washing line in Suffolk and my pegs have got a cosy new home! 
Picture
2 Comments
    Picture

    About me...

    Hi - welcome to my quilting blog! My passions are my family, my dog, my friends and sewing, not necessarily in that order! 
    ​​I live in Suffolk, not far from the coast, surrounded by the beautiful countryside.  
    ​If you want to share or pin any of my pictures, please link back to my blog.

    Picture
    Picture
    Picture
    Picture
    Picture
    Picture
    Picture
    Picture
    Picture
    Picture
    Picture
    Picture
    Picture
    Picture
    Picture
    Picture
    Picture
    Picture
    Picture
    Picture
    Picture
    Picture
    Picture
    Picture
    Picture
    Picture
    Picture
    Picture
    Picture
    Picture
    Picture
    Picture

    Archives

    January 2023
    December 2022
    November 2022
    October 2022
    September 2022
    August 2022
    July 2022
    June 2022
    May 2022
    April 2022
    March 2022
    February 2022
    January 2022
    December 2021
    November 2021
    October 2021
    September 2021
    August 2021
    July 2021
    June 2021
    May 2021
    April 2021
    March 2021
    February 2021
    January 2021
    December 2020
    November 2020
    October 2020
    September 2020
    August 2020
    July 2020
    June 2020
    May 2020
    April 2020
    March 2020
    February 2020
    January 2020
    December 2019
    November 2019
    October 2019
    September 2019
    August 2019
    July 2019
    June 2019
    May 2019
    April 2019
    March 2019
    February 2019
    January 2019
    December 2018
    November 2018
    October 2018
    September 2018
    August 2018
    July 2018
    June 2018
    May 2018
    April 2018
    March 2018
    February 2018
    January 2018
    December 2017
    November 2017
    October 2017
    September 2017
    August 2017
    July 2017
    June 2017
    May 2017
    April 2017
    March 2017
    February 2017
    January 2017
    December 2016
    November 2016
    October 2016
    September 2016
    August 2016
    July 2016
    June 2016
    May 2016
    April 2016
    March 2016
    February 2016
    January 2016
    December 2015
    November 2015
    October 2015
    September 2015
    August 2015
    July 2015
    June 2015
    May 2015
    April 2015
    March 2015
    February 2015
    January 2015
    December 2014
    November 2014
    October 2014
    September 2014
    August 2014
    July 2014
    June 2014
    May 2014
    April 2014
    March 2014
    February 2014
    January 2014
    December 2013
    November 2013
    October 2013
    September 2013
    August 2013
    July 2013
    June 2013
    May 2013
    April 2013
    March 2013
    February 2013
    January 2013
    December 2012
    November 2012
    October 2012
    September 2012
    August 2012
    July 2012
    June 2012
    May 2012
    April 2012
    March 2012
    February 2012
    January 2012
    December 2011
    November 2011
    October 2011
    September 2011
    August 2011
    July 2011
    June 2011
    May 2011
    April 2011
    March 2011
    February 2011
    January 2011
    December 2010
    November 2010
    October 2010

    RSS Feed

    Picture
    Picture

    Blogs I follow

    A Quilt Lady
    A Quilting Life
    Abyquilt
    Anne-Grethe's quiltblog
    Anne Marie Quilt
    Bente Malm Quilte-Design
    Bloom
    Cinderberry Styitches
    Daisy made it
    Dilly Dimple
    Karis Quilterier
    Evas Quilterom
    Erickaeckles
    Fantasia Yarns
    Gail Pan Designs
    Hanne's Quilt Corner
    Halfpenny Home
    I'm a Ginger Monkey
    J-quilts
    Just Jude Designs
    Kviltstina
    Leanne's House
    Liv Aagots Quilteblogg
    Lily's Quilts
    Litamora's Quilt & Design
    Lynette Anderson Designs
    Merete's Quiltestue
    Mona's quiltblog
    Pam's Paradise Stitching
    Pia Si Sia
    Random Ramblings
    Sigrun's blog
    Sølvi's blog
    U-handblog
    ZewNice

     UK shops

    These are the UK shops that I use to purchase my quilting supplies - fabrics and threads etc.
    Bramblepatch
    Buttonberry
    Coast and Country Crafts
    Craft Den
    Cross Patch
    Emma's Fabric Studio
    Fiona's Fabrics
    Glenroy Designs
    Halfpenny Home
    Hulu
    J-quilts
    KIS Quilting
    Patchwork Chicks
    Quilter's Cloth
    Quilters Haven
    Sew and So's
    The Eternal Maker
    The Fat Quarters
    The Quilt Room
    U-handbag

    Australian links

    Cookies and Cream Craft
    Homespun magazine
    Little Quilt Store
    Quilt Fabric Delights
    Under The Mulberry Tree

    Scandinavian links

    Lapp-Elisa Quilts HB
    Lappedesign
    Lappedilla AS
    Myquilt
    Northern Quilts
    Quiltegården
    Quiltekroken
    Quiltemagasinet
    Quiltespecialisten
    Sy-Sammen