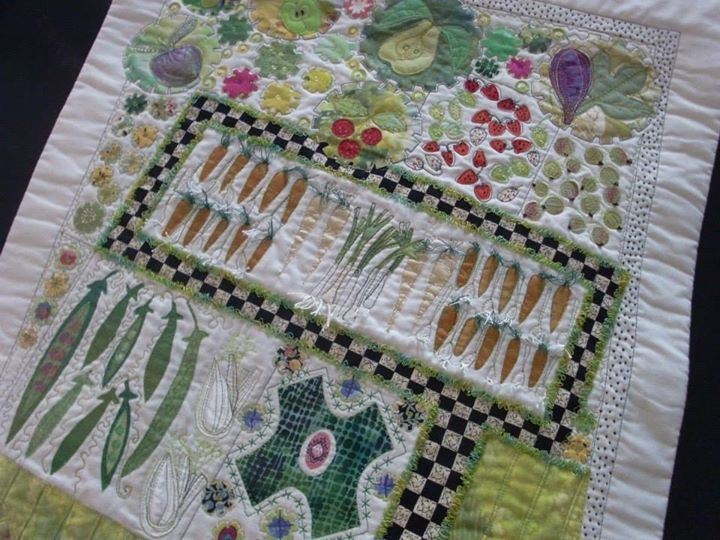
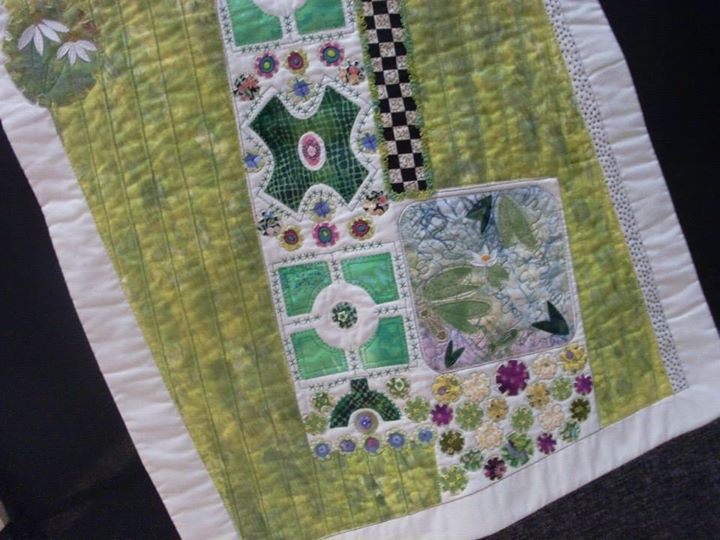
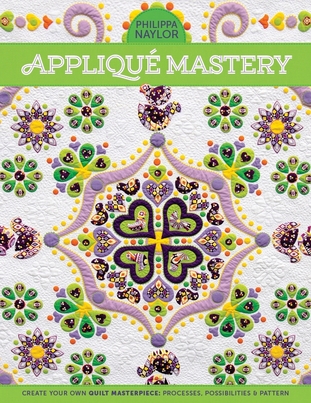
What a wonderful week away I've had with my friends Helen and Linda, and 7 other quilters, in Yorkshire on a quilting course with Philippa Naylor. We stayed in a superb B and B, Highfield Farm, in Southburn, near Driffield (where we've stayed for the past couple of years too) - and we were all made extremely welcome as usual. Before I share some pictures of the quilted projects I made while I was away, I just had to show you a few pictures of where we were staying, and also some pictures of the delicious food that was provided by Highfield Farm as part of our course... 
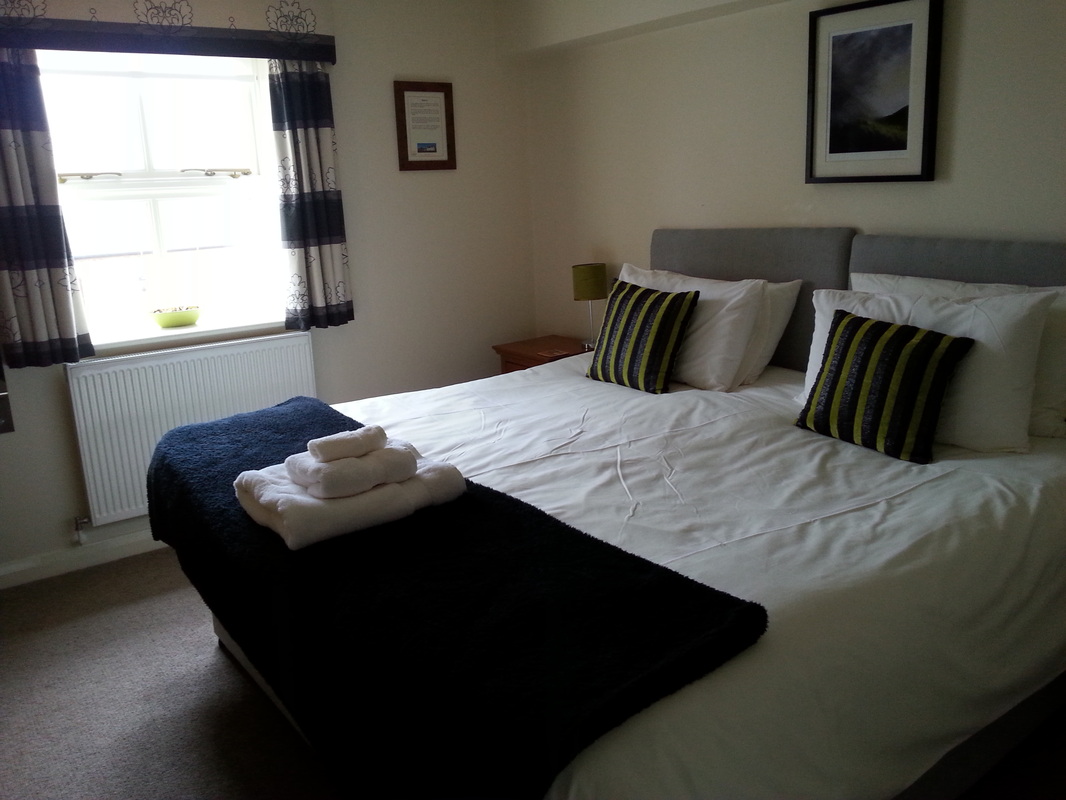
...my room, "Hutton", was very comfortable as you can see, and the view from my window was across open fields. It was so peaceful, and very relaxing. It was a shame I had to come home after just a week!... 
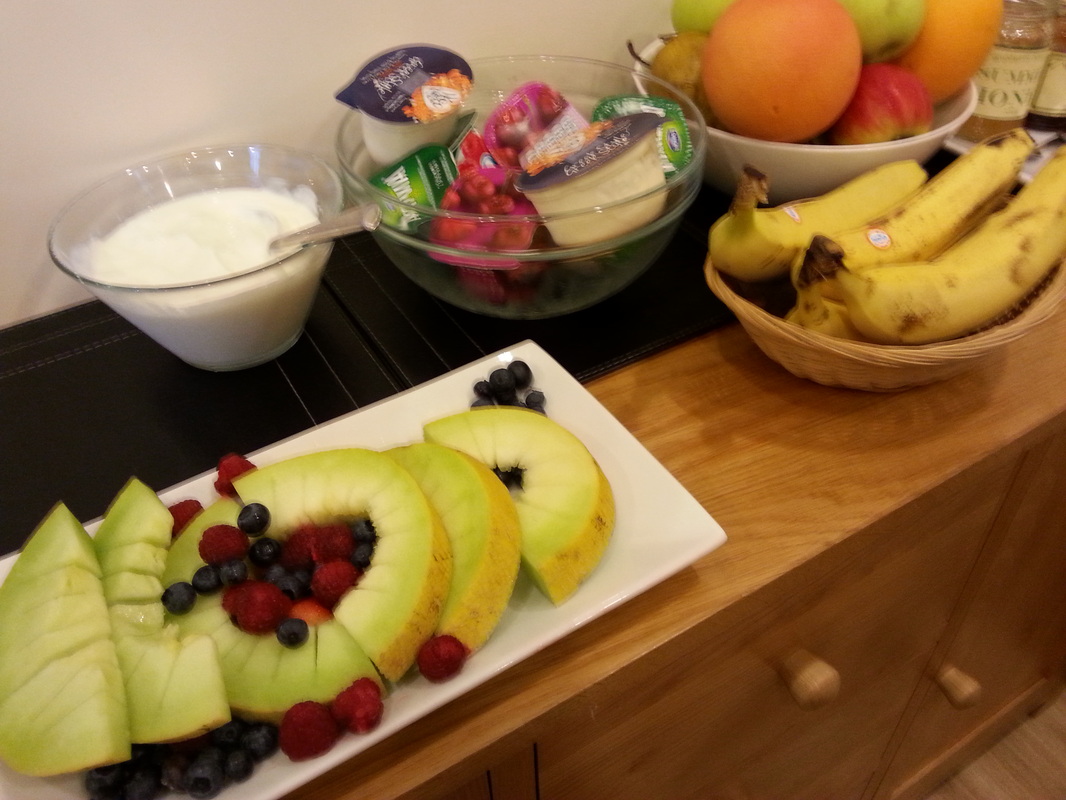
...Highfield Farm is also the base for the Yorkshire Wold Cookery School - maybe I should have another holiday their to refine my cooking skills! The meals were all delicious, and we were lucky enough to have evening meals provided for us there as well as our breakfasts... 
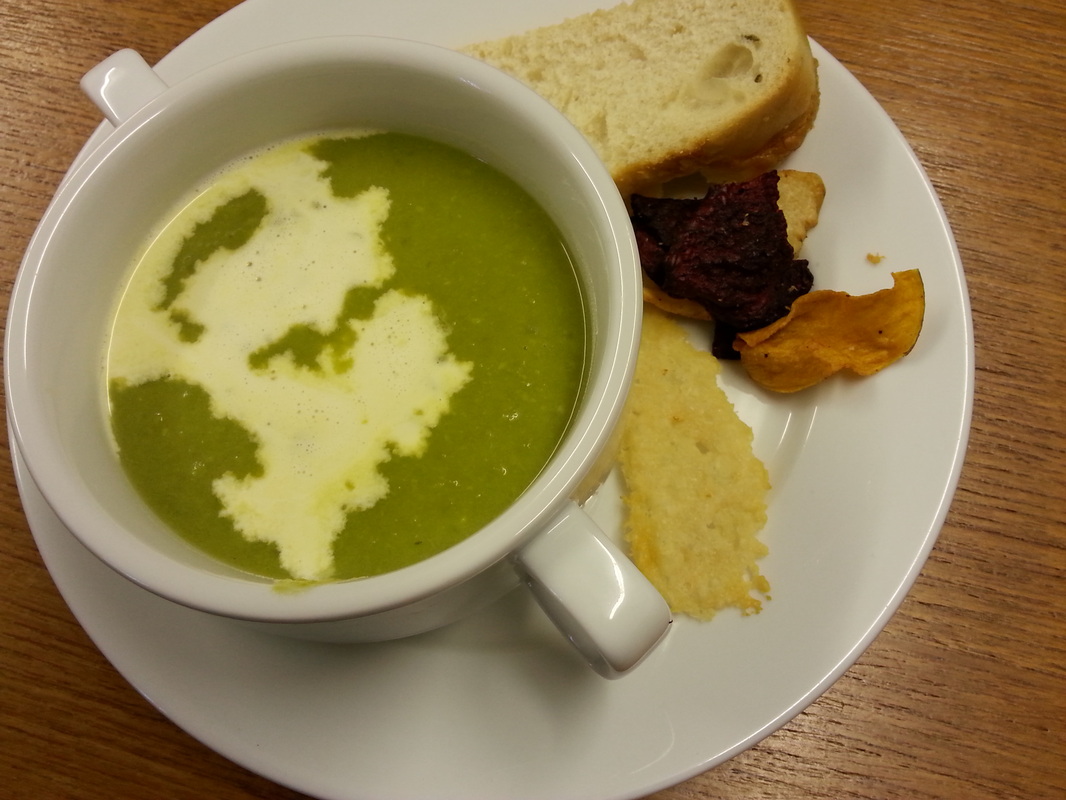
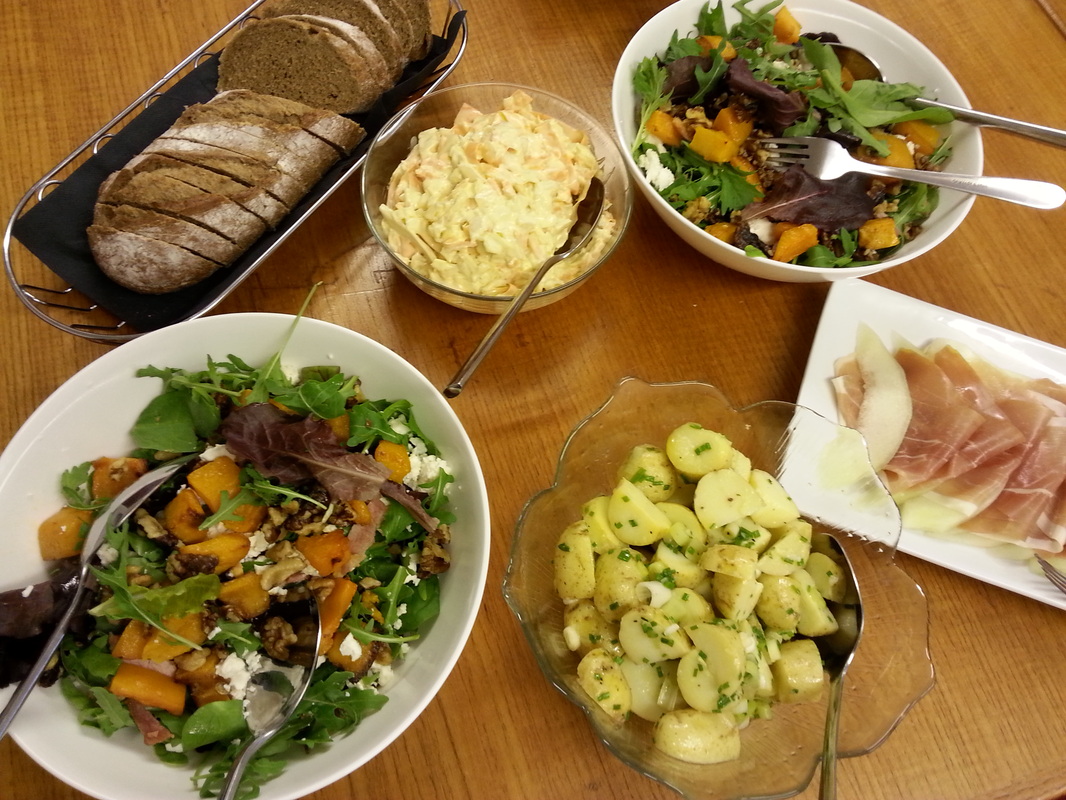
...lunches were provided by the staff at Highfield Farm too - we had a superb menu that ranged from pea and mint soup with blue cheese focaccia bread, parmesan crisps, beetroot crisps and vegetable crisps, to caramelised walnut and butter nut squash salad, prosciutto and melon salad, and Womersley vinegar potato salad. As you can see from the pictures, it really was yummy... 
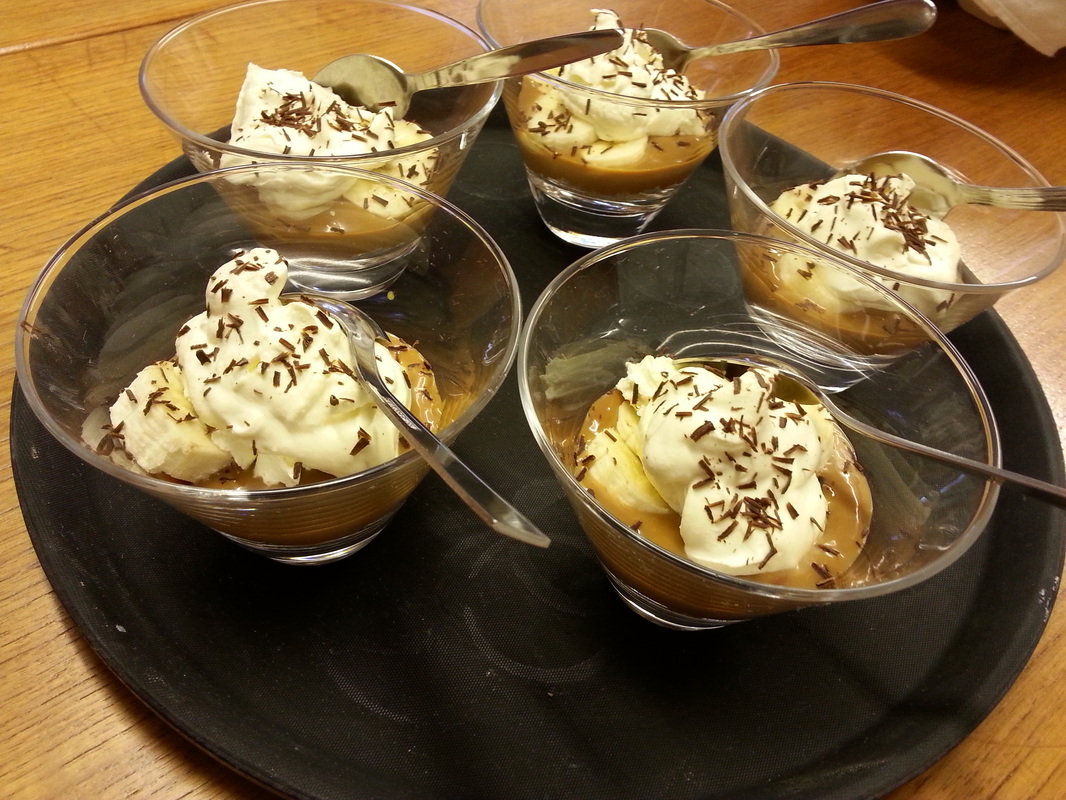
...we really were spoiled, and the puddings were absolutely delicious too - especially these Banoffee Pie puddings!! We were all very well looked after, and I shall look forward to going back there again next year - and maybe I can squeeze in a holiday there with Mr F too, as there are lots of places to explore in that part of Yorkshire.
2 Comments
Last year my friend Lynette's son Eddie married his beautiful bride, Emma. I had started a very special gift for them soon after the wedding, using one of their wedding photographs, then I was distracted by other projects, until finally a few weeks ago it was completed. Initially a selection of vintage fabrics, lace and buttons were collected together. I'd printed the photograph onto an EQ printable fabric sheet (I buy packets of these from Quilters Haven). This project was quilted very simply with lots of straight rows using the quilt-as-you-go method. Some cream lace was added, and some vintage buttons from my button tin were used to embellish it... ...the back was made with some sepia-toned fabric depicting vintage ladies in their lingerie and also some fabric that had once been a Laura Ashley duvet cover (I'd had this as a wedding present many years ago and although it had seen better days, I was still able to put it to good use). A zipper is hidden under the flap, and one of my labels was added to the side seam before the binding was stitched into place... ...and here is the finished project - this was posted out to Emma a couple of weeks ago, and arrived safely in Australia in time for their 1st wedding anniversary.
I'm having a great time on a quilting holiday in Yorkshire with my friends Helen and Linda, being taught by Philippa Naylor. Today we had a "show and tell" session and what a surprise I had as this quilt was being shown. When I was at the Festival Of Quilts in August, I took a photograph of this very same quilt - it's called "Up The Garden Path" and was made by Jill Gray - and would you believe this - Jill is on the quilting course with me! Anyway she kindly agreed for me to get a picture of the quilt with her too... ...and if you click on the pictures below you can see them enlarged. There is more info over here about this quilt, from when I blogged about my favourite quilts at the FOQ back in August.
It's time for my annual trip to Yorkshire with my friends Helen and Linda for our annual quilting holiday! We're staying at a fabulous B and B, Highfield Farm, and we'll have a week of quilting being taught by the fabulous Philippa Naylor! (Philippa has a new book that has just been published, "Applique Mastery). This is the third year running that I've been, so you'd think I'd know what to pack by now - but there's always one more reel of thread, and one more fat quarter that I just NEED to squeeze into my suitcase. And yes I have packed one or two items of clothing to wear too, and some shoes, and a bit more fabric! I'll take lots of pictures, of the B and B, and the beautiful countryside, and the quilting, and the food - (I forgot to mention the food is simply divine at Highfield Farm) - anyway, I'll tell you all about it when I get back next week.
A few weeks ago, when I was at the Festival Of Quilts, I bought this pattern "Garden Pincushions" by Lynette Anderson Designs, along with a small bundle of fabrics also designed by Lynette, "Hollyhock Cottage", for Lecien. The pattern included 2 large raw wood buttons to decorate the completed pincushions, and 2 stitchery designs. I traced the design onto the textured fabric, fused a small piece of stabiliser onto the back, and was ready to start stitching... ...once the stitchery was completed and the borders attached, the front and back were stitched together using a very small machine stitch, leaving an opening for turning through to the right side. I'd made an inner lining with calico too for the filling. This was stuffed with crushed walnut shells that I'd bought online from Creative Grids UK, and the opening was closed using ladder stitch. Finally buttons were added as decoration. I used one from my button tin for the back... ...and the raw wood button that came with the pattern was used to decorate the front. I used some very strong thread to sew these buttons into position. Now I have a pretty new pincushion to use when I'm sewing. And what will I do with the other button that is spare? Well I might just make another one so I've got a spare pin cushion ;)
This quilt top was made a few years ago, as a sample for a class that I taught. This pattern is called "Pinwheel Puffs" (it was part of the "Breakfast Club" programme held a few years ago at my local quilt shop) and was made with a Jelly Roll - this one is "Rural Jardin" by French General for Moda. Each month you were given the cutting directions and a total number of 2.5" strips of fabric. Of course you could just cut the strips yourself and use your stash, but it was much more fun to use a Jelly Roll and Moda certainly has a huge selection to chose from. I'd made this top and put it away as I wasn't really sure how I wanted it quilted. A few weeks ago I took it over to Jeanette at J-Quilts and she worked her magic... ...and just look at the wonderful quilt I've collected from her! I used a plain fabric for the binding, also from French General, that I bought last week from my local quilt shop, Quilters Haven. I used a narrow binding for this one, machined into place on the front of the quilt, and hand stitched to the back. Janette longarm quilted 2 of these smaller quilts for me recently, and used this lovely French General fabric for the backing too. As it was extra wide fabric, she was able to quilt them both with one width of fabric. Anyway, this morning I finally managed to get a picture of this pretty quilt in the sunshine! I simply LOVE this one - and may have to make this pattern again!
I was clearing out a cupboard yesterday, and came across this wall-hanging that I'd made a few years ago (not sure if it was 2006 or 2007!!). This was made on a class I went to at my local quilt shop, Quilters Haven, and the technique we were learning was another method of applique. The pattern was taken from the book "Stitch and Split Applique" by Jayme Crow and Joan Segna. I named this wall-hanging "Stormy Sunflowers" and my inspiration had been driving past a field of sunflowers in a neighbouring village during a storm... ...the background was quilted using a decorative stitch before the applique was added. The leaves are embellished with green beads, and I copied the leaf motif for free-motion quilting in the borders. This was one of my first attempts at FMQ, so the tendrils are probably a bit more curly and wild than they should have been! The background "field" and "sky" of this wall hanging was made with batiks, also the borders and bindings. The stems, leaves and the sunflowers themselves were made from an assortment of fabrics from my stash. The sunflower centres were embellished with large buttons.. ...it seemed perfect to use this sunflower print for the back of the quilt! I haven't got any sunflowers in my garden this year, but Mr F has grown some very nice Rudbeckia, which compliments this wall hanging very nicely. Now I wonder if he'd notice if I picked a few of these to have in the lounge ;) ... ...anyway, back in 2007 I'd entered this wall hanging in a "Quilt Walk Around Wickham Market" that was organised by my local quilt shop, Quilters Haven. Quilts were hung all around the market square, in the church and in local shops too. This wall hanging was displayed in the hardwear shop.
No, it's not actually me that's having a jolly jaunt at the sea-side, but I have taken my Bernina along for a summer holiday at the Felixstowe Sewing School, that provides servicing and spa treatments for sewing machines. I'm off on a week-long quilting holiday later this month with Philippa Naylor, and need to have my machine in tip-top condition, so I've left my machine to have a bit of a pamper! I'll be machine-less for a few days, but thank fully I've prepped some hand-sewing instead so I don't miss my Bernina TOO much!
My daughter recently celebrated her 21st birthday, and as she didn't want a "big" present we decided to get her 21 presents. Some were big-ish, some were small, and a couple were homemade. I made her a quilt, and also made her a small cosmetic bag. This was based on a pattern "Anna's Sminkepung" by the Norwegian designer AnnAKa. The zipper has a beautiful antique-style key charm - I'd bought a selection of these zippers from Lynette Anderson a few weeks ago from the Festival Of Quilts in Birmingham (and there are more available from her online store). This cosmetic bag was filled with a few girly-goodies and I'm sure she'll put it to good use :)
I bought a bundle of beautiful batik fat quarters from Kaleidoscope when I was at the Festival Of Quilts a few weeks ago, in shades of turquoise and teal, as I had a very special project in mind. My daughter was going to be 21 and I wanted to make her a special quilt for her birthday. I decided to use a simple pattern for the quilt design as I needed to make a quilt top that was quick to piece together. "Turning Twenty" by Tricia Cribbs was the perfect choice of pattern... ...this quilt top pieced together really quickly, and is a great quilt to make to showcase gorgeous fabrics like these batiks (my regular blog followers will know that I've made quite a few of these "Turning Twenty" quilts!) As you can see, it was quite a blustery day when I did this photo-shoot... ...once this was pieced together, it was taken to Janette at J-quilts to turn it into a fabulous quilt - and she certainly did an excellent job! My daughter loves dragonflies, so "Dragonfly Pond" seemed the perfect quilting design for this one. The backing fabric was an extra-wide Moda fabric (this was from the Shangri-La collection by 3 Sisters for Moda) that had been in my stash for simply ages, and was the perfect colour. How spooky is that! Unfortunately the batik fabric that I'd ordered from Kaleidoscope for the binding didn't arrive in time (so much for ordering Priority Post - 5 days later and I was still waiting - I won't order from that company again if I need fabric urgently!) but luckily there was just enough fabric left over from the backing to make the binding too... ...I was so pleased to be able to get this finished in time for my daughter's special day, although I did burn a lot of midnight oil getting the binding finished! Alice really was thrilled with it, and that made me a very happy mummy :) Thank you SO much Janette - your quilting was superb as always!
|
About me...Hi - welcome to my quilting blog! My passions are my family, my dog, my friends and sewing, not necessarily in that order! Archives
February 2025
Blogs I followUK shopsThese are the UK shops that I use to purchase my quilting supplies - fabrics and threads etc.
Australian linksScandinavian links |