Here's my Seaside Town quilt again - on location in MY local seaside town, Aldeburgh. This picturesque town is just a 20 minute drive from where I live. Whilst I was busy taking photographs on the beach amongst the fishing boats and lobster pots, I just couldn't resist getting a video of my quilt blowing in the wind! I'm not sure what the local fishermen thought of me as I was trying to arrange my quilt in an artful way, and clicking away with my camera - and a few people walking along the beach looked quite surprised too - it's probably not what they were expecting to see when they were trying to admire the sea view!
|
When my quilts are completed, I always try to get a picture of them outside, and this must be the ultimate photoshoot - taking photographs of my Seaside Town quilt in my local seaside town! I spent a bright but breezy morning on the beach at Aldeburgh, amongst fishing boats and lobster pots with the north sea in view and my quilt flapping in the wind - it was absolutely the best photoshoot ever! Although goodness only knows what the fishermen thought of me as I draped my quilt over one of their boats! This pattern is by Lynette Anderson Designs, and was bought as a BOM from Cross Patch, an online shop here in the UK. All the fabrics used were also designed by Lynette. The hand embroidery was all stitched using hand dyed Valdani threads, and the hand applique was made using the applique paper and glue stick method, along with Apliquick tools. It has been free hand custom quilted by J-Quilts. Finally it has been embellished with hand painted wooden buttons. 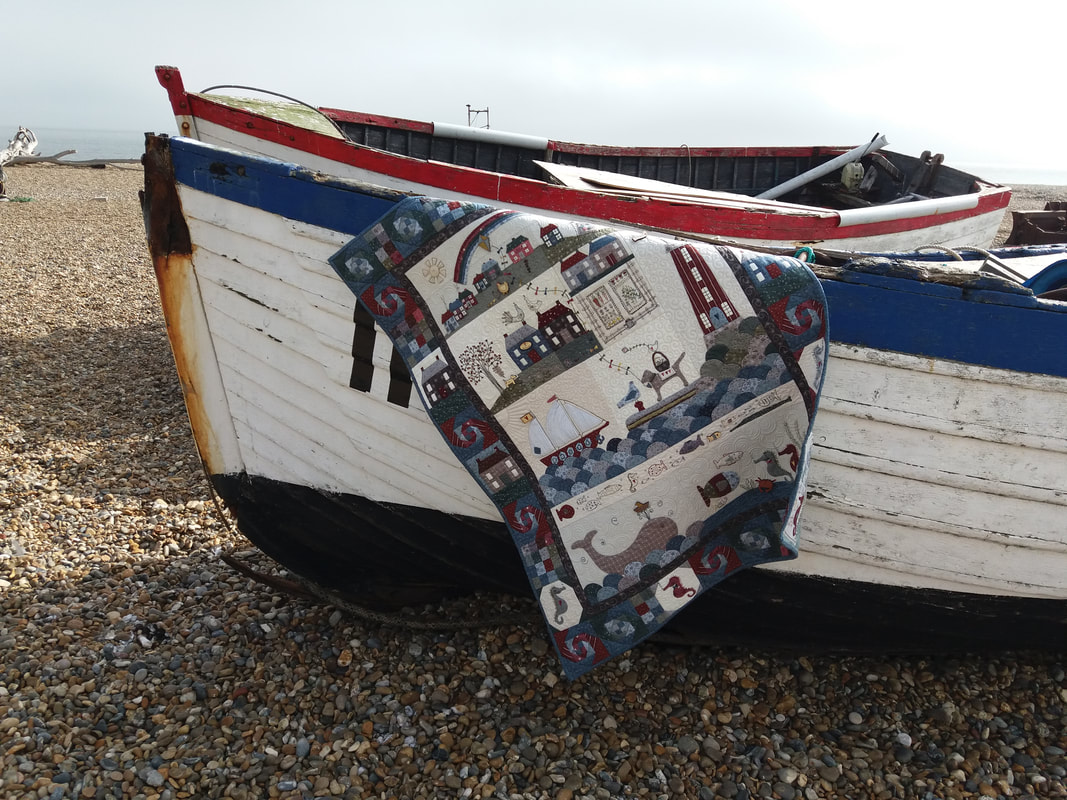 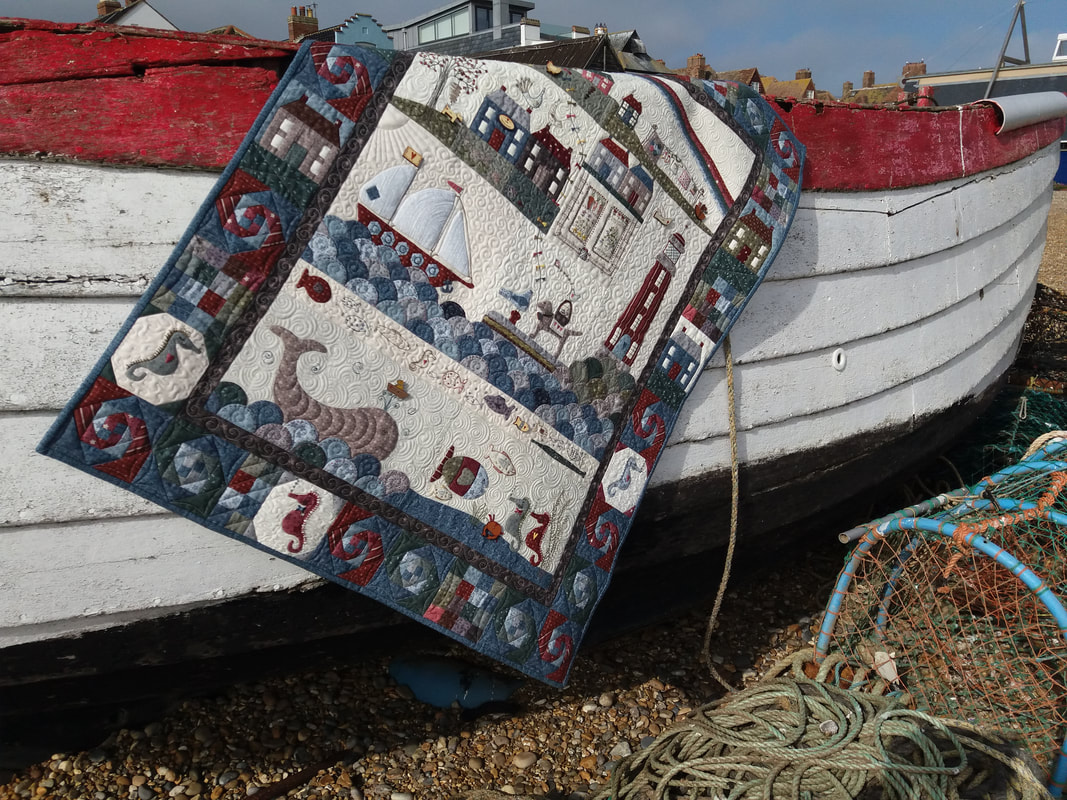 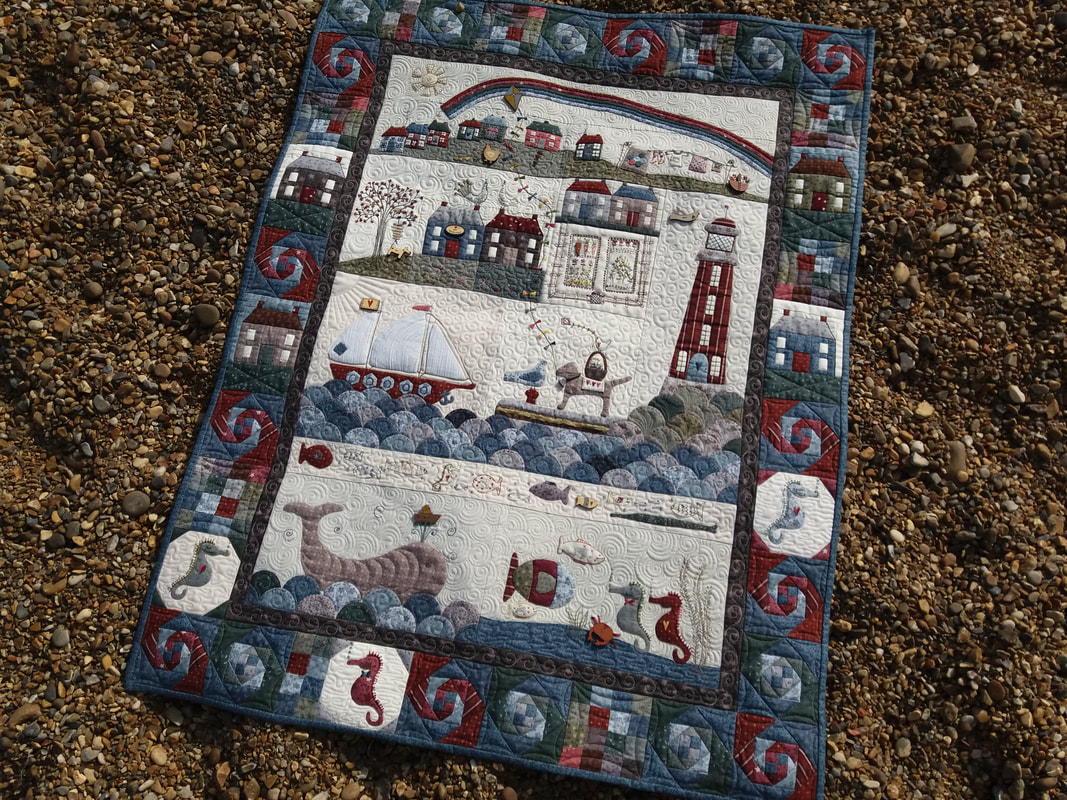 Did you guess which quilt my label was for? I always like to make my own labels for my special quilts, and this one was no exception! Hand embroidered with Valdani embroidery threads (these have a lovely soft variegation) and embellished with some applique. This label was made using some sew-in interfacing, stitched all the way around the outside edges, the curves clipped. Then a small slit was made in the interfacing and the label turned the right way through. A good press, and it is ready to be hand appliqued onto the back of the quilt... 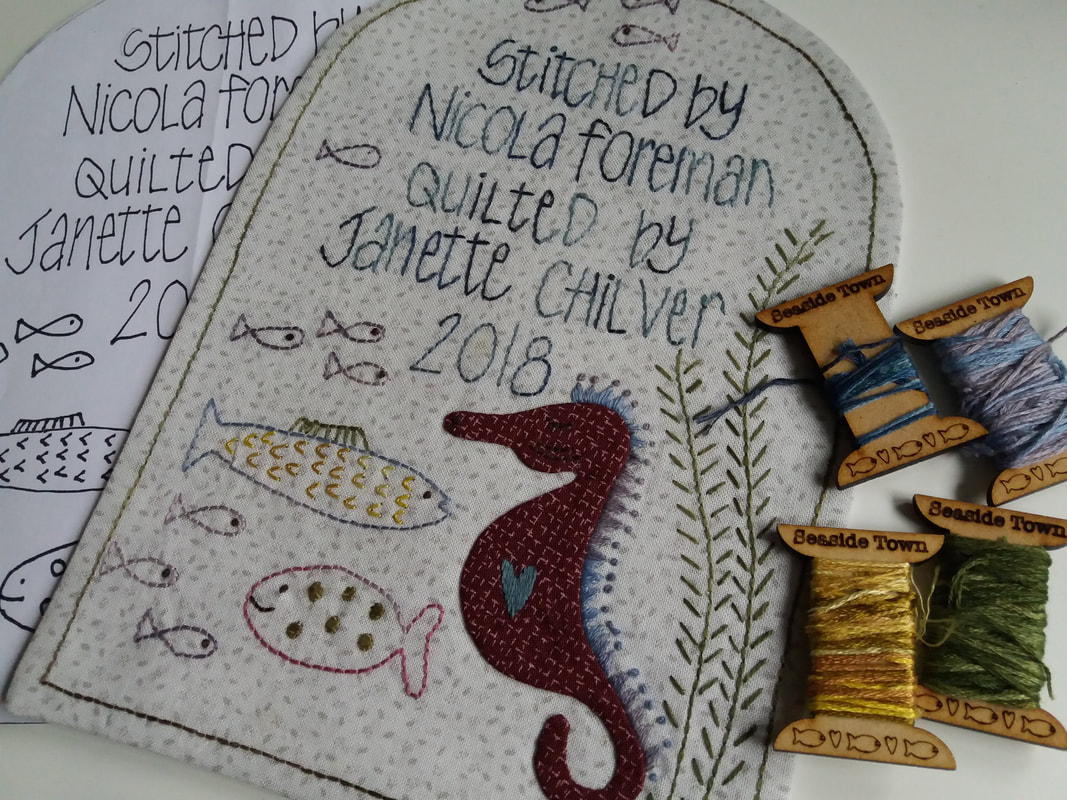 ...I machined the lower edge of the label 1/4" from the edge of the quilt, so the binding covers that part. Then the remainder of the label is hand stitched into place, taking care not to stitch all the way through the quilt. I'm really pleased with this label - although it will be hidden when it's hanging up, it will be a reminder of all the hard work that went into making this beautiful quilt. 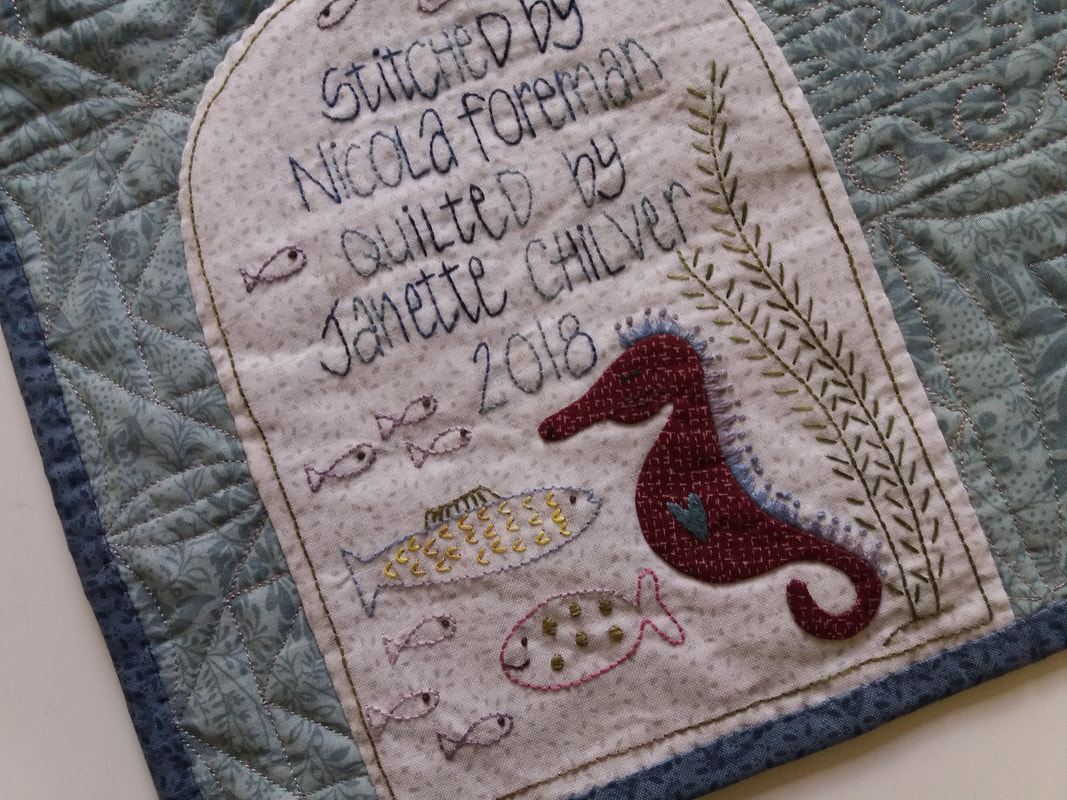 I had a day off on Tuesday and after a busy morning shopping in Woodbridge, I spent I spent a couple of hours in my sewing studio. After doodling some designs I was ready to draft a label for one of my quilts that I collected from the longarm quilter last week - can you guess which one it is? Usually I try to incorporate the theme from the quilt into the label, and after I've sketched an idea with pencil and paper, I draw over the lines with a very fine Sharpie pen. This forms the label pattern, which I can then trace onto fabric using a lightbox and a Micron Pigma pen. These are permanent, so you do need a really steady hand. I prefer the finest size 005 nib, but I'd already got a box of 01 nibs, and 2 strands of embroidery thread will easily cover them (I'm not keen on the 05 nibs, they really are too thick). A fine stabiliser is fused on the back, and then it's ready to hand embroider with some Valdani threads that were used for the quilt top. And I've prepared some applique to embellish this label with too. 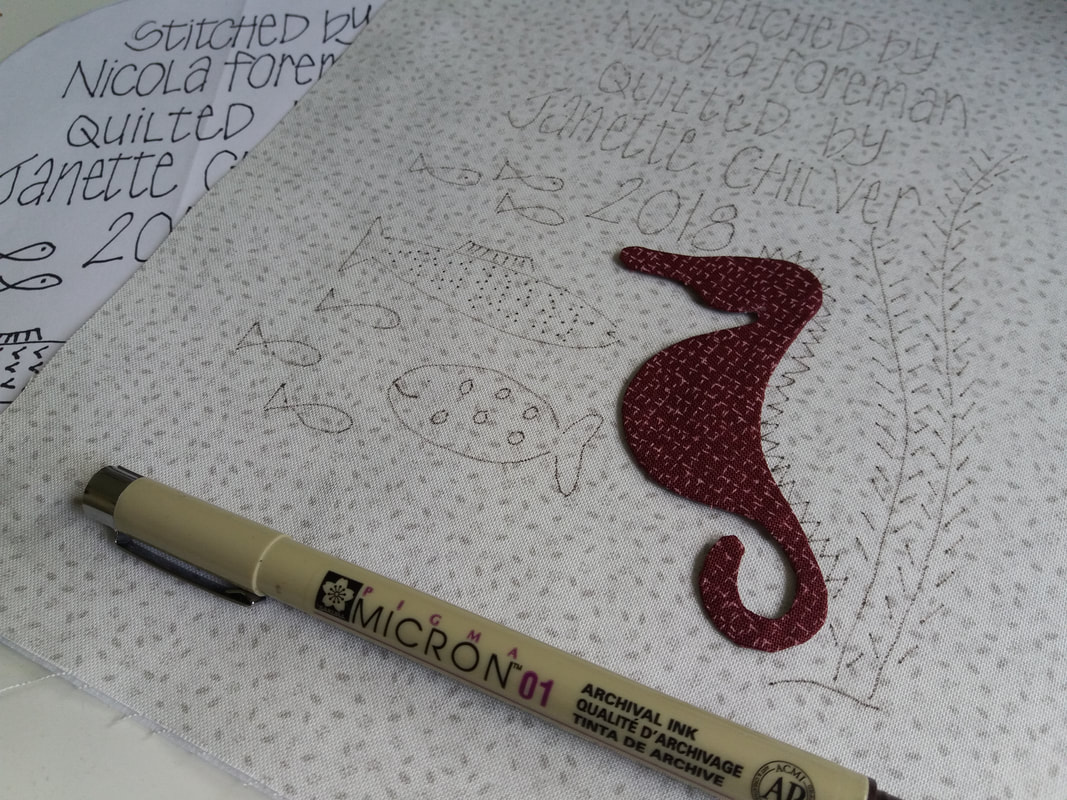 Whoop whoop! I'm finally ready to start my Hearts and Happy Flowers quilt! This gorgeous quilt was designed by Leanne Beasley, and this was bought as a kit from Cross Patch in Wales back in February. The gorgeous Cosmo threads were bought online from Gum Valley Patchwork in Australia, and the pre-printed linen arrived in the post from Fabric Patch (also in Australia) last month. The linen arrived with a lightweight interfacing already fused to the back. Having a pre-printed design certainly saves an awful amount of time and effort! Anyway, I've cut out the stitchery design for the first block, my Cosmo threads are all wound onto spools, and I'm ready for a night sewing with my friends. 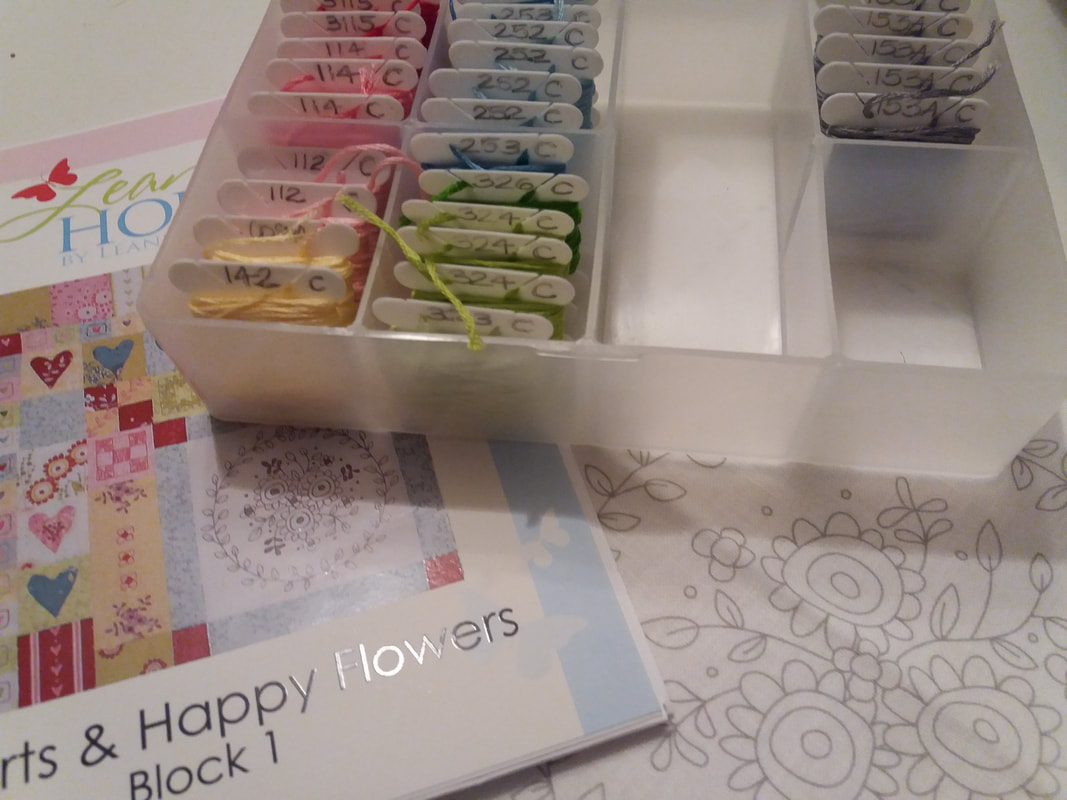 I had a great time on Saturday at the Tuffet class at Busybee Stitching, and my homework is completed! The remaing four panels have been stitched, and all eight panels have been joined together. My Bernina quite happily stitched through all the layers without too many difficulties. As I'd used a Bali Pop for my strips, (pre-cut 2.5" strips of batik fabrics) my trimmings were a bit bigger than expected. The left over bits from Saturday were "rescued" by Gillian, and no doubt she'll make something with the small pieces - and I'm sure she'll be happy with these ones too! 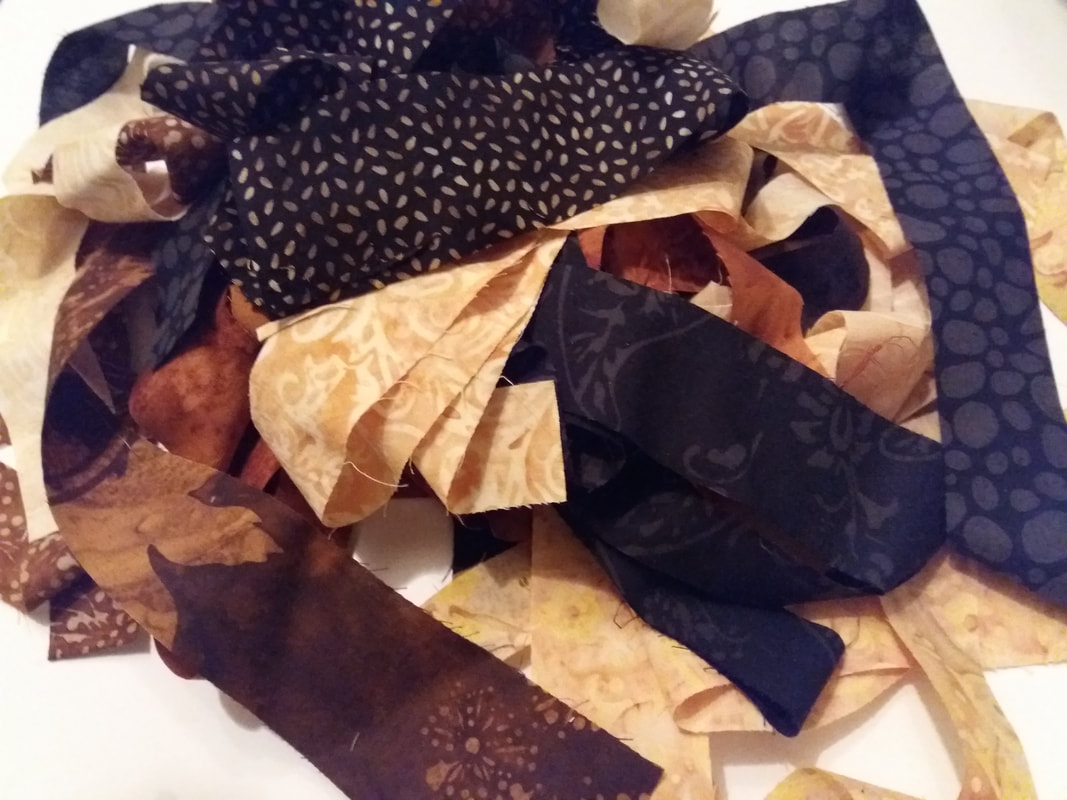 |
 About me...Hi - welcome to my quilting blog! My passions are my family, my dog, my friends and sewing, not necessarily in that order! 


Archives
July 2023

 Blogs I followUK shopsThese are the UK shops that I use to purchase my quilting supplies - fabrics and threads etc.
Australian linksScandinavian links |
 RSS Feed