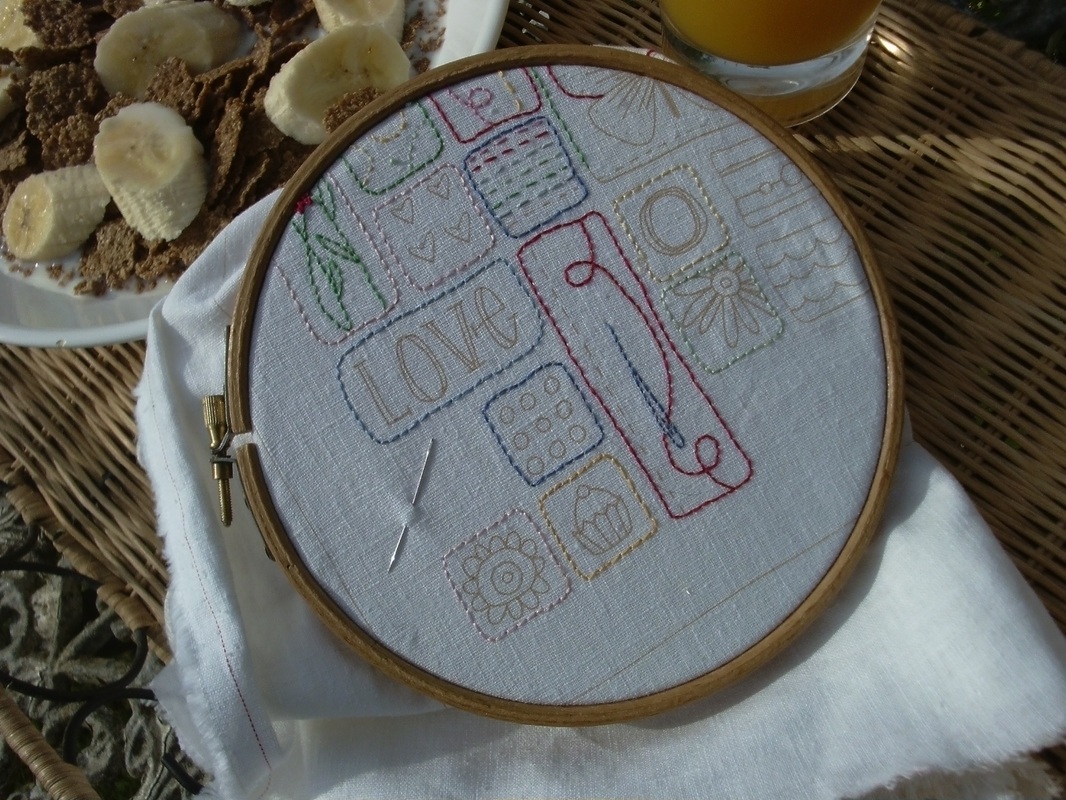
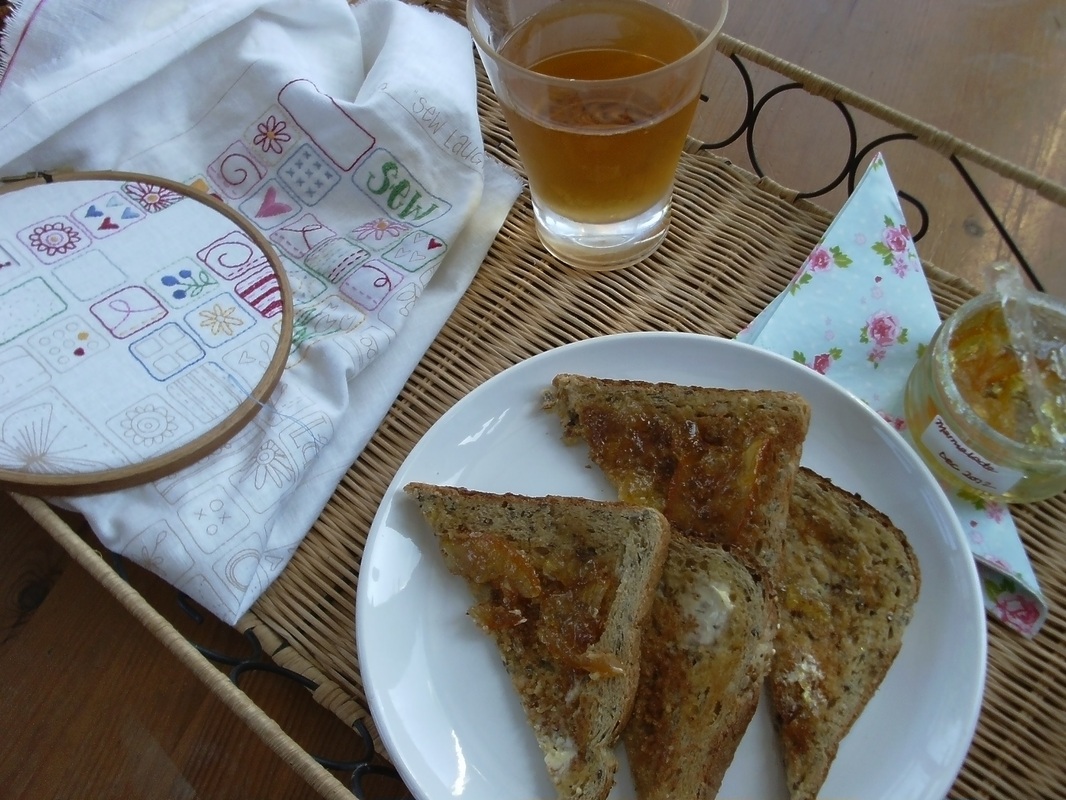
Well it's day 4 of the "Tour de Fibre" and I've made a slow but steady progress with my first project "Sew Laugh Love" (pattern by Leanne Beasley) and also making a very slow but also steady progress with my post-op recovery too!! I'd been enjoying some leisure breakfasts in the garden, and have enjoyed a bit of hand sewing as well - although there has been rather a lot of unpicking too!!
4 Comments
For a few years now, I have followed the blogs of 2 Norwegian quilters, Hanne and May Britt. For the last 3 or 4 years, they have a "Tour de Fibre" in the summer, where they stitch and sew and quilt and knit and generally catch up with unfinished craft projects. They invited me to join them, and this sounded like a great idea while I am convalescing! Although I am still very tired following recent surgery, and finding it difficult to concentrate on bigger projects, I decided to do a little bit of hand sewing to pass away the time! This kit has been in my stash for ages - it is called "Sew Laugh Love" and is by Leanne Beasley. I took it with me on a cruise to Norway last year, but didn't do very much - so yesterday I made a start on picking up where I left off. I'll give you plenty of updates on how I'm progressing - and hopefully by the time this project is finished, I'll be ready to tackle some bigger projects with my sewing machine! Oh and here is a peek of my progress so far this morning - stitching and eating breakfast in the sunshine!!
Another project that I completed on the "Drama and Detail" course with Philippa Naylor, was a cover for a ring-binder. I used a mixture of batiks and linen for this project. I prefer to use Schmetz Microtex needles size 60 when sewing batiks, and this project was no exception..... .....I was really pleased with how this cover turned out! The applique on the front was a combination of edge-stitch applique for the petals, satin stitched applique circles and free-motion applique for the top layer of the petals. I quilted the batik part of the cover in straight rows of quilting about 0.5" apart, and used a King Tut variegated quilting thread to match the colour of the batiks. I even managed to thread a Schmetz Microtex needle size 60 with the quilting thread - for some reason my automatic threader isn't very good when it comes to size 60 needles - and I could hardly see the eye of the needle when it was in my machine, so my top tip was to thread the needle THEN put it in the machine!
During the "Drama and Detail" course that I did with Philippa Naylor, we learnt to make some curved bias strips - and some were made so the sides had varying widths. These strips were made with a turquoise batik, and stitched into place on top of some linen to make a notebook cover, lined with more batik..... .....this one was for my daughter Alice. Now I've mastered this technique for covering notebooks, I'll be making several for friends and family as Christmas gifts! And what about making one as a cover for a Wedding Album using a photograph printed onto fabric like the memory cushions? Ohhhh now my creative juices are flowing I can't wait to get stitching at the weekend!!
During my week away with Philippa Naylor, I made lots of small projects embellished with applique - I took a supply of notebooks and bag handles with me, and was inspired by the sample I made of satin stitch appliqued circles to progress further to make a decorative journal cover. I've just enlarged the layout so it will accommodate an A4 notebook - and I've made this one using pink batiks and linen. 3 circles of different batiks were attached to a piece of linen using steam-a-seam-2 and secured with machine satin stitch. I used a Mettler silk-finish thread in fuchsia pink around the purple batik circle, orange Mettler quilting thread around the pink batik circle, and finally I used purple Mettler quilting thread around the orange batik circle. Then I added the panel of linen, which I frayed along the 2 long sides, just off centre on the front of the journal cover. The linen panel was then machine stitched into place with a matching coloured thread..... .....and here is the finished journal cover. I really love using linen, and think it goes beautifully with the fine cotton batik. The joy of having a removable cover is that when the notebook is full, it can be removed and replaced with a new one! Philippa showed us lots of top tips for satin stitch applique - we used stitch and tear stabilizer underneath the background fabric (in this case the linen), and stitched very slowly!! As you can see, this was quilted very simply using lots of straight rows, using a variegated YLI quilting thread in shades of orange and pink to match the pink batik fabric.
Simply ages ago I bought a beautiful hand embroidered linen laundry bag from a vintage market - and it had been laying on my bed, with a feather cushion inside, with the top of the laundry bag turned over and was using it at a cushion. It's really old, and some of the linen had started to fray at the seams, so it was time to perform a little bit of surgery on it and breath new life into it..... .....with a few slices with my rotary cutter, a bit of stitching with my sewing machine and a zipper, and here it is as good as new, albeit a little bit smaller!! Looks fab piled on my bed with all the other cushions! I had a great time on Saturday, as I went fabric shopping with my youngest daughter Alice. She really NEEDED another piece of red batik to go with all the red batiks she'd already bought from Quilters Haven, so off we went to Sew and So's at Bungay, to see if they had any. Well after lots of perusing around, she DID manage to find the perfect one - and also her mother found a few perfect fabrics too!! Last summer I spent AGES at the NEC (having already desperately searched online) trying to find a "Tonga Treats Strips" in a particular colourway - "Blueberry Pie" for Alice, and couldn't get them anywhere at all - and I ended up getting a couple of balipops in a similar colourway instead (and no I haven't used them yet!!) and what was the first thing I saw as we walked into Sew and So's? You've guessed - the exact packet of Tonga Treats Strips "Blueberry Pie" - well obviously that just HAD to be bought!!..... .....also I managed to find just a few Lecien fabrics that I needed to make some more cosmetic bags with - I bought some half-meters of this pretty yellow selection, from a range called "Princess Rose", and also a few brown "Antique Floral" fabrics. Oh and then I spotted this little fat quarter bundle, which included some printed linen - perfect! After we'd both finished shopping, we strolled down to Earsham Street Cafe where we had a delicious afternoon tea - Alice did say she wasn't really very hungry, however she managed to polish off a huge slice of peanut butter cake that was 3 layers high - and I had a scrummy piece of carrot cake - note to self - MUST go there again! OK so here is the project that I decided to start last night as part of FNSI. I've got lots of things started and had made a challenge to finish at one project before |i start another - but then I couldn't decide which one to pick and I WAS going to collect a quilt from the longarm quilter so technically that WAS a completed project (I know I need to get the binding on, but I have a cunning plan to spend Saturday afternoon binding it while Mr F and the hairy hound are out on a shoot!!) so anyway I had a rummage in my stitchery project-box and this Leanne Beasley pattern was calling out to me. I bought this "Sew Laugh Love" kit back in November 2011 from Quilt Fabric Delights, and it came with the pre-printed handkerchief linen and several skeins of Cosmo thread that are just wonderful to sew with! I can't believe I had put it away with lots of other kits and never got around to actually stitching it!! So I quickly set to and wound the threads on those little cardboard bobbins, and I was ready to get my needle threaded..... .....well as you can see I dithered about for so long binding those Cosmo threads onto those blasted little cardboard bobbins that I didn't actually get around to doing very much sewing at all!! Well at least I've got everything prepped and ready - hopefully by next month's FNSI I'll be a bit more organised!! Last weekend I was busy making this set of placemats, using the "Kveldsmat" pattern from myQuilt, a Norwegian quilting magazine. I used a combination of turquoise linen and a selection of batiks. I was really pleased with this combination of colours, so this weekend I have been busy with the sewing machine again..... .....as I had plenty of fabrics left over from the placemats, I was able to sew a runner for a dining table. As you can see from the photo, I based the design of the tablerunner on the layout of the "Kveldsmat" placemats..... .....this runner was quilted the same way as the placemats, quilting around all the segments, "stitch-in-the-ditch", straight rows to the narrow panel and a cross-hatch pattern on the wide panel..... .....AND I had enough leftovers to make a smaller matching runner for a coffee table too, except I marked a 3" grid for the cross-hatch design (I used a 1½" grid for the placemats and the runner for the dining table)..... .....oh and as usual, a final little flourish - one of my labels. I really like this design. I feel very creative now, and I have a cunning plan to draft my own design for a runner - AND write a tutorial for it!! I had seen these placemats on Anne-Grethe's blog, and was inspired to make something similar, using a mixture of linen and batiks - my favourite fabrics. So this weekend I have been busy making some placemats using this pattern, "Kveldsmat" (which means "Supper") and the pattern is from the latest issue of "myQuilt" 1/2012. As you know, I don't actually speak Norwegian - so I had to study the diagrams very carefully..... .....last year when I stayed with Eva and Hanne in Norway, I bought this beautiful piece of turquoise linen from Hanne's shop, Lappedilla, and then I bought this selection of batiks when I went to the Festival of Quilts last summer. I thought this combination of fabrics would be perfect for this project... .....linen can be a bit tricky to cut as it can slide around on your cutting board, and Hanne had given me a top tip - to iron a soft fusible vilene to the wrong side of the linen, to make it easier to both cut and sew. I used some vilene H180 that I normally use for stitchery..... .....I quilted these placemats very simply, with a cross-hatch pattern on the linen and "stitch-in-the-ditch" around the batik pieces..... .....then these placemats were finished off with a couple of prarie points, and I used a striped batik for a single-fold binding. I have made 4 of these placemats, and have enough batiks and linen leftover to make a runner for a table too. Now woul these look good on your table when you're having coffee and cake?? Or afternoon tea? |
About me...Hi - welcome to my quilting blog! My passions are my family, my dog, my friends and sewing, not necessarily in that order! Archives
July 2023
Blogs I followUK shopsThese are the UK shops that I use to purchase my quilting supplies - fabrics and threads etc.
Australian linksScandinavian links |