|
Sometimes my sewing projects take quite a long time to complete - and this is one of them! Purchased as a kit from Maries Cross Stitch absolutely ages ago, I actually started this back in January 2025 - it was perfect for stitching while I was curled up on the sofa on cold winter evenings... ...the pattern is called Sail Away Sampler by Design Works, and the kit included the fabric, a printed chart, all the DMC stranded embroidery threads, and an embroidery needle... ...I decided to have this professionally framed, so took it to The Fraser Gallery in Woodbridge. The owner had framed some cross stitch samplers for me many years ago when my daughters were babies! I collected this from the gallery on Friday, and I really am thrilled to bits with it. I'm sure it will look lovely displayed on the wall in Alfie's bedroom.
0 Comments
The main part of the bag is made using ByEarlier this year I made a zipped bag for my grandson Rory. It was used for his colouring books and crayons, and was often used when he was out and about. My daughter had started to put a few bits in for Rory's younger brother too, and Rory decided that his brother should have his own bag, so a special request wa smade to nanny! Rory wannted to choose the fabrics himself, and as his brother loves dinosaurs, we were on a mission to track down some fun dino prints, and these were just perfect! These gorgeous dinosaur fabrics were purchased online from Oh Sew Crafty here in the UK. The Zip It Up 2.0 pattern, wadding - Soft and Stable, stretch mesh, and clear vinyl that is used for the internal pockets are all from the ByAnnie brand and were all purchased from Oh Sew Sweet - again they're here in the UK. I've slightly adapted the internal pockets, by having 2 large pockets rather than the large and 2 small ones which are in the original instructions. The main body of the bag was made using the Soft and Stable wadding, and was quilted using a simple crosshatch design. I've used the orange dinosaur footprints fabric for the outside of the bag, and this green dinosaur print for the inside of the bag... ...I've used some Moda grunge spot fabric from my stash for the accents of this bag, including the binding for the pockets. I've used a bright green mesh for one large pocket, and clear vinyl for the other large pocket. The instructions are very well detailed, and you could easily use both vinyl or both mesh. Thee zippers are made with continuous zipper tape - the company I tend to use is Zipper Station as they have an excellent assortment of zipper tape in a variety of colours and matching zipper pulls... ...once the bag was constructed the end of the main zipper was neatened with a fabric tab. The handle is made using webbed strapping, this was leftover from the bag I'd previously made for Rory, but the pattern has instructions for using fabric with a webbing inner... ...the pocket on the bag is is large and roomy, perfect for books and pencils. Rather than using ByAnnie soft and stable for the pockets, I've used a lighterweight fusible wadding - Vlieseline H630 - as it's not quite so bulky. Both the front and back pockets have been quilted very simply, and have been lined with the orange dinosaur footprint fabric, so Alfie will get a little surprise when he opens the pockets! As a final flourish, I've added a "made by nanny" label from Little Rosy Cheeks to the front of the bag... ...and here's the front of the finished Zip It Up 2.0 bag - I gave it to my little grandson Alfie yesterday, and he absolutely loved it! It didn't take him long to put a couple of books in it, and he carried it around with him for most of the day, saying "Alfie's just like Rory" - he was so cute!
While I was away on a quilting retreat last week, this was my main project. Using the book Schnibbles Times Two by Carrie Nelson, I'd already decided to use the McGuffy pattern, and teamed it with a couple of Layer Cakes that I'd had for a few years - Little Black Dress by Basic Grey for Moda. These fabrics were lovely to work with... ...once I was happy with the block arrangement, they blocks were stitched together. As it was several years since this particular fabric collection was released, I wasn't able to source a fabric from the Litlte Black Dress range, so I purchased a black and cream print from the current range also by Basic Grey - Posh - from Bramble Patch here in the UK. I've used this for the inner border, and I'll also use this fabric for the binding too. The scrappy outer border is also made from strips cut from the Layer Cake... ...and here's the finished quilt top. As there are so many pieces in the outer border, I've stay-stitched around the outer edge to prevent the seams from unravelling. Now this is ready to go to the longarm quilter, where Daisy May Quilting will work their magic - I just need to decide on a quilting design!
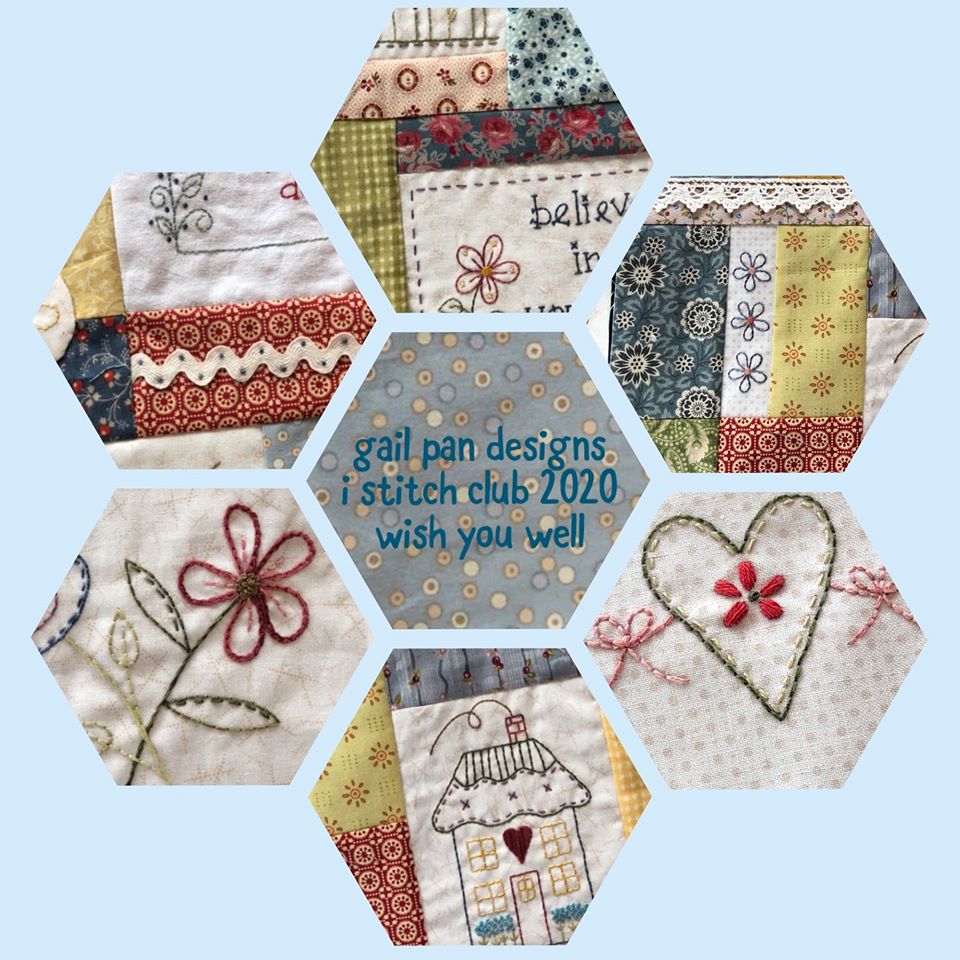
I shared a picture yesterday of a scrappy "Friendship Notebook cover" that I'd made - it was part of a batch of covers that I'd made to take with me on a recent sewing retreat, to give to my friends. They've all been made using the same pattern by the Australian designer Gail Pan, and I've used a selection of Lynette Anderson fabrcs for all them. These have been made to fit an A5 notebook, although they can esily be adapted to fit any size of notebook. I've got lots of pretty "Lynette" fabrics leftover, so I may have to make a similar one for myself now!

One of my favourite projects to make when I need a gift for a friend, is this hand embroidered project - the pattern is Friendship Notebook Cover by the Australian designer Gail Pan. I'd originally purchased this pattern several years ago from Coast and Country Crafts and Quilts here in the UK. The pattern includes a full size traceable stitchery design, and instructions for making this simple notebook cover. It's very simple to enlarge it to cover whhatever size notebook you want to use. This stitchery design has been traced onto a piece of background fabric designed by another Australian designer, Lynette Anderson. I've used a fine nibbed Micron Pigma pen (nib size 005, in a pale brown colour) and fused a piece of lightweight fusible interfacing to the wrong side of the background fabric. I've used a selection of Valdani variegated stranded embroidery threads for the hand embroidery. This design uses very simple embroidery stitches... ...once the embroidery panel was completed, it was pressed, trimmed to size, then added to scrappy panels that I'd made using a selection of 1" strips of fabric also designed by Lynette Anderson - these were leftovers from another project, and were too pretty to throw away! Once the scrappy panels were joined to each side of the hand embroidery, they were layered up with a piece of fusible wadding, such as Vliseline H630. I've quilted this very simply, but it could equally be quilted using the quilt as you go method, thereby constructing and quilting the panel at the same time... ...I've detoured from the original instructions for the construction of this notebook cover, and used my own tried and trusted method. Once the panel is completed, it's trimmed to size, and the 2 sides are neatened with a strip of binding. I've also enclosed one of my labels too. The cover is then constructed, forming 2 slip pockets to enable a notebook to to be enclosed. The notebook can easily be removed, once it's full up, and replaced with a new one... ...this shows the front of the notebook cover with a notebook tucked safely inside. I've made several of these covers, and this particular cover is one of a group that I've made for some very special friends.
|
About me...Hi - welcome to my quilting blog! My passions are my family, my dog, my friends and sewing, not necessarily in that order! Archives
October 2026
Blogs I followUK shopsThese are the UK shops that I use to purchase my quilting supplies - fabrics and threads etc.
Australian linksScandinavian links |


RSS Feed