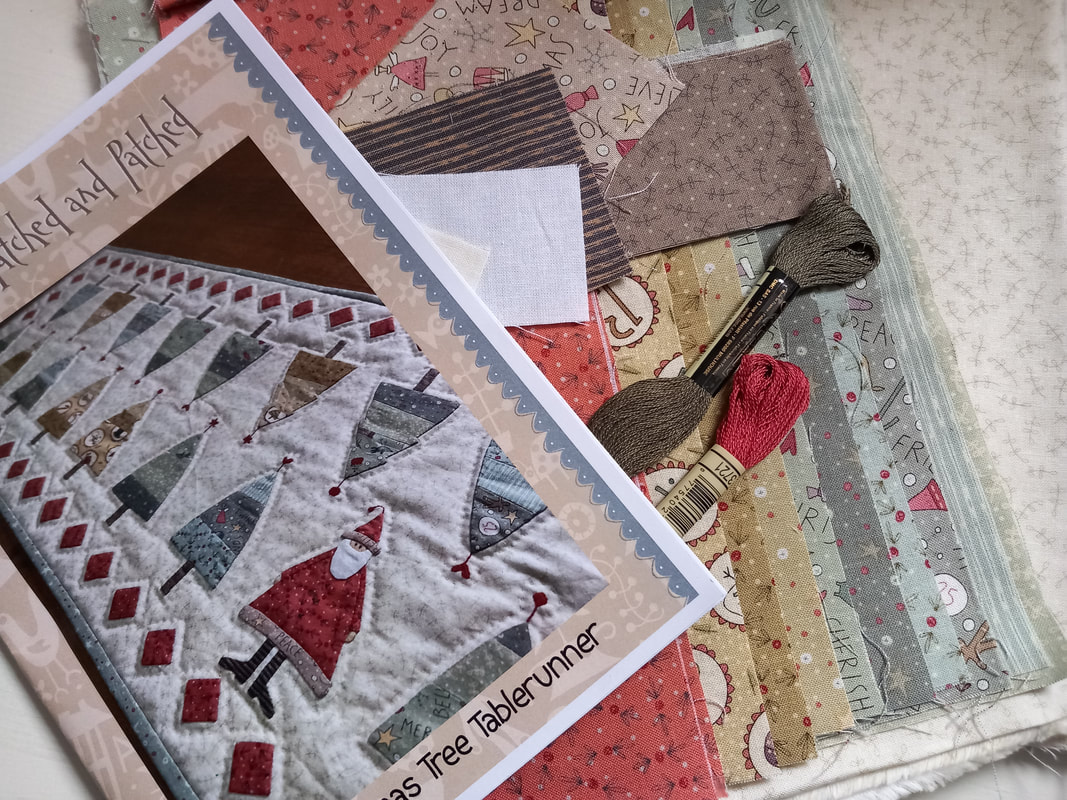
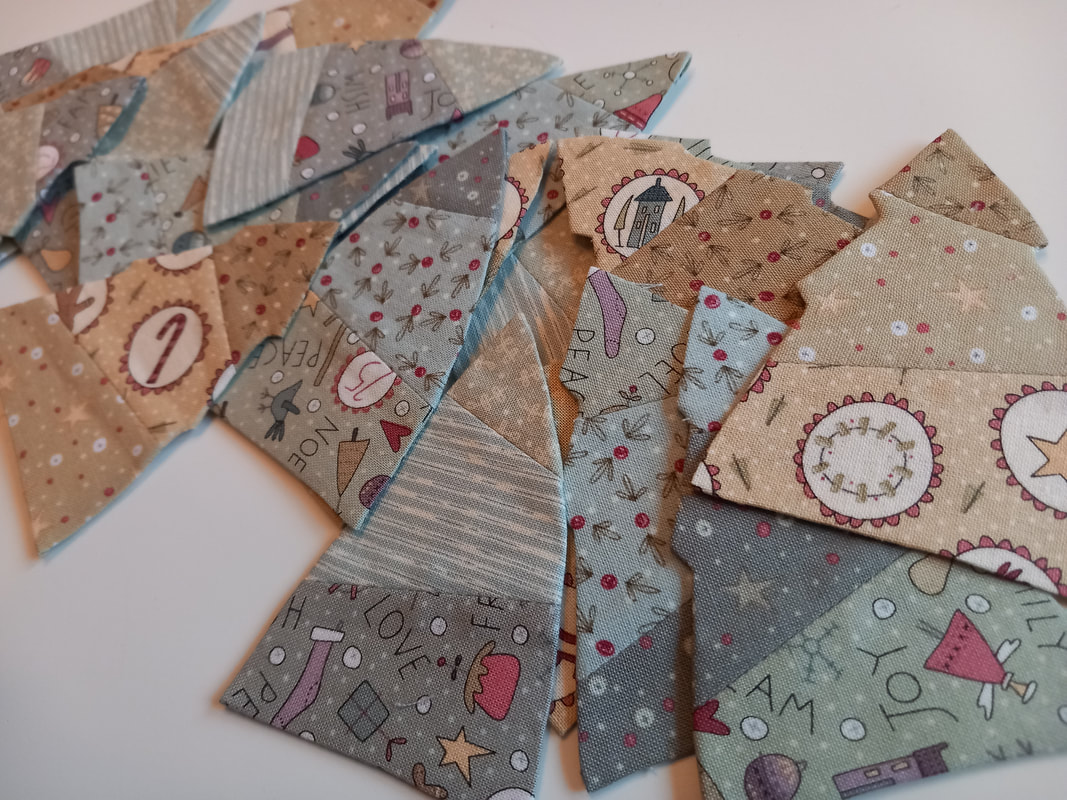
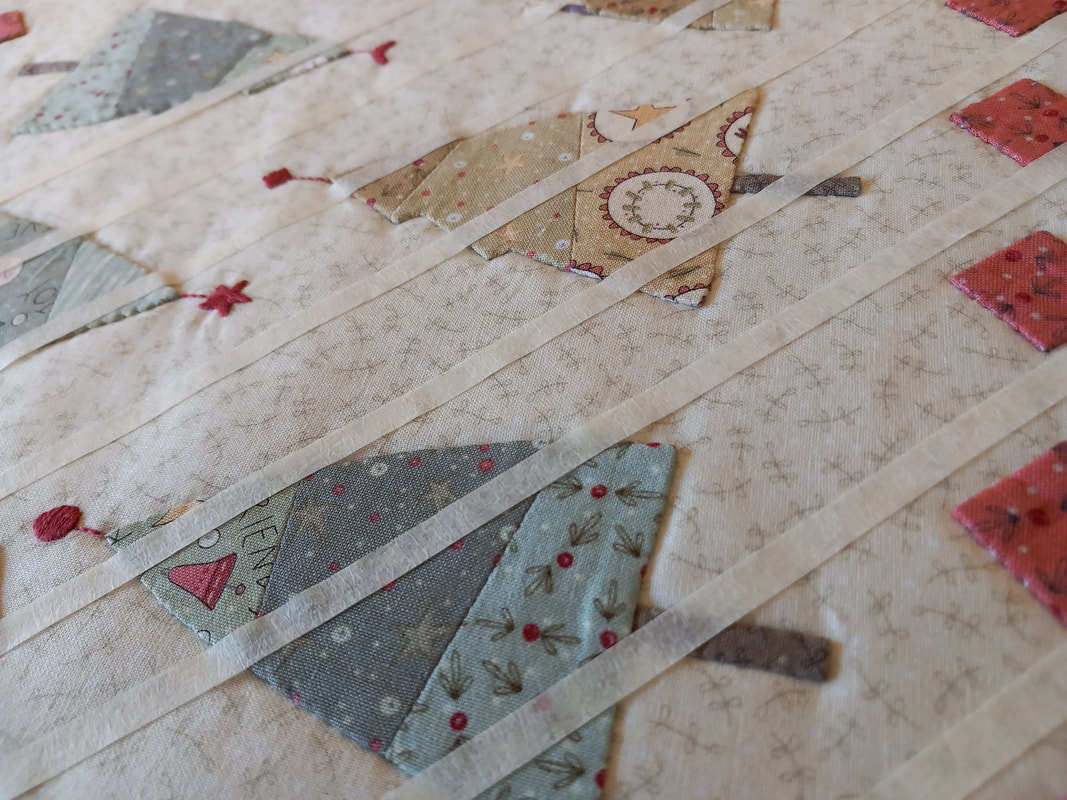
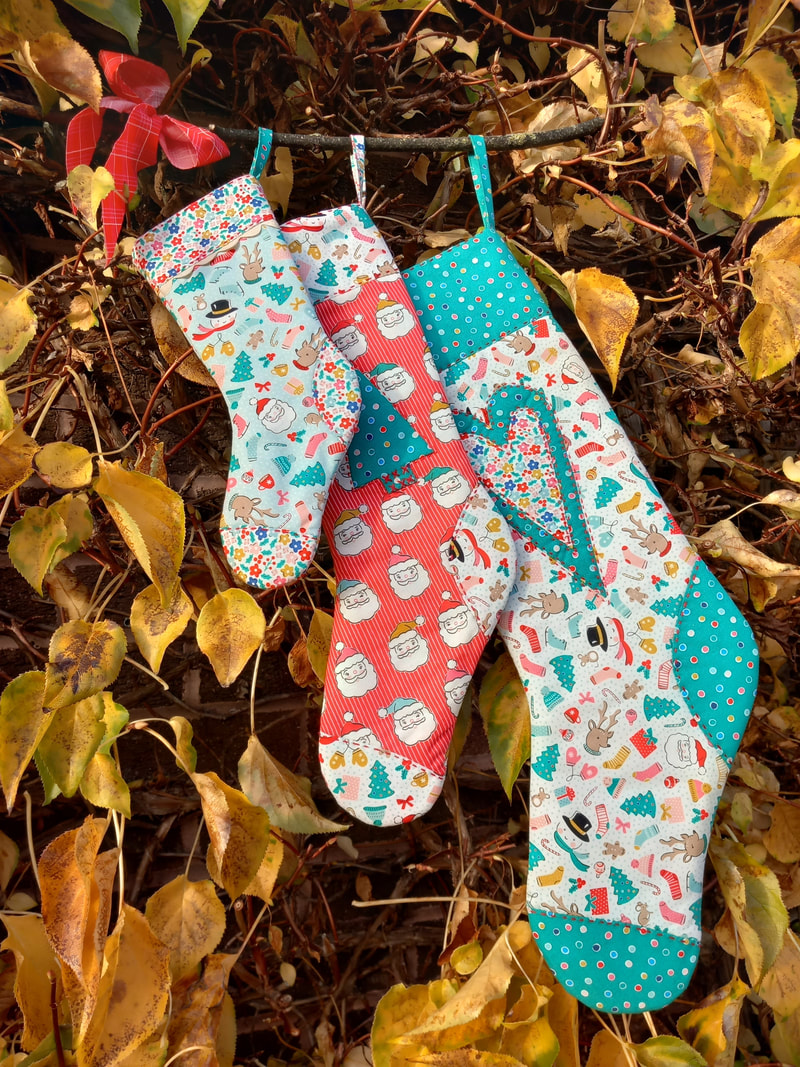
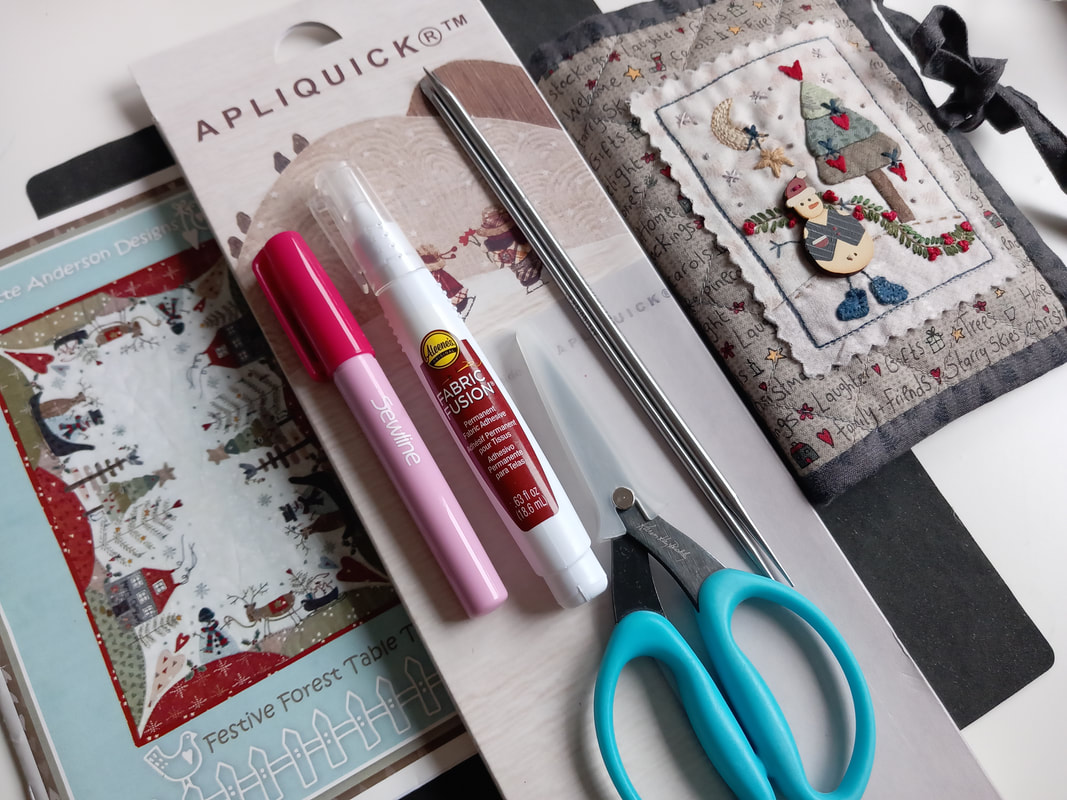
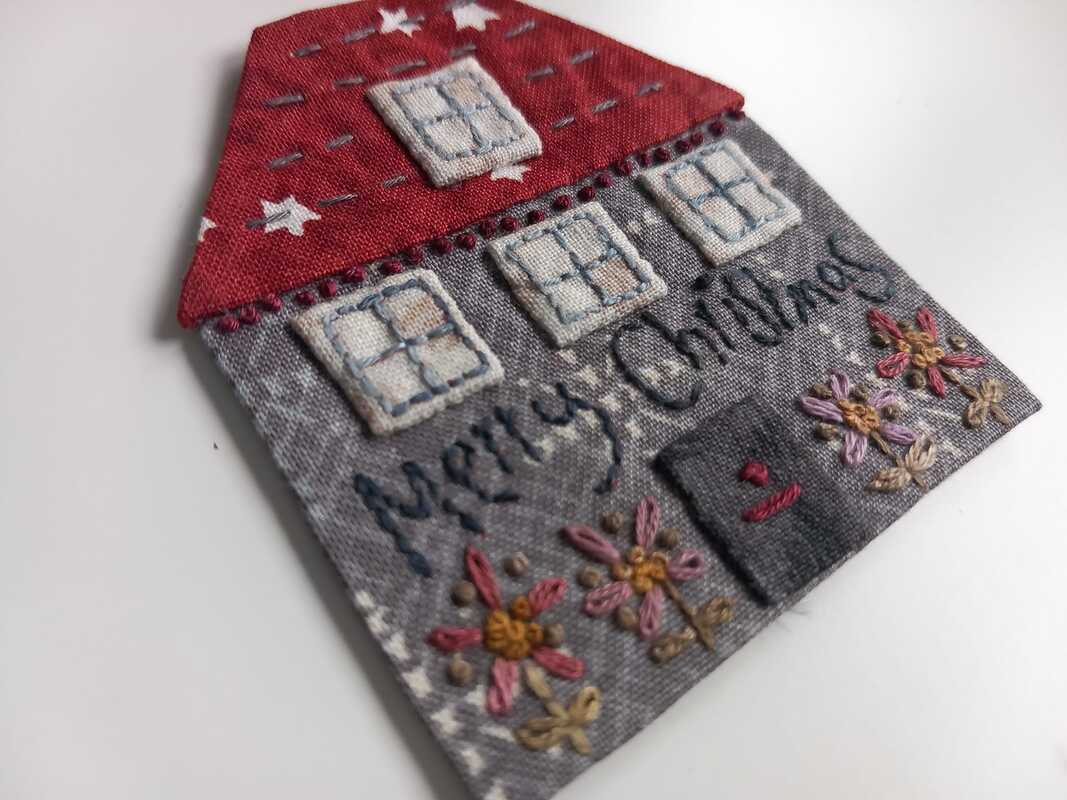
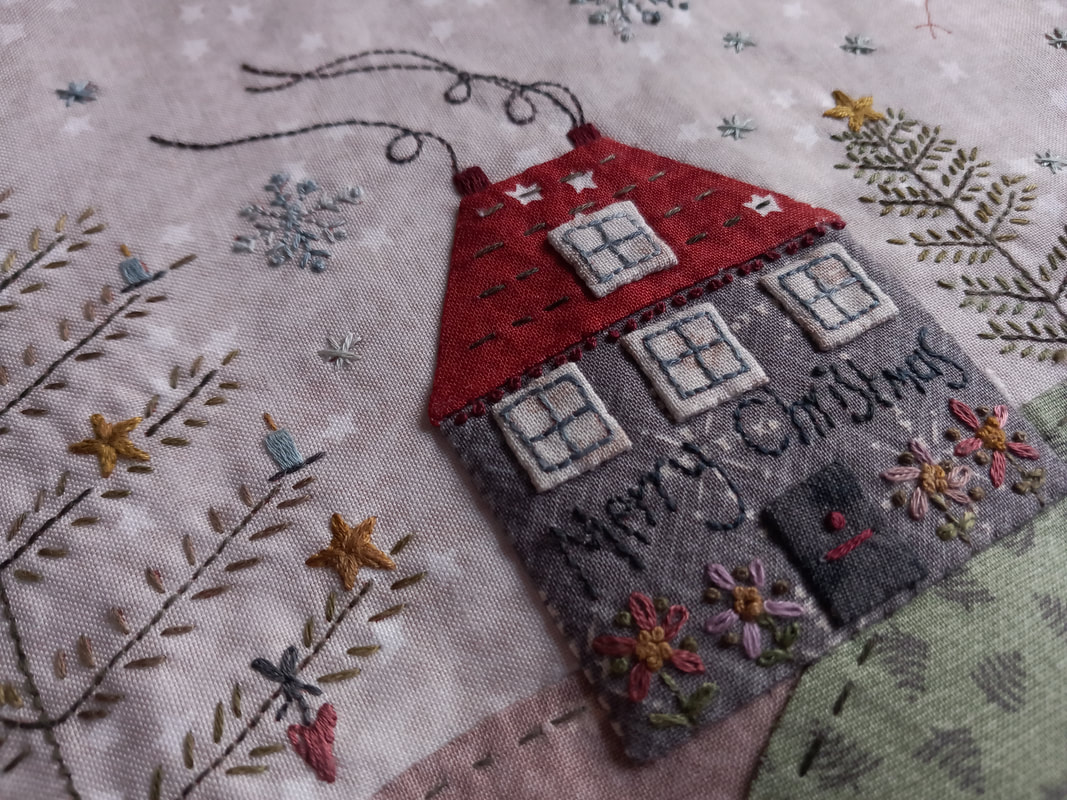
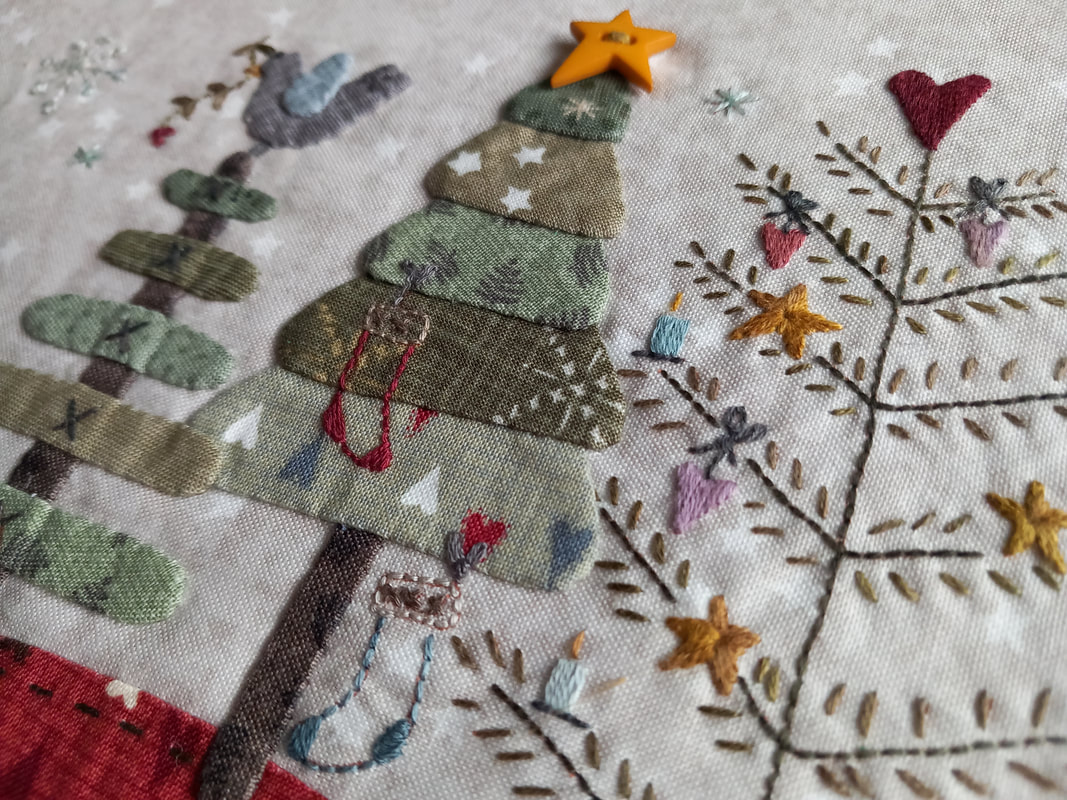
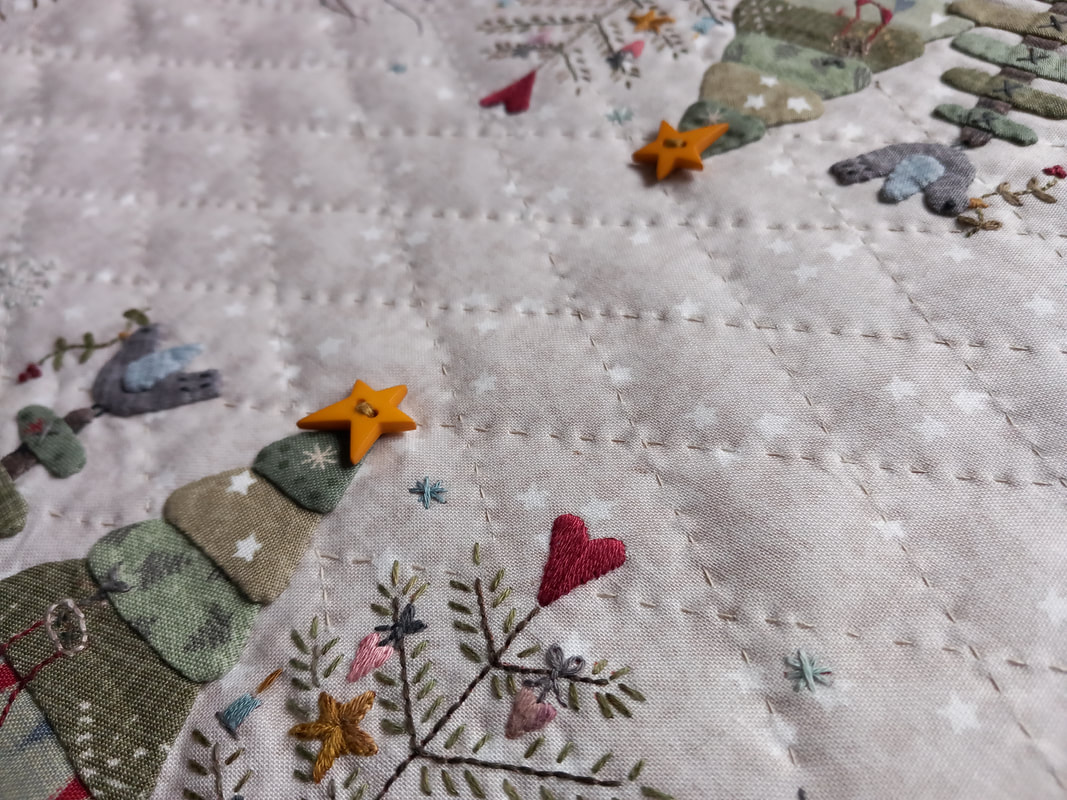
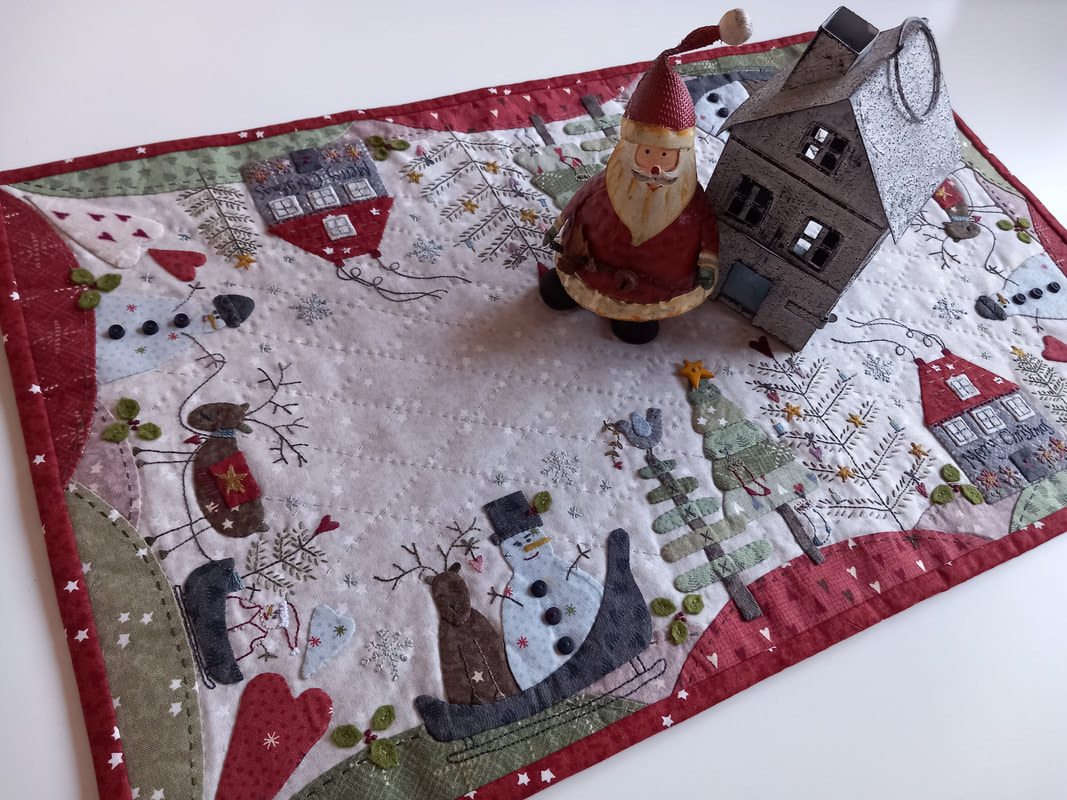
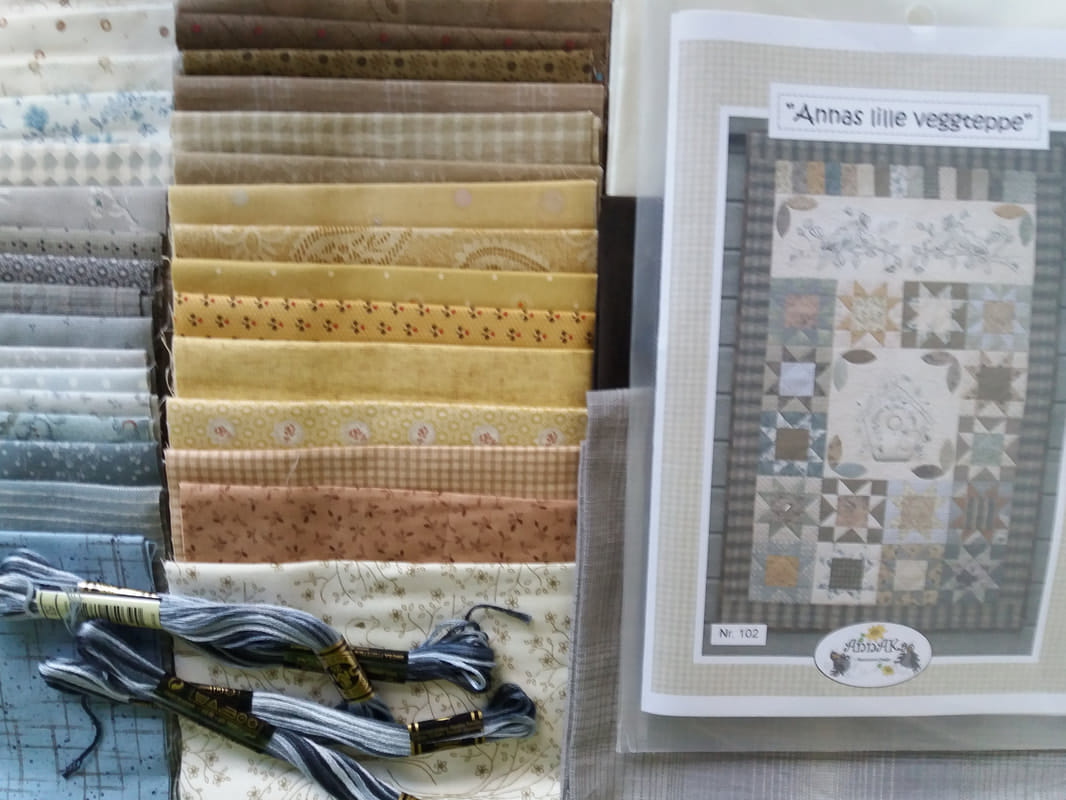
Oh Christmas Tree Tablerunner by the Australian designer Anni Downs - Hatched and Patched - was purchased from Coast and Country Crafts and Quilts in 2020. The kit included the pattern, embroidery threads, fabrics for the applique, the stichery/applique background and the binding fabric. I chose to use the Apliquick method of applique for this project, although you can use whatever method you prefer. These cute Christmas trees were made from 3 different prints that were joined together using a very small machine stitch - I set my Bernina at stitch length 1.90, then the seams were pressed open. I've used the Apliquick method of applique, as my fat fingers are far too clumsy for traditional needleturn applique... 
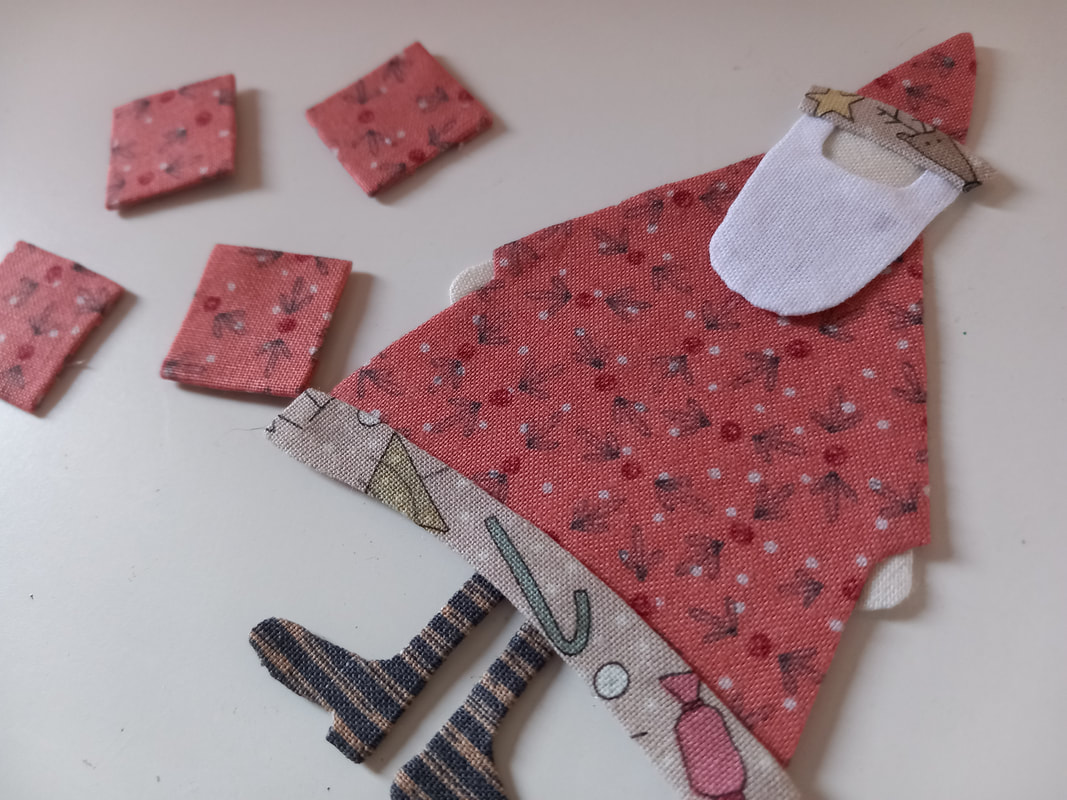
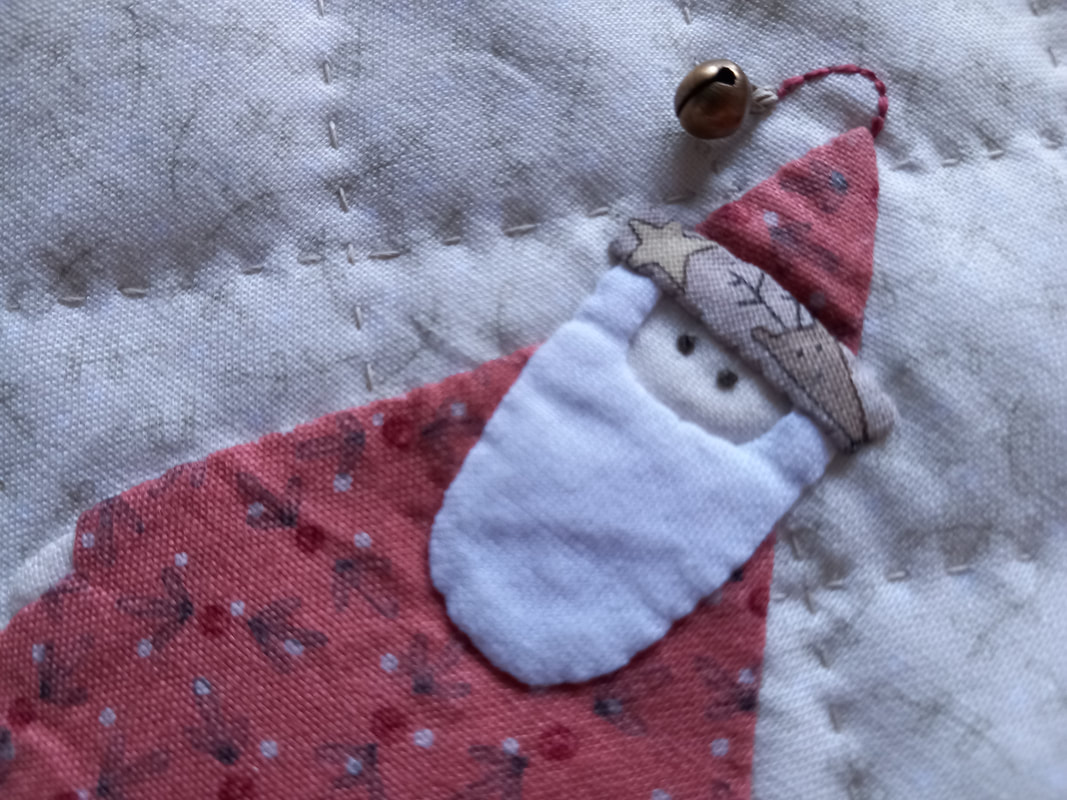
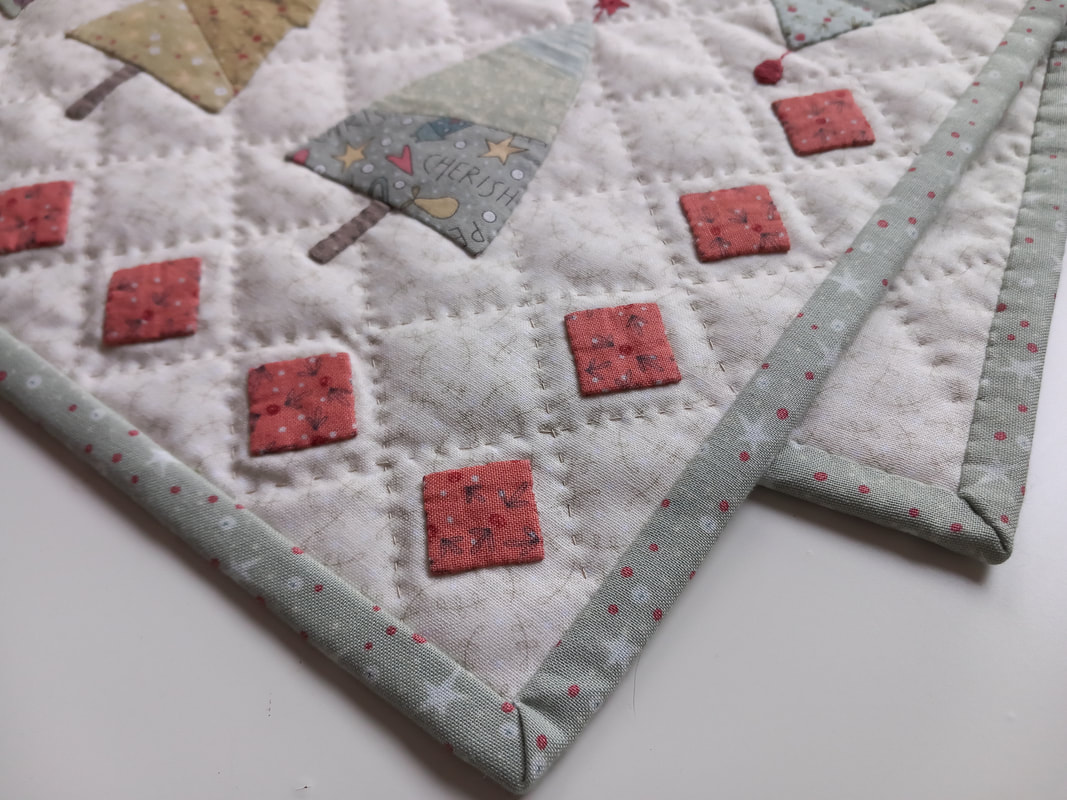
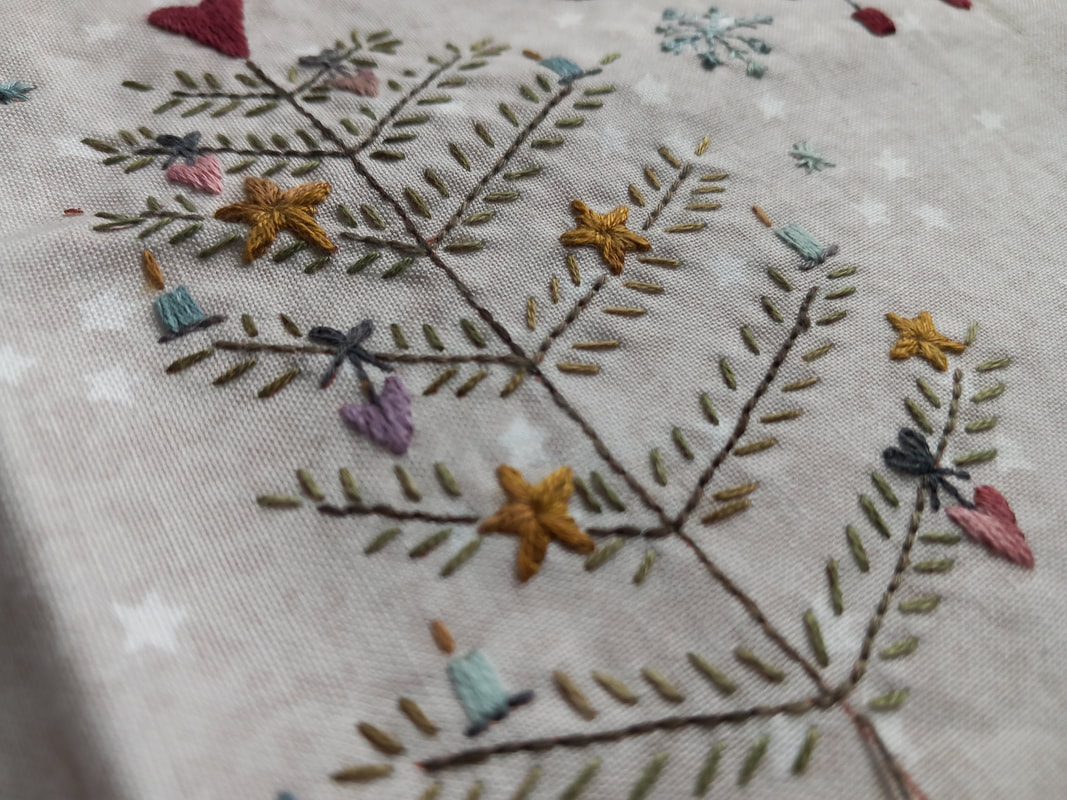
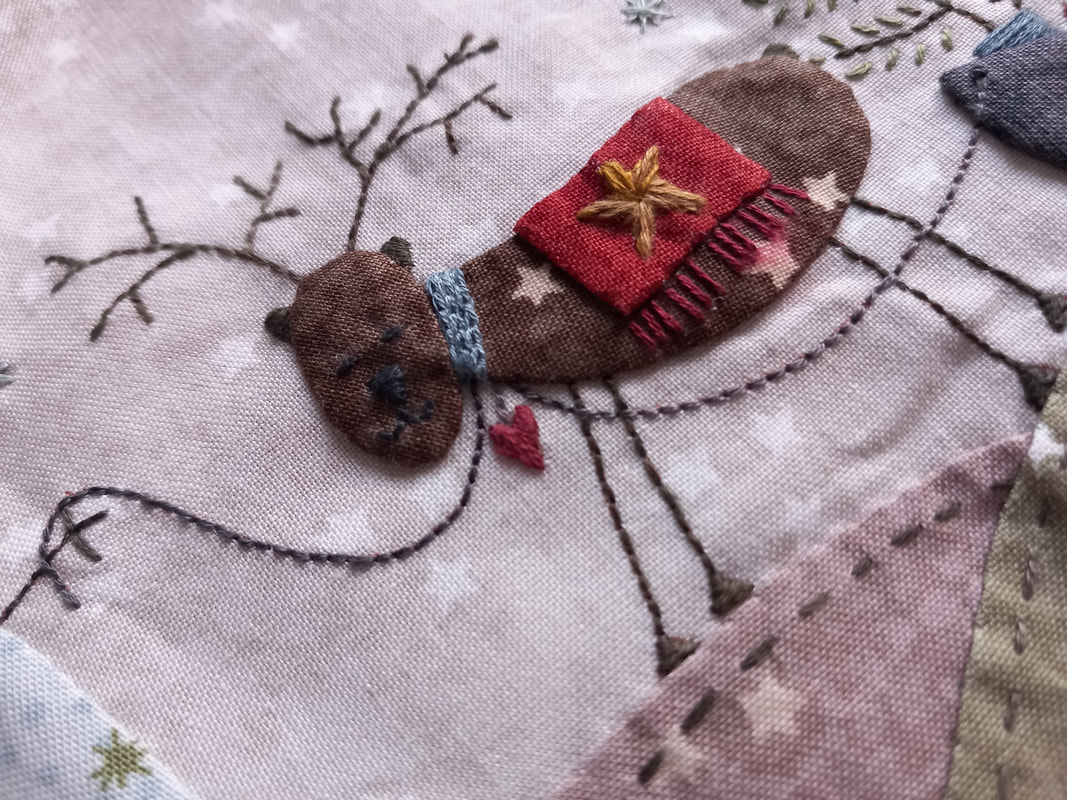
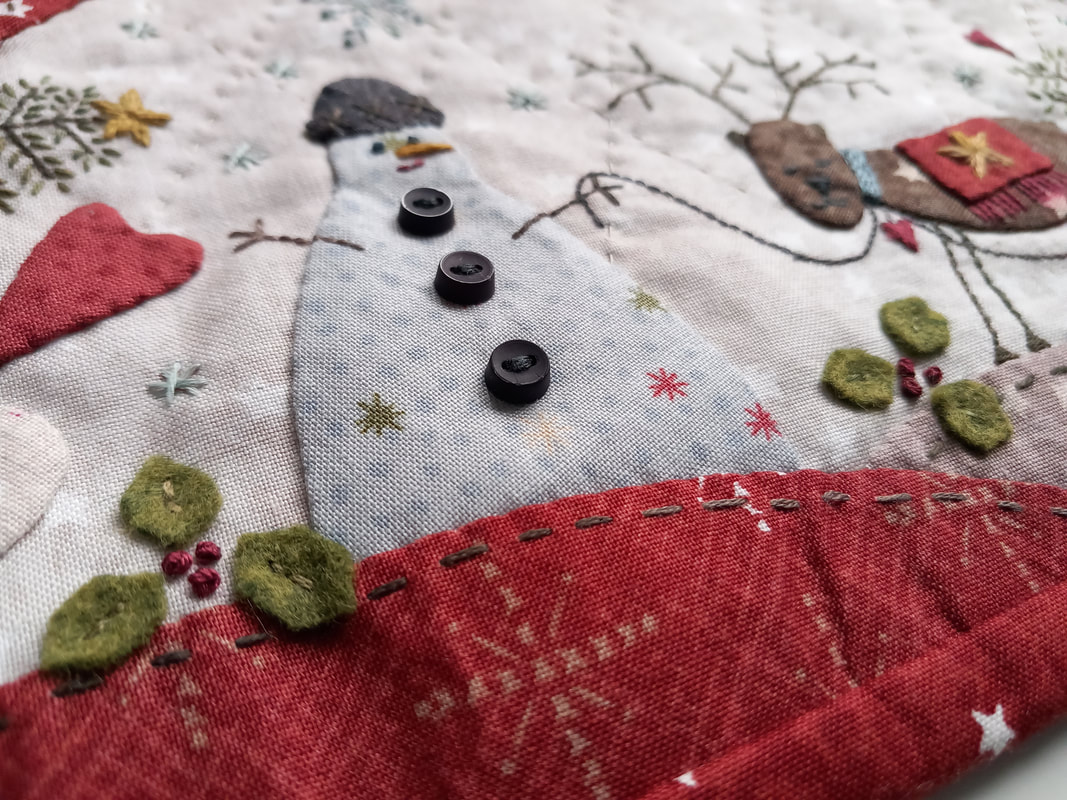
...these 52 tiny little 3/4" squares were also made with a piece of Apliquick interfacing on the back, along with the jolly Santa. Once the applique shapes were completed, they were placed in postion on the background fabric and hand stitched using a fine thread - I've used an Aurifil 80wt thread in a mid-grey colour, along with a Clover Blackgold needle and a very small slip stitch. The tree toppers were hand embroidered using a DMC stranded embroidery thread that was supplied with the kit... 
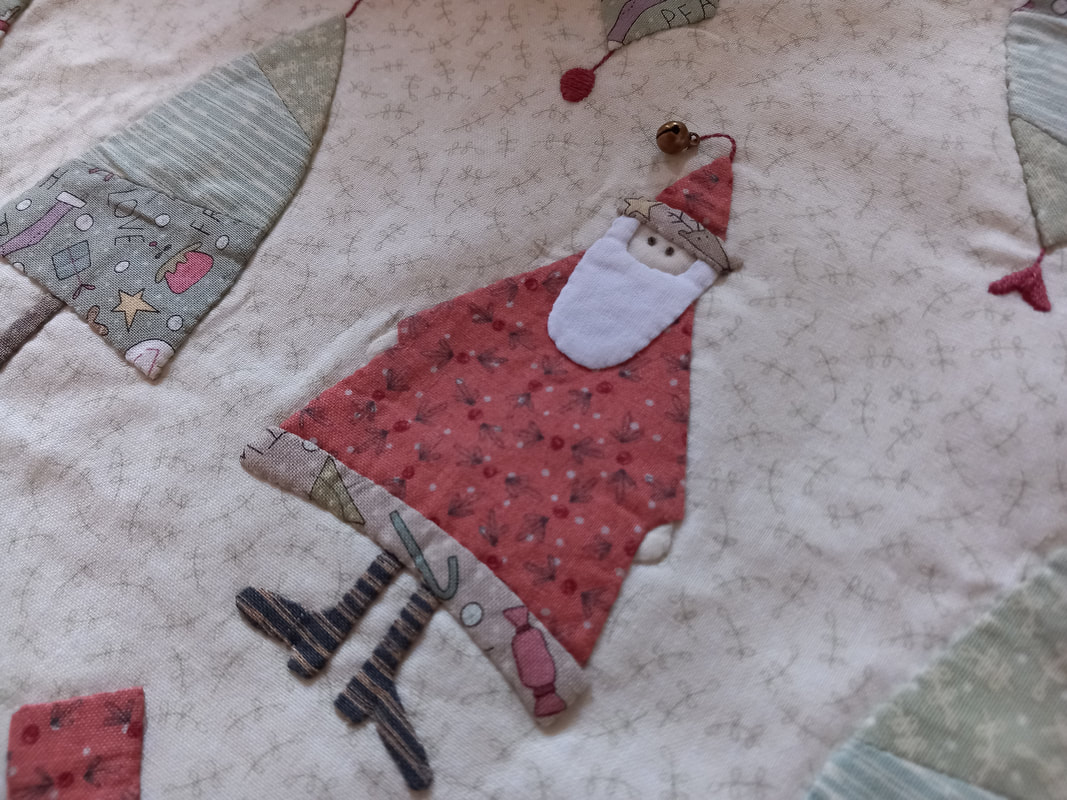
...strips of Quilters Tape were used to plan the quilting grid. The tablerunner was hand quilted very simply using a YLI quilting thread in an ecru colour to blend in with the background fabric. I quilted up to the applique shapes, rather than quilting over them. When the hand quilting was completed, I added a very tiny jingle bell on the end of Santa's hat... 
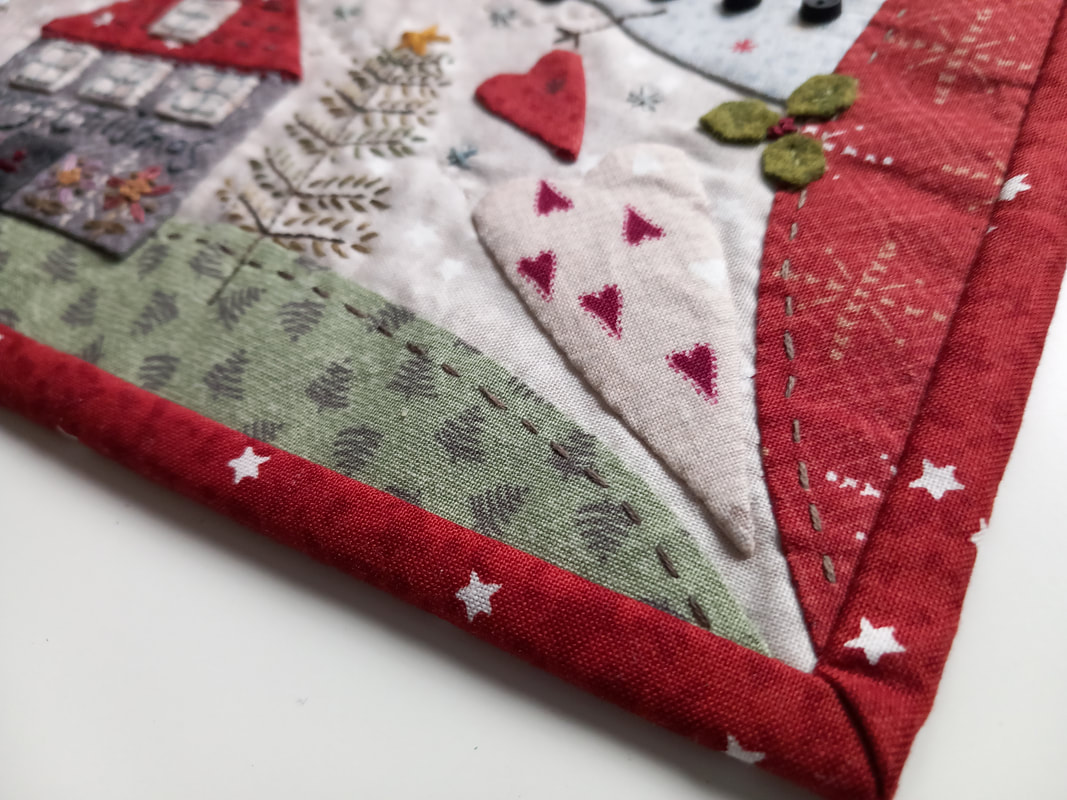
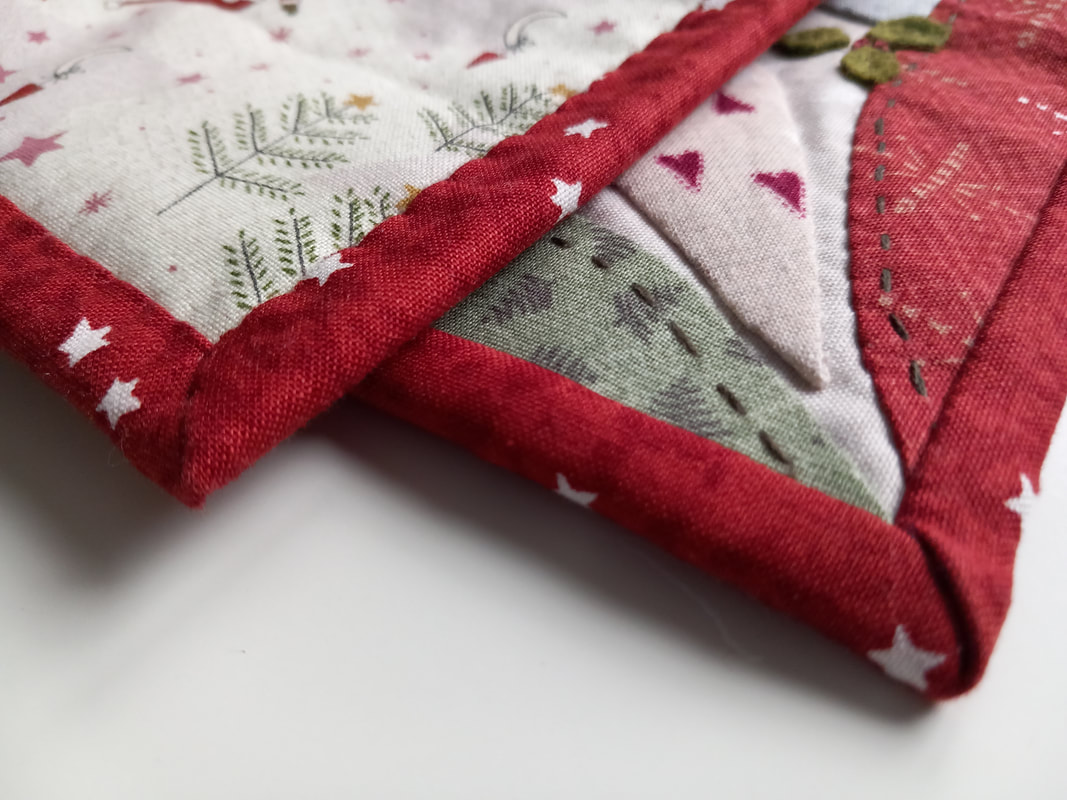
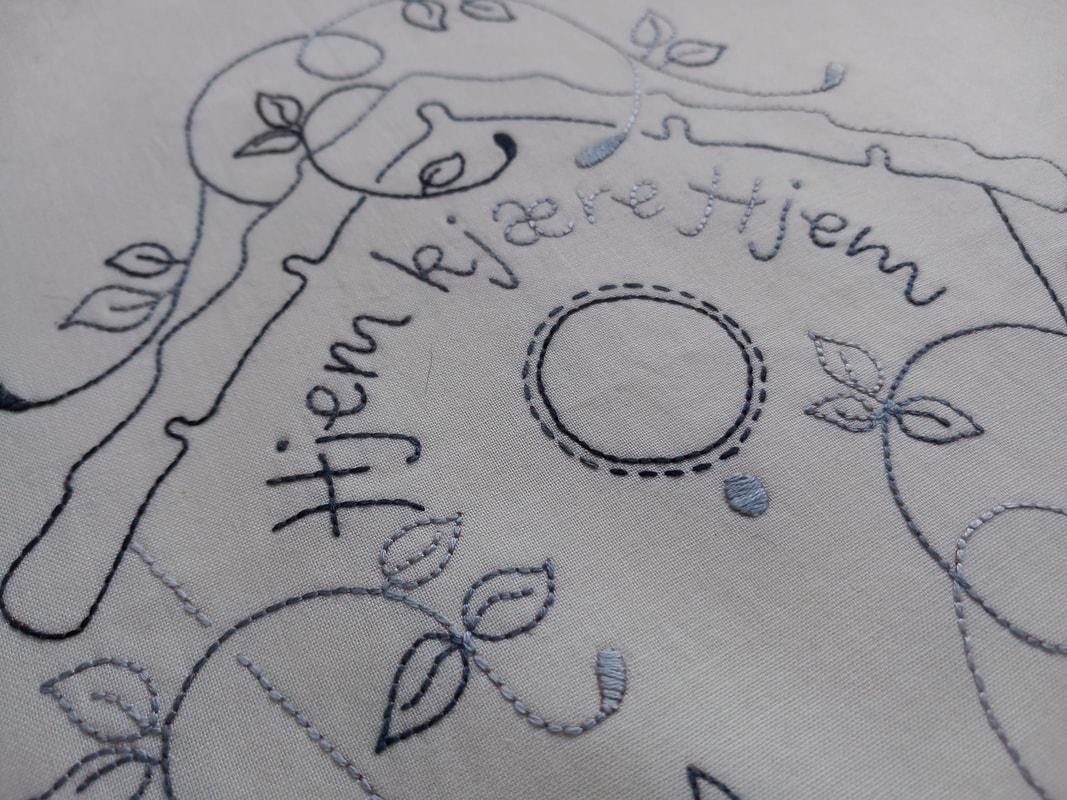
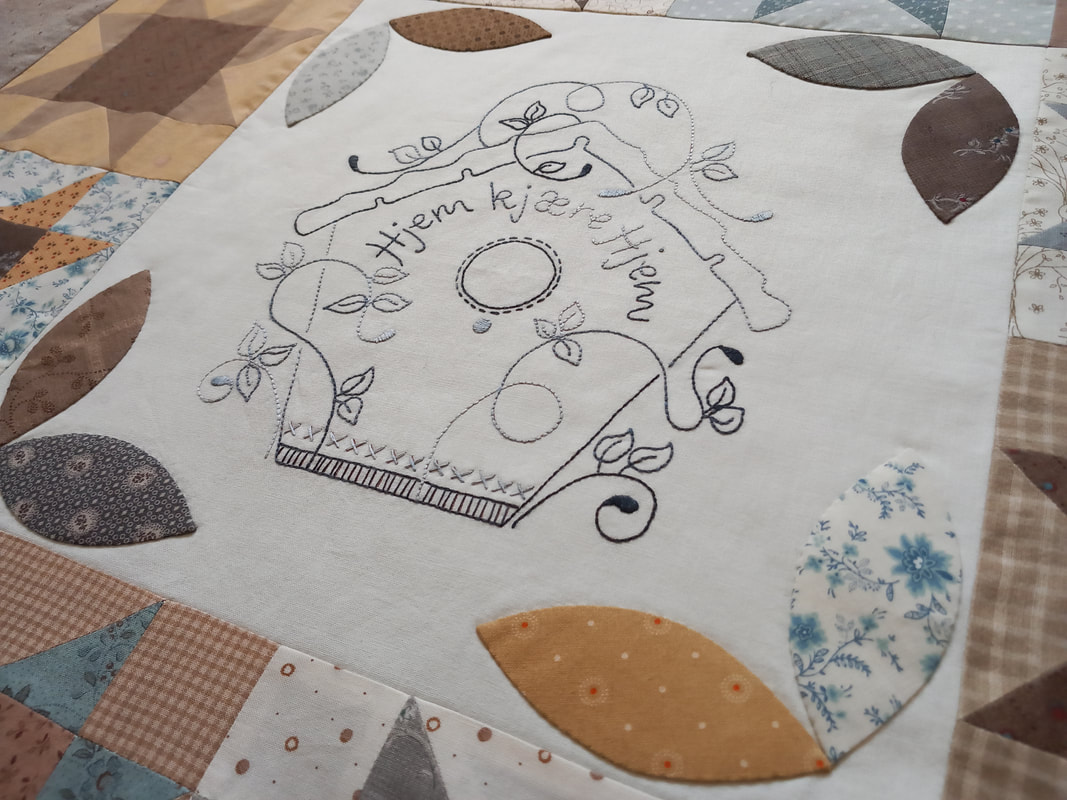
...once the table runner was finished, it was trimmed to size and a narrow double fold binding was machined to the front of the tablerunner. This was mitred at the corners, folded over to the back and hand stitched in place using ladder stitch. A small hand embroidered label was also hand appliqued to the back of the quilt. The central motif was traced from the main pattern, and hand embroidered using the same coloured DMC thread that wa sused for the tree toppers on the front of the runner... 
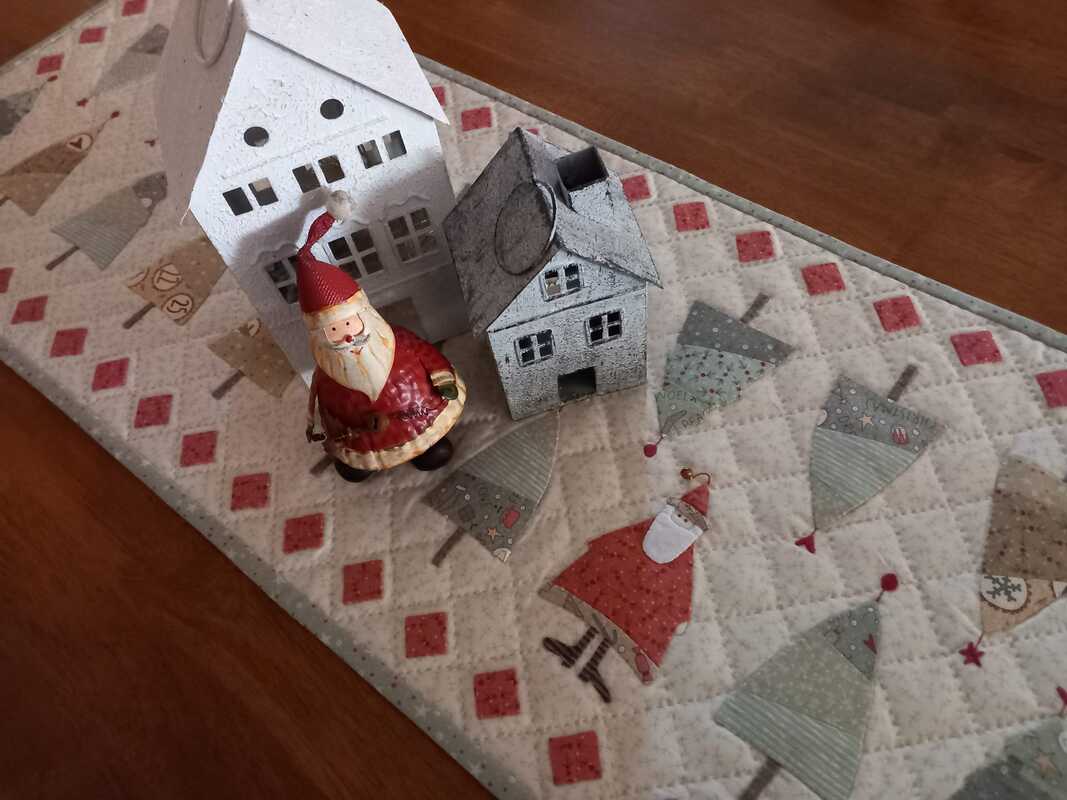
...and here's the finished runner, ready to use during the festive season. This was such a lovely table runner to make, using a combination of my favourite techniques - and I'm planning to make a few more Hatched and Patched projects next year.
0 Comments
Decorating for Christmas is a bit last-minute here at Foreman Towers! Mr F very kindly cut me some sprigs of holly from the trees in our garden, so I was able to get creative and make my own homemade wreath for the front door. A pre-used oasis was soaked in water, and a selection of wired pine cones, cinnamon sticks and dried bell peppers were added for texture and colour. There's even a small robin perched in there too! It won't win any floristry awards, although it's quite large, and VERY prickly, so would certainly deter any unwanted guests over the festive season!
A few months ago I purchased a super kit from Coast and Country Crafts and Quilts. Designed by Heart to Hand this festive walling hanging is called Snow Birds, and the kit included the pattern, all fabrics including the wadding, and the embroidery threads needed to complete it. I used some Lite Steam-a-seam 2 for the applique. The DMC embroidery threads were used for both the hand embroidery and for securing the applique shapes in place... ...the tabs were machine stitched in place, then it was machine quilted around all of the applique shapes. Once the wall hanging was completed, 2 buttons were stitched to the top and some twine wrapped around them ready to hand it on a twig... ...and here it is displayed on the wall, bringing a little festive spirit into my sewing studio.
Keeping in with the theme of the Gingerbread House that I made for my little grandson, I've been making some gingerbread house gift bags for some of the younger members of the family. Armed with some brown paper bags, brown tape, a selection of chalk pens and a healthy dose of imagination, I set about drawing on the bags... ...these were really simple to make, and you can add as many curliques and swirls and hearts as you like! The possibilities really are endless - you're only limited by your imagination. I've personalised the gift tags, and these have been tied to the bags with twine. Now these have all been delivered - will there be one or two of these underneath your Christmas tree?
I haven't spent as much time in my sewing studio recently as I would've liked, as we've been renovating our kitchen and dining room. As we've had an abundance of cardboard sheets (from new kitchen units) I decided to get crafty, and armed with a chalk pen, some super strength sticky tape and my imagination, I set about making a gingerbread playhouse for my little grandson... ...an old rotary cutter, a cutting mat and a selection of my quilting rulers were the perfect tools for drawing and cutting out both square and round windows and a pretty door that opens. Once the main part of the house had been put together and the windows cut out, I used a chalk pen to draw lots of culiques and swirls and hearts around the windows... ...and even more curliques and swirls and hearts were drawn on both the front and the back of the gingerbread house. This was such a fun project to make, and my little grandson absolutely loved it, although he wasn't too keen on letting the dog sit inside the house with him! Hopefully he'll have lots of fun and games playing in here during the festive period.
As a member of the Poppy Patch Posse, I get to review kits supplied by Poppy Patch and this festive kit arrived in the post a few weeks ago. This super kit includes the pattern for Vintage Stockings by Marg Low Designs - a selection of fabrics from the Oh What Fun! collection by Elea Lutz for Poppie Cotton - ric-rac trimming - and fusible wadding. The pattern includes full-size templates, that you can either cut out or trace, which is useful if you want to lay the template onto feature fabric for fussy cutting. Each of the stockings has a diffent feature - the largest size stocking has appliqued hearts on the front, which I made using the Apliquick method, although you can use whatever method of applique you prefer... ...the medium size stocking has an appliqued Chhristmas tree, and the smallest one is embellished with ric-rac trimming. The stockings are hand quilted around the cuffs, which I did using a red DMC perle thread. A hanging loop is attached between the body and the lining. The templates are printed with a seam allowance and a grainline, which is particularly useful when placing the template on striped fabric, such as the fabric I used for the medium sized stocking. The instructions for making up these stockings is clear and concise and they don't take very long to make at all... ...the toes and the heels of the stiockings are appliqued onto the body of the stockings, and are also hand quilted which is a lovely added detail. I used the fusible wadding supplied in the kit, which was fused to the wrong side of the stocking, before the lining was added. Having three different sizes in the pattern means they can be made for tiny little hands to delve into as well as bigger ones too... ...and here are the finished stockings - I've added a smart red bow to a twig for hanging them on, making it look very festive. Photpgraphed on a sunny autumnal afternoon, they look very jolly, and are ready to fill with all sorts of goodies and festive treats. These fabrics are so cute and as always Poppy Patch have put a fantastic kit together, and I can see lots more of these stockings being made as gifts for my friends for Christmas. Being a member of the Poppy Patch Posse encourages me to try patterns and fabrics from designers that I haven't used before, and I shall definitely look for more fabrics designs by Elea Lutz in the future, as this particular range has well and truely become one of my favourites!
A couple of months ago I made a quilt top whilst I was away on a quilting retreat. This morning I finally wrapped it and posted it off to Daisy May Quilting to be longarm quilted. Val and John provide an excellent service, and will provide both the wadding (my favourite is bamboo) and the backing fabric too. It will be so exciting to see what they do with it!
While I was away in Norfolk recently, I was able to make a start on preparing the applique for this cute festive project. I'd bought this kit for The Festive Forest Table Topper - designed by Lynette Anderson, from Little Quilt Store back in 202 when it wa sstill owned by Lynette and wa sbased in Australia. The applique shapes were all prepared using the Apliquick method, usne the Apliquick interfacing that I'd purchased from the Festival of Quilts a few months ago. I traced the stitchery design onto the background fabric, and used a selection of variegated Valdani stranded embroidery threads for the hand embroidery... ...once the bulk of the background embroidery had been stitched, I added the applique. The windows and door were added to the house first, then the house was secured to the background, so I didn't have to stitch through too many layers... ...the reindeers look very smart in their embroidered blankets. I chose to use a yellow star button from my button tin rather than the woolfelt stars that the pattern suggested... ...I decided to hand quilt this table topper, using quilter's tape to mark out a grid and a YLI hand quilting thread in a neutral colour. The final embellishment was the addition of some 3D holly leaves. These were cut out from woolfelt, and secured inplace with a couple of backstitches using a green Valdani embroidery thread. The original pattern has hand embroidered scarves for the snowmen, however I changed things up a bit, and used some teeny tiny buttons to embellish the snowmen instead... ...a neat double fold binding finishes this table topper off nicely, with neat mitred corners. I've used another one of Lynette's festive fabrics from my stash for the backing... ...now I've taken a few festive-looking photographs, I'll pack it away until December, then I can decorate my lounge properly with the help of my little grandson!
So today this happened - although goodness only knows where the time has gone! I'm spending my birthday celebrating with my family, and we're off for a few days to Norfolk, so I won't have much time for sewing, although I might be able to sneek a small hand sewing project into my suitcase!
While I was away recently on a quilting holiday, I started another one of those kits from my very long list. This one is Annas Lille Veggeteppe by the Norwegian designer AnnAKa and was purchased from Lappedilla in Norway back in 2011. The kit included all the fabrics needed for the quilt top and the binding. There are 2 hand embroidered blocks, and the stitchery fabric, interfacing and skeins of variegated embroidery thread were also included. After taping the pattern and background fabric to my lightpad, the stitchery design was traced using a Micron Pigma pen - I prefer a very fine nib, size 005, in a pale brown colour. The ink is permanent, so you do need a very steady hand! Once the design is traced, the lightweight interfacing is fused to the back... ...the patchwork blocks were all machine pieced using a fine Aurifil 50wt thread, pressed and packed away until I was ready to piece the quilt top together... ...the 2 stitchery blocks were hand embroidered using very simple stitches - mostly back stitch and a few satin stitches. The blockes were pressed when they were completed, and the upper patchwork border added... ...applique shapes were prepared using the Apliquick method, then hand stitched in place to the background fabric. Once I was happy with the layout of the patchwork star blocks, they were joined together and finally the borders were added... ...this gorgeous fabric, also by Lecien, was purchased from Sew and So's and is just perfect for the backing for this beautiful wall hanging. Now I need to get it layered and decide whether to quilt it by hand or machine.
|
About me...Hi - welcome to my quilting blog! My passions are my family, my dog, my friends and sewing, not necessarily in that order! Archives
July 2023
Blogs I followUK shopsThese are the UK shops that I use to purchase my quilting supplies - fabrics and threads etc.
Australian linksScandinavian links |